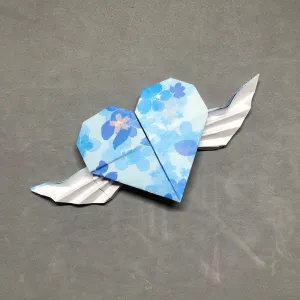
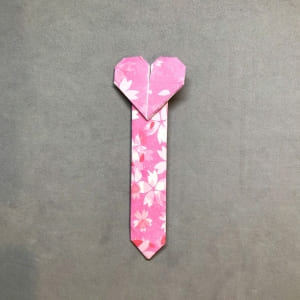
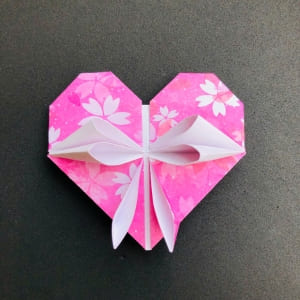
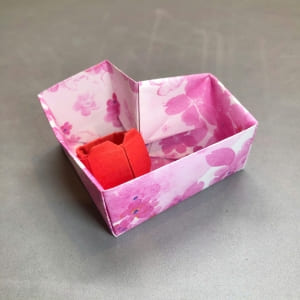
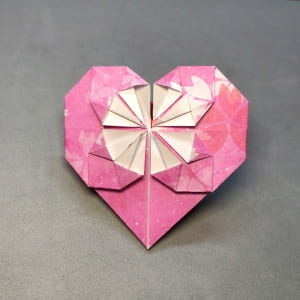
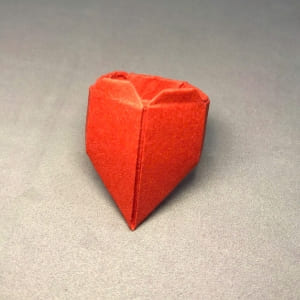
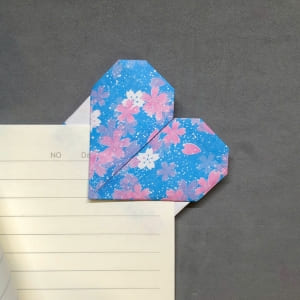
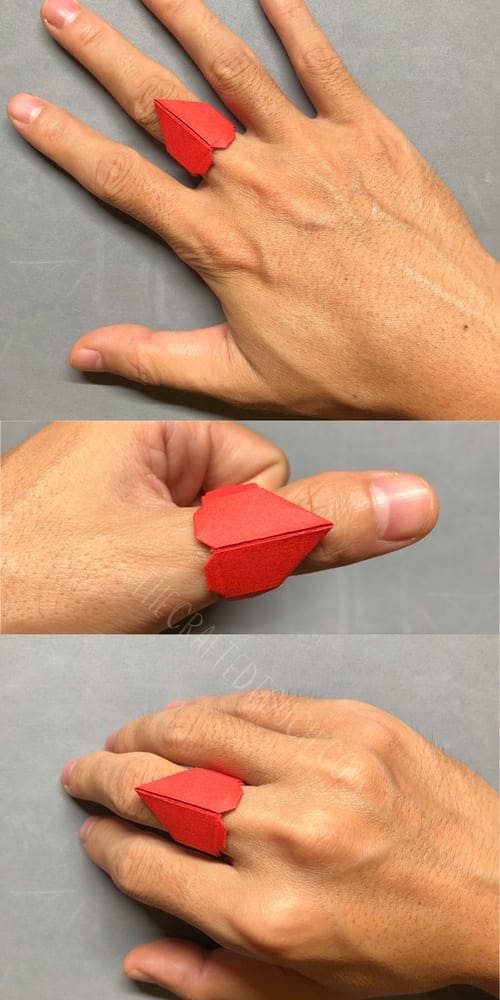
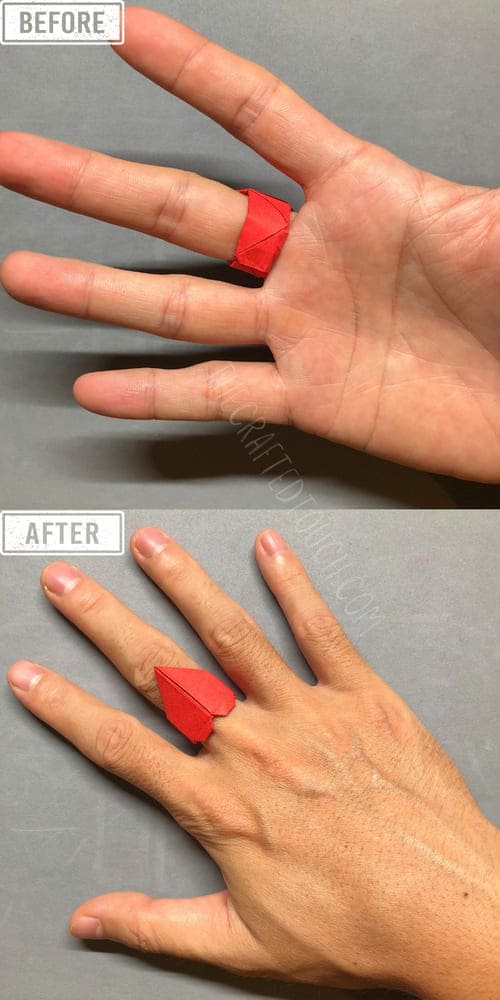
It’s so sweet and lovely to wear a little heart that you’ve skillfully folded yourself. Have you ever heard of the Origami Heart Ring? It’s small, but it packs a gentle punch. The first time I saw and folded it, I smiled at its cuteness. Folding it is like writing a secret message to yourself, hidden from view.
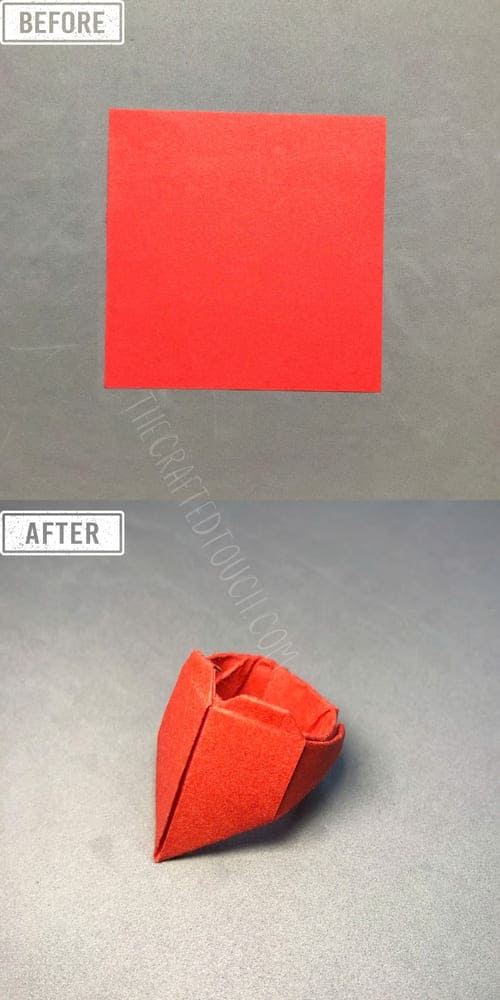
MATERIALS NEEDED FOR FOLDING
| Material | Why It’s Helpful |
| Square sheet of paper | I use a square paper to start every time. You can choose any color you like bright, soft, or even patterned! If you only have a rectangle, just cut it into a square first. |
| Flat surface like a table | Folding on a smooth table helps a lot! It keeps the paper from sliding around, so I can make my folds nice and straight. Folding on a bed or couch is tricky. |
| Your fingernail or a ruler | I press down each fold with my fingernail to keep it flat and neat. If you want extra sharp folds, a ruler’s edge works great too. |
| A bit of patience | take my time and try not to rush. The slower I go, the better the ring turns out. It’s okay if you need to try again—it gets easier every time |
Skill Level
★★★☆☆ (Intermediate)
FOLDING INSTRUCTION IN DETAILS
Have you ever wanted to wear something cute that you made all by yourself? This origami heart ring is a fun and easy craft that you can fold from just one square sheet of paper. It’s perfect to wear, to share with a friend, or to give as a sweet little gift. You don’t need anything fancy, just your hands, some patience, and a flat surface. Ready to start folding? Let’s go!
Step 1: To start making the origami heart ring, I place the square paper flat on the table.
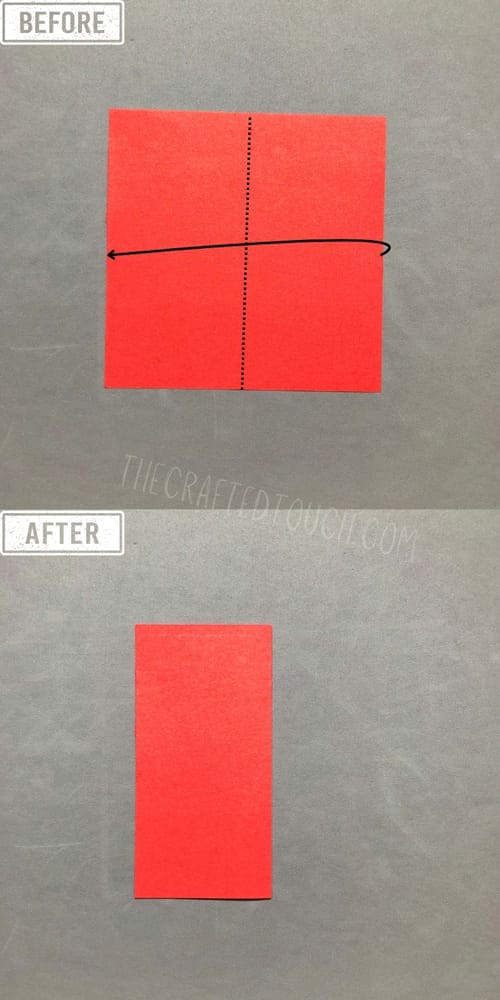
Step 2: Next, I fold the paper in half, bringing the right side over to the left side. I press down to make a neat crease.
Step 3
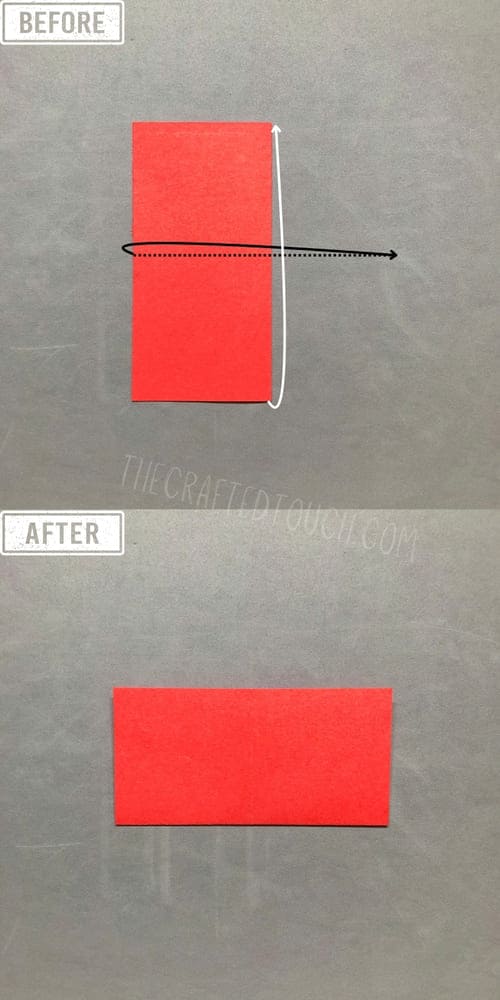
After making a neat crease, I open the paper back to where it was. Then, I fold it in half again, this time from bottom to top, and press to make another clean crease.
Step 4
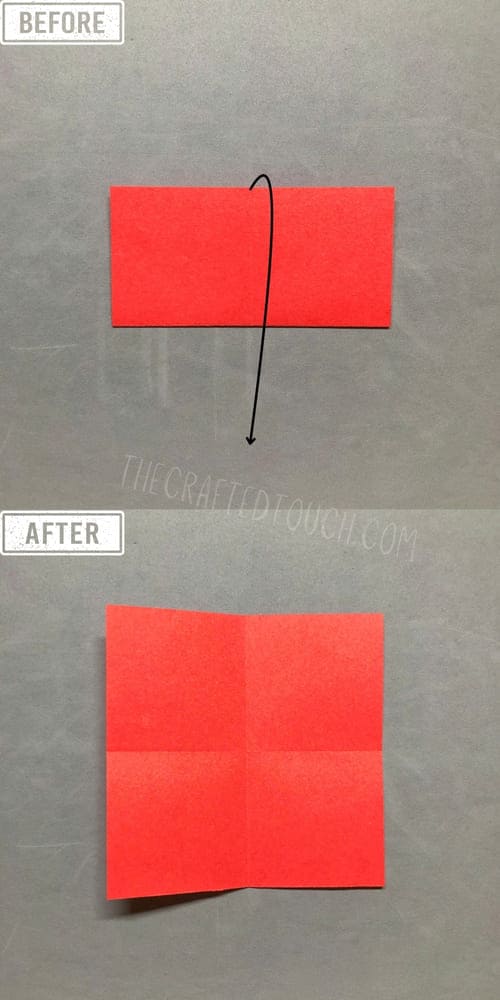
Then, I open the paper back to the beginning. Now, I can see a plus sign (+) made by the folds in the center.
Step 5
On the left half of the paper, I fold it in half to make a long, thin rectangle.
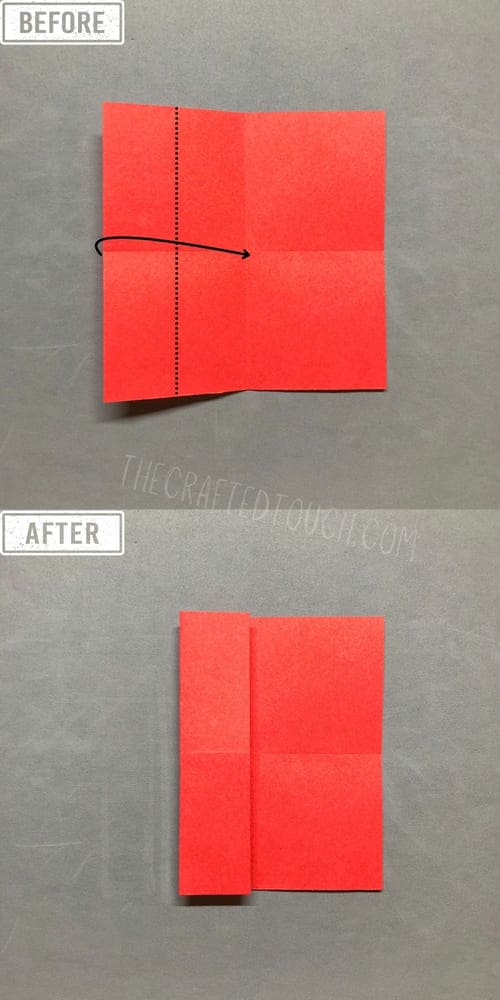
Step 6
After making a clear fold, I open it back to the original shape.
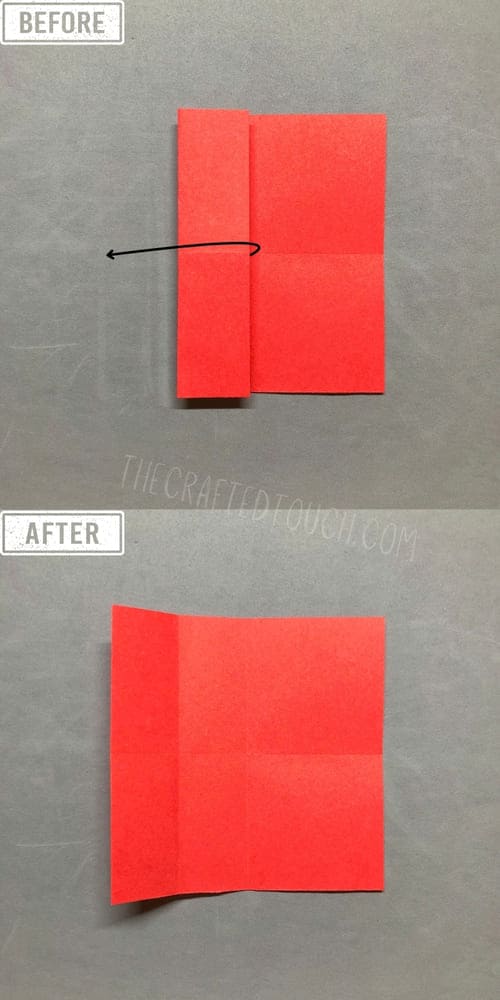
Step 7
On the long, thin rectangle I just made, I fold it in half again from left to right. This makes an even smaller rectangle.
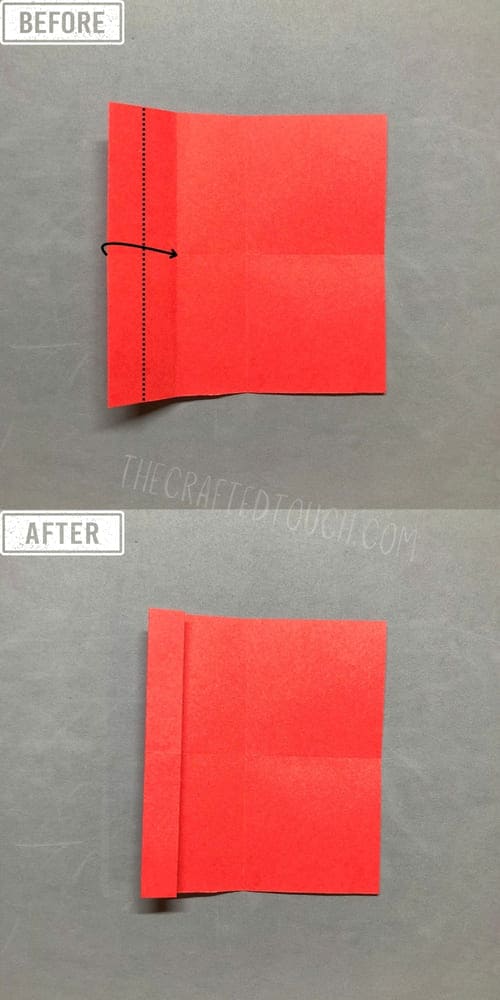
Step 8
Now I fold that small, long rectangle again, from left to right, right along the edge.
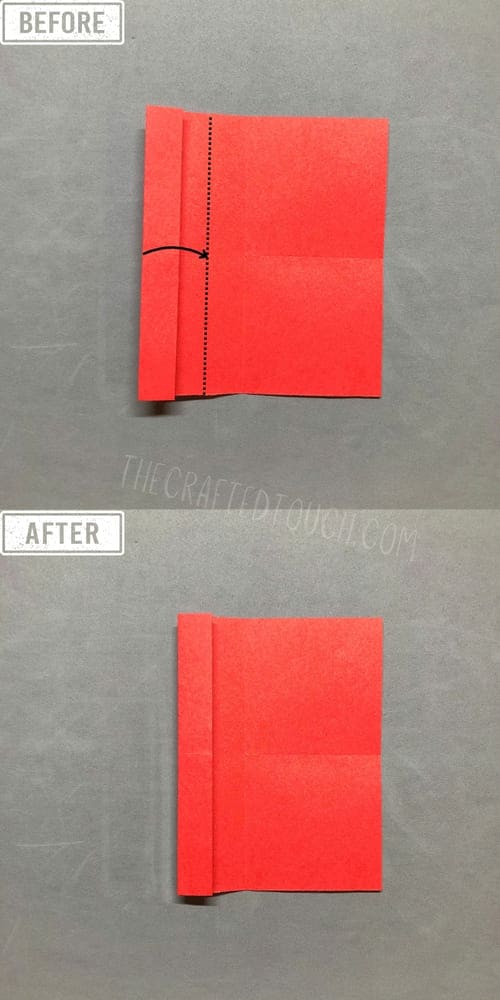
Step 9
I do the same fold one more time from left to right. Make sure to press it flat and neat. Now I have a small, long rectangle that looks like a little stick.
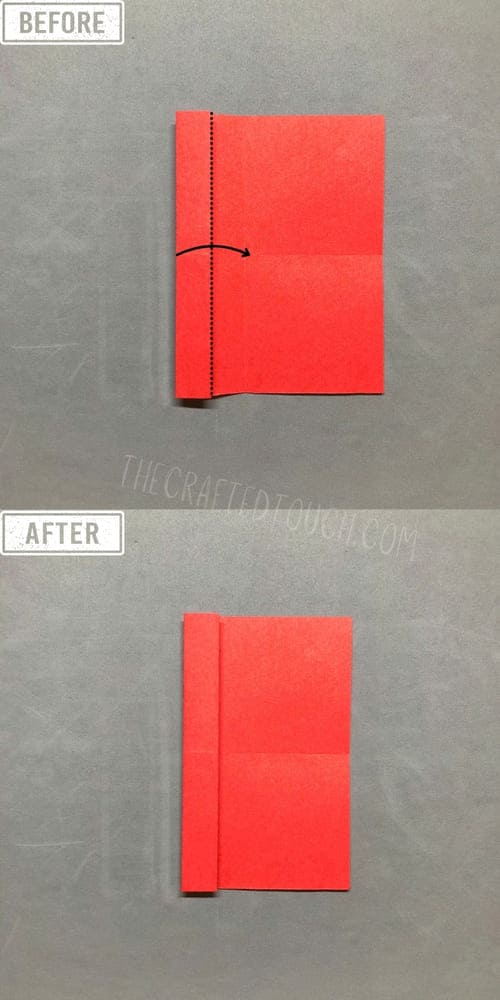
Step 10
On the right side of the paper, I do the same fold as step 5, this time folding from right to left.
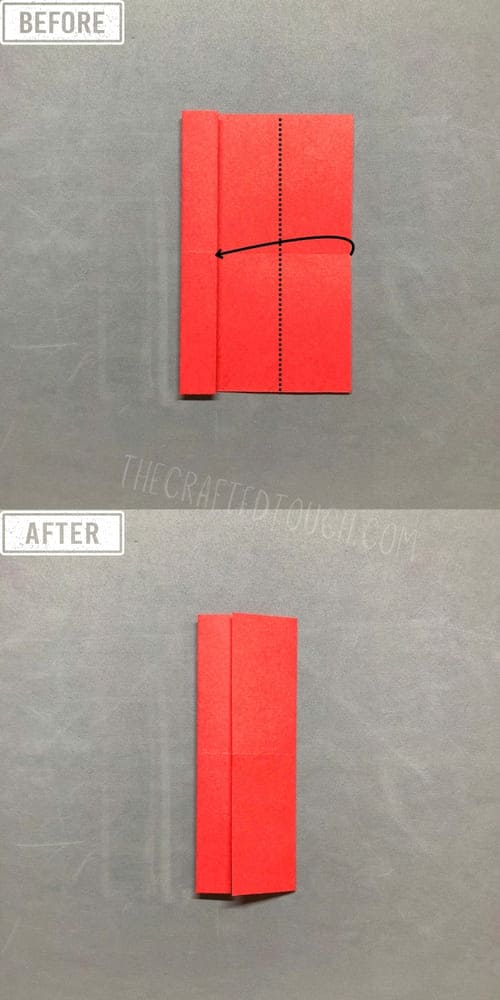
Step 11
Then i unfold the right side
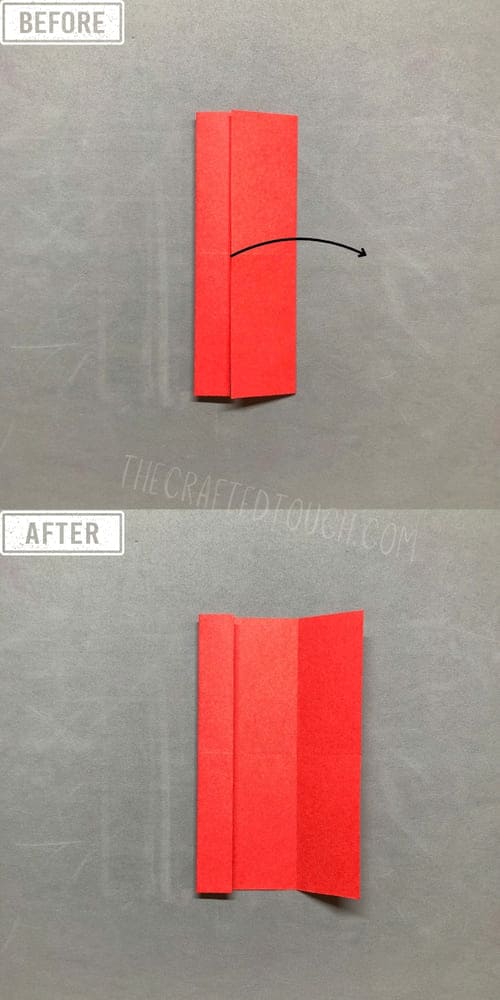
Step 12
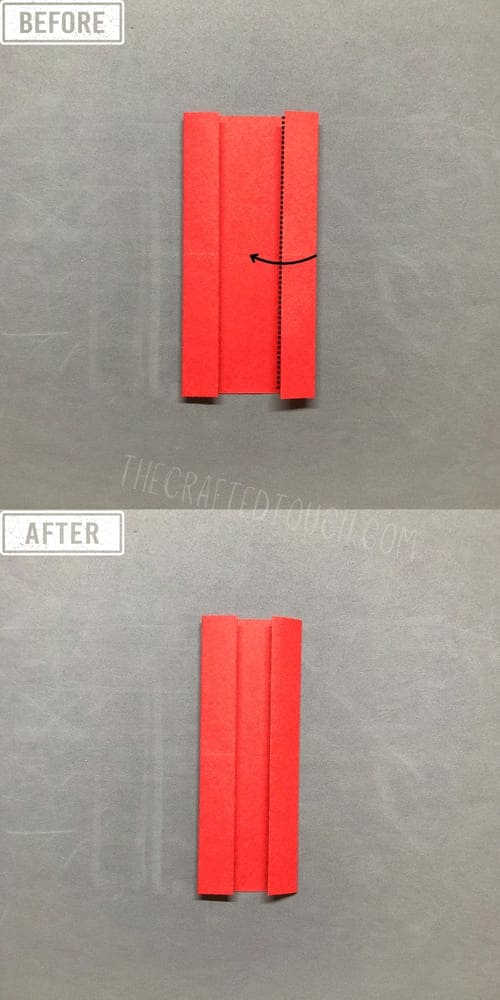
After that, i fold the small rectangle on the right side again, this time from right to left.
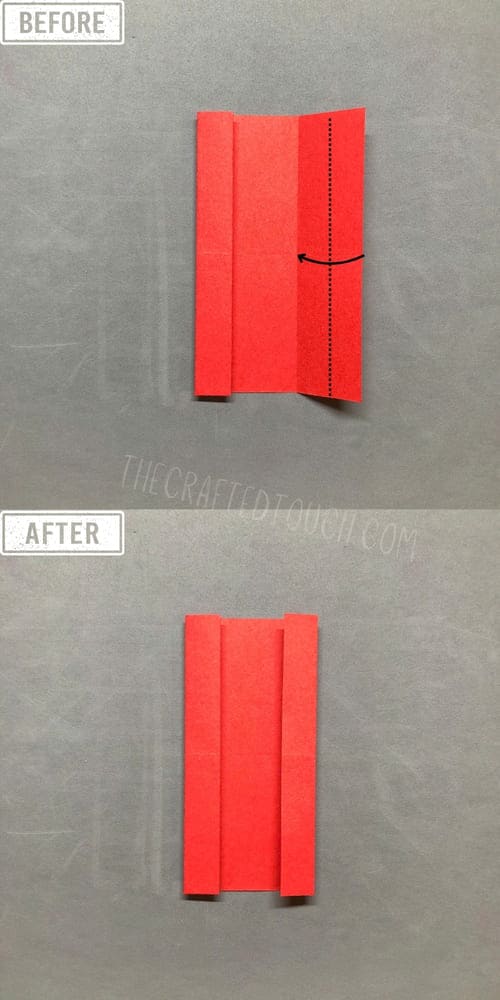
Step 13
Then I fold it one more time.
Step 14
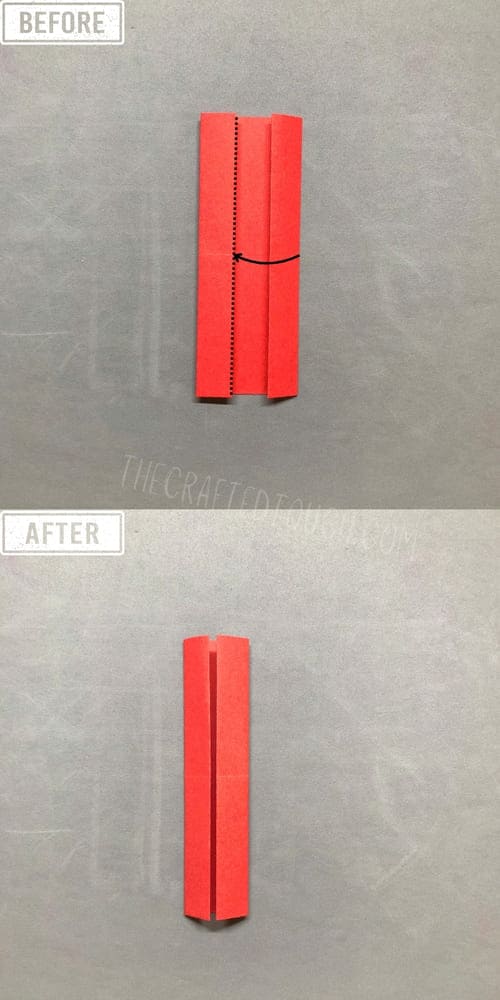
And one more time, now i have two little stick. Always remember to press the folds tightly so the next steps will be easier.
Step 15
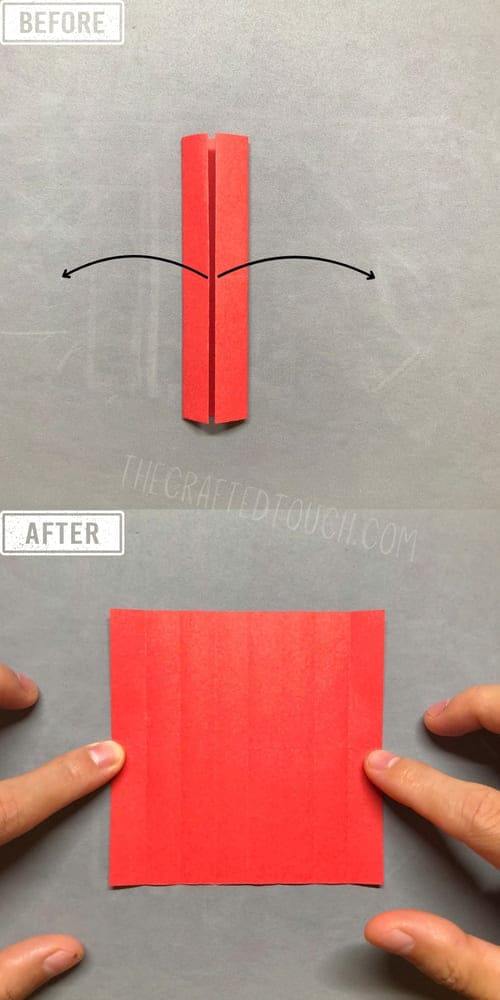
I opened it up, and look! The folds made 8 tiny rectangles on the paper.
Step 16
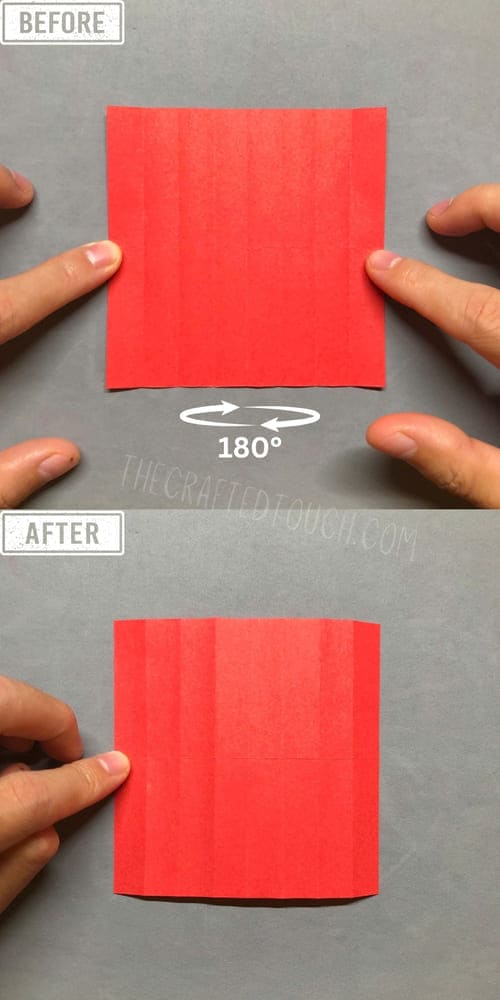
Now I will flip the paper over.
Step 17
With the small rectangle on the far right, I fold it from right to left.
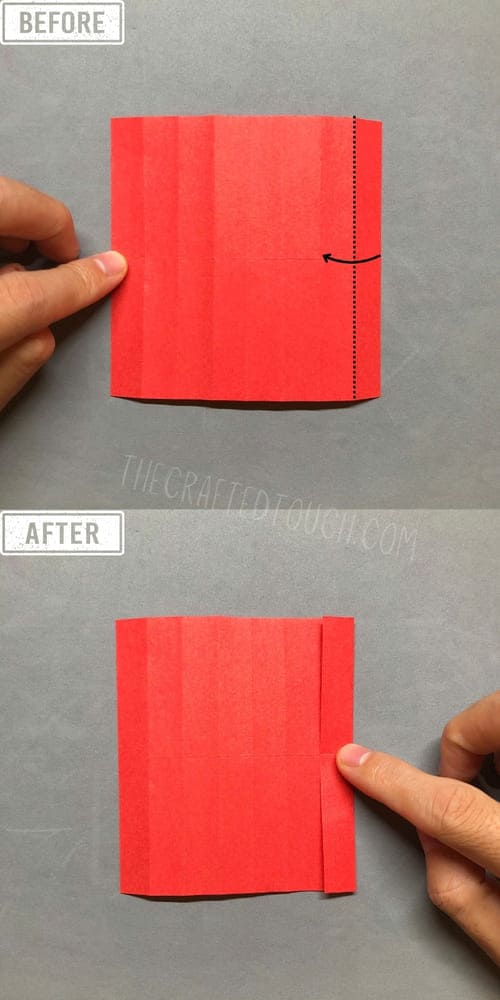
Step 18
Now I flip the paper over again. Remember, the small rectangle I folded in step 17 is still on the right side.
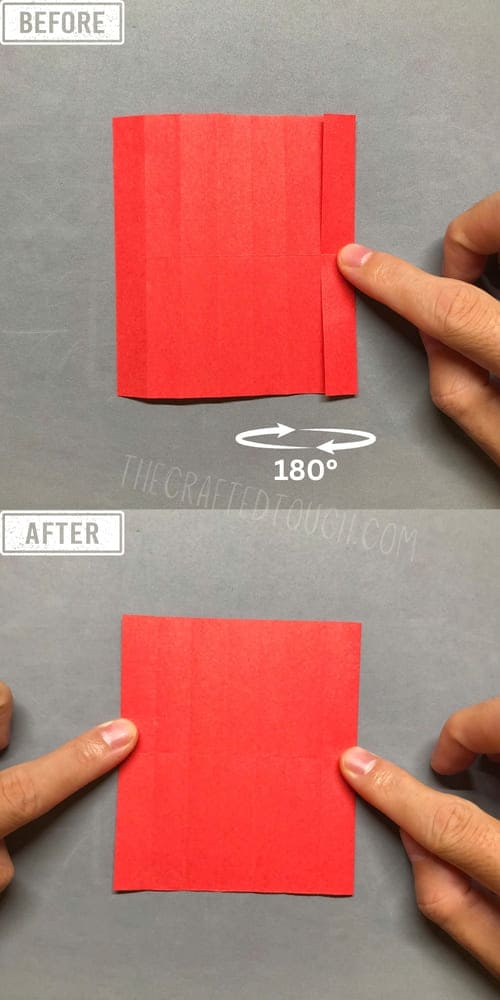
Step 19
Now I fold the top right corner of the paper toward the center to make a triangle.
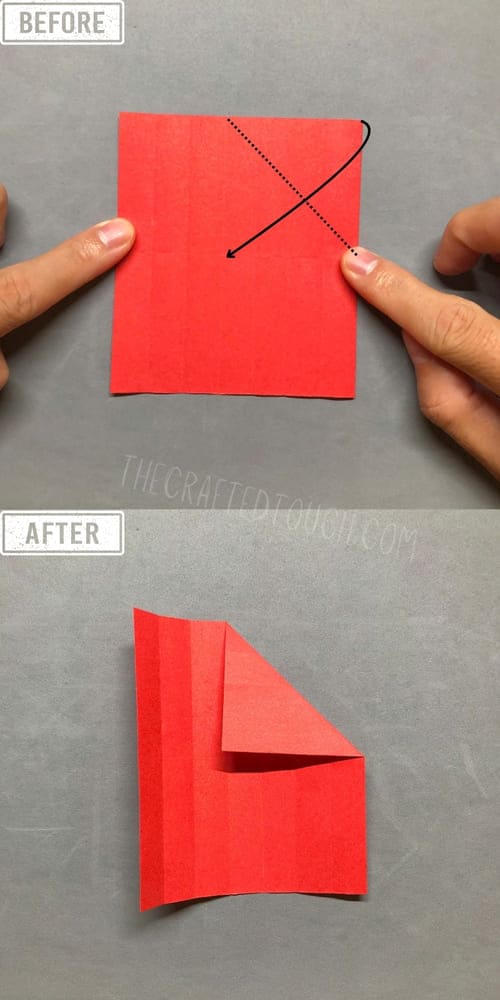
Step 20
And I fold the bottom right corner toward the center to make a second triangle
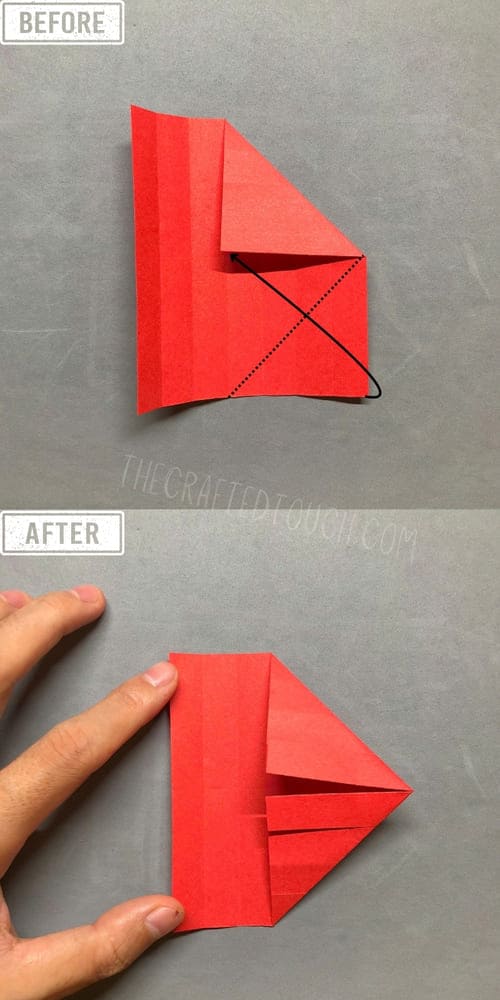
Step 21
Next, I flip the paper over.
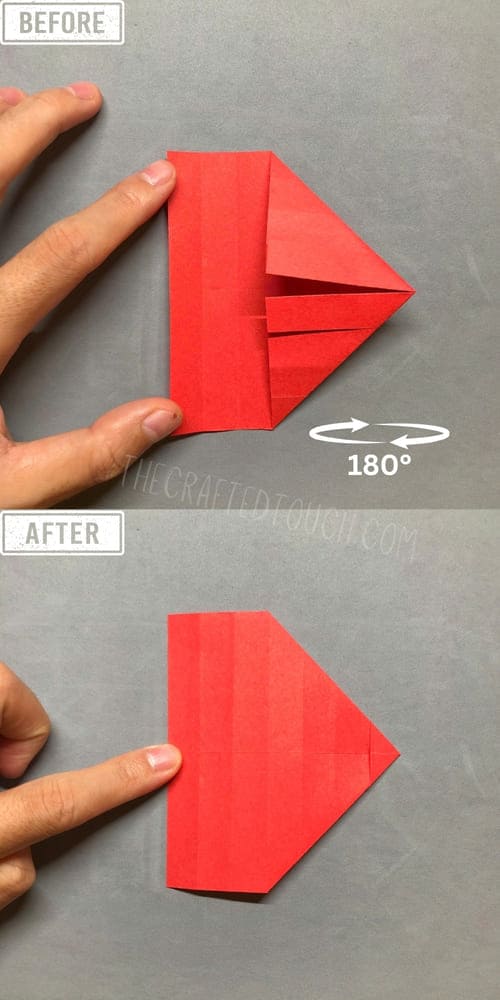
Step 22
Then I fold the top right corner into the center to make a little triangle on the right
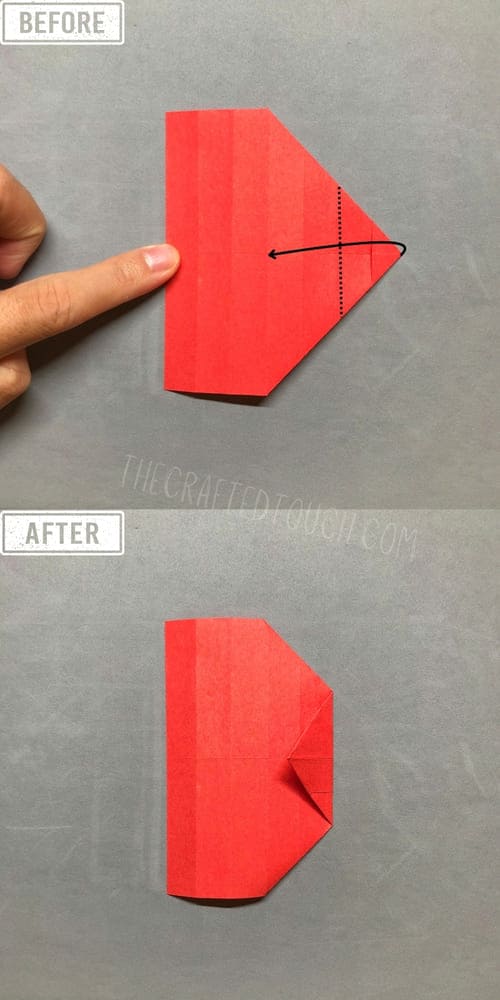
Step 23
After that, i turn the triangle I just folded upward from right to left, and then flip the whole paper over. Now, the front side of my paper has two small rectangles at the top center.
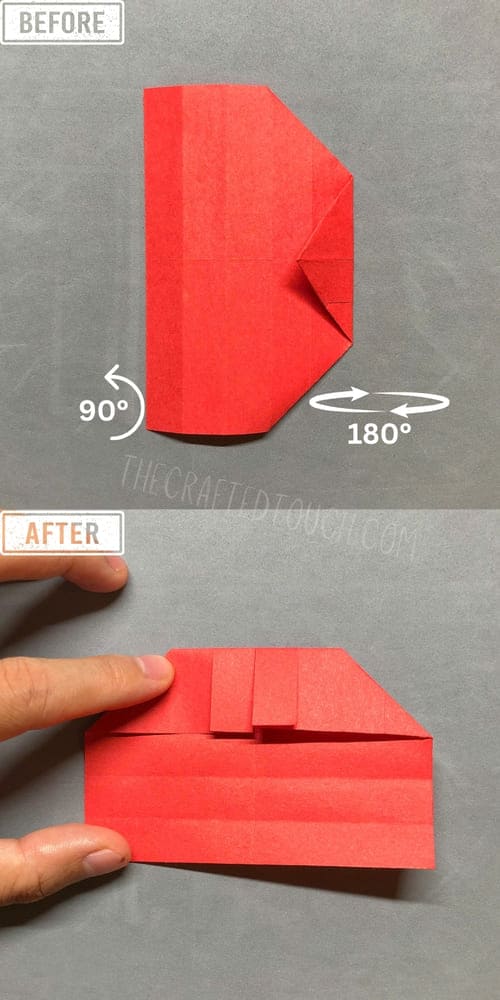
Step 24
First, I’ll open up the small rectangle on the left by pulling it upward from the bottom.
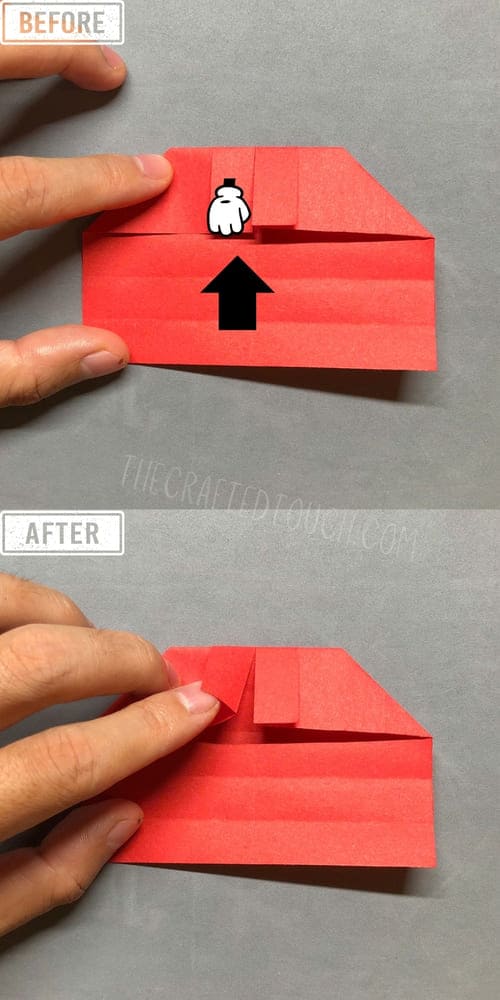
Step 25
Using my left hand, I open it more, while my right hand gets ready to press it flat
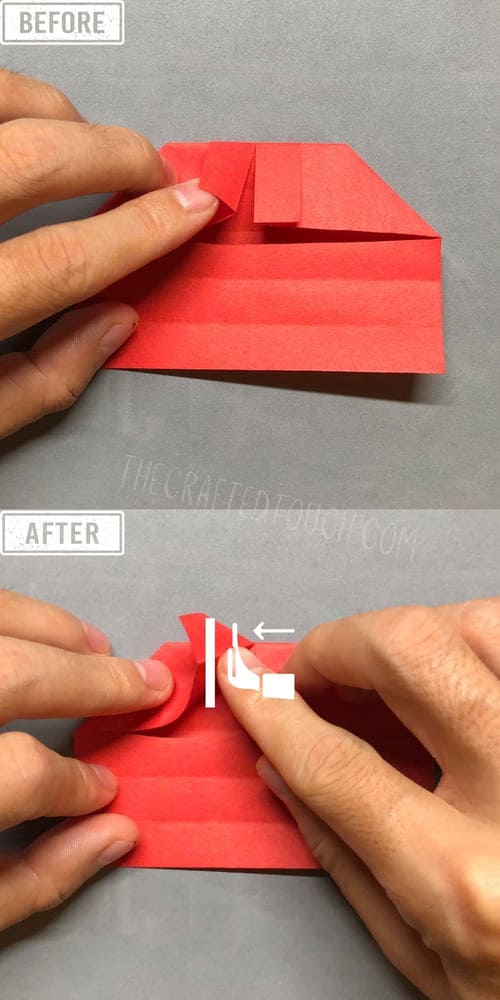
Step 26
I line it up neatly and evenly, then press firmly to match the shape in the guide.
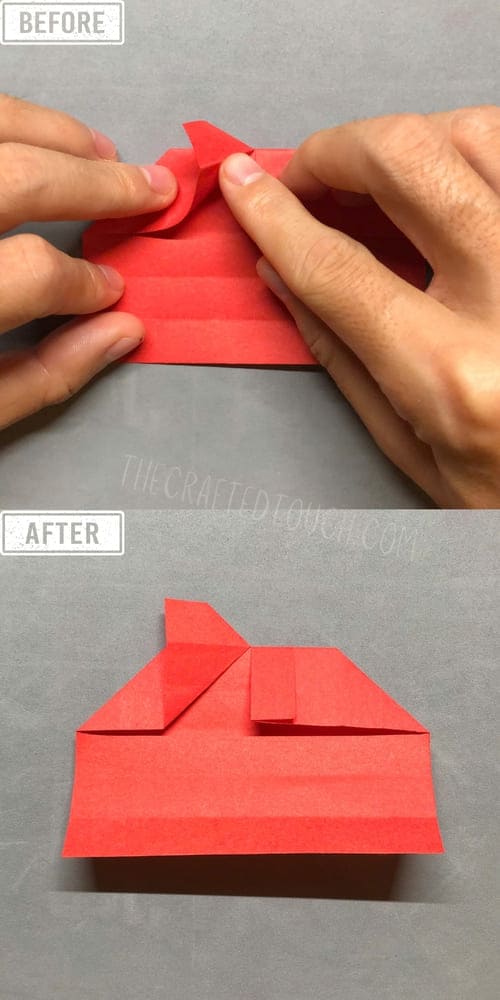
Step 27
Now I’ll do the same with the small rectangle on the right. I start by slowly opening it up from the bottom to the top.
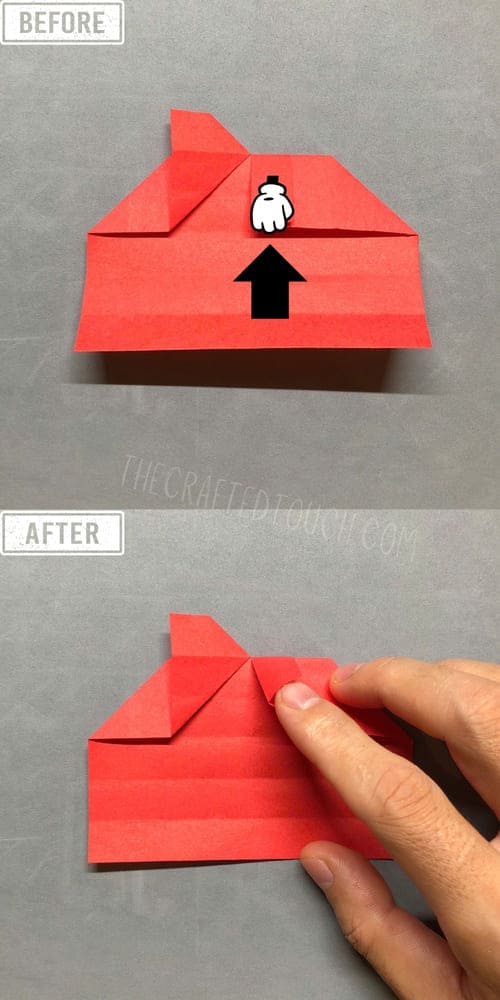
Step 28
I continue opening it up with my right hand and press it down with my left hand.
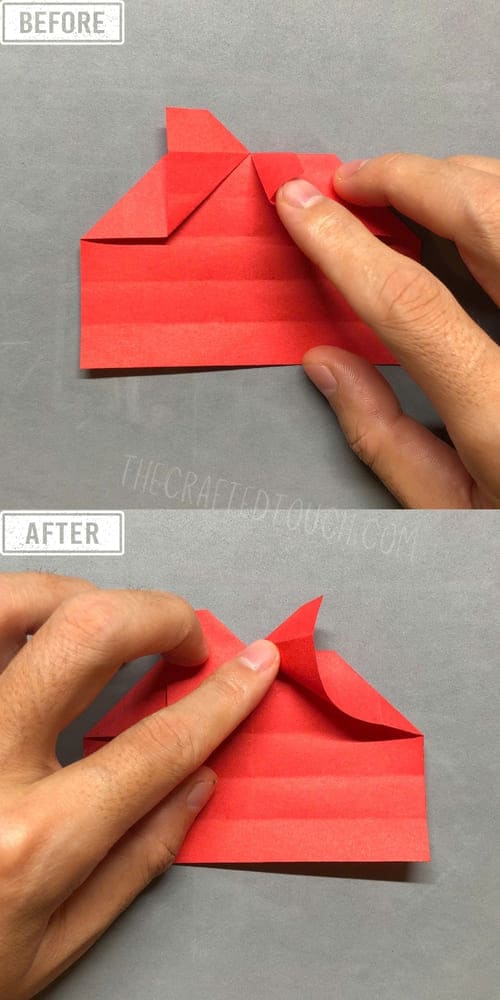
Step 29
Make sure to adjust it so both sides are even before pressing it down—just like I did. Now I have two symmetrical shapes at the top of the paper.
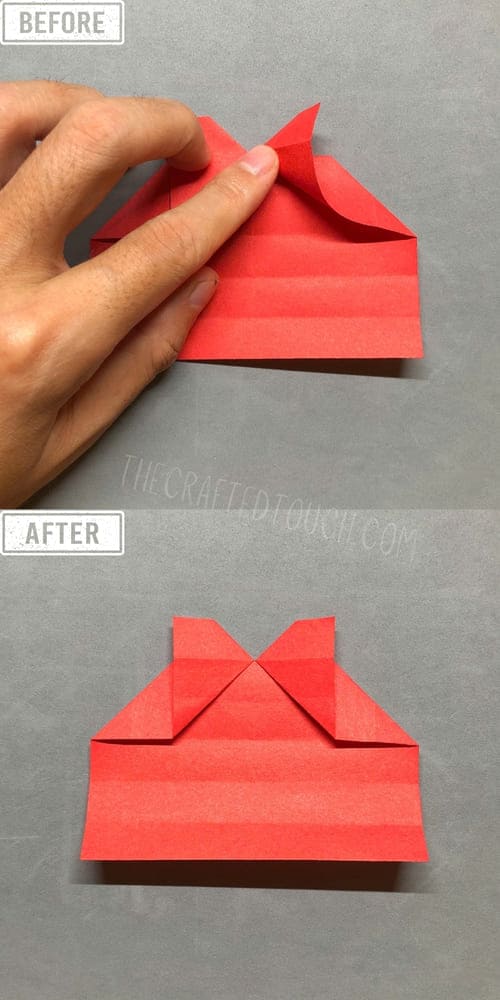
Step 30
Now on the left flap I just made, I fold it down across to the right to make a little triangle at the top.
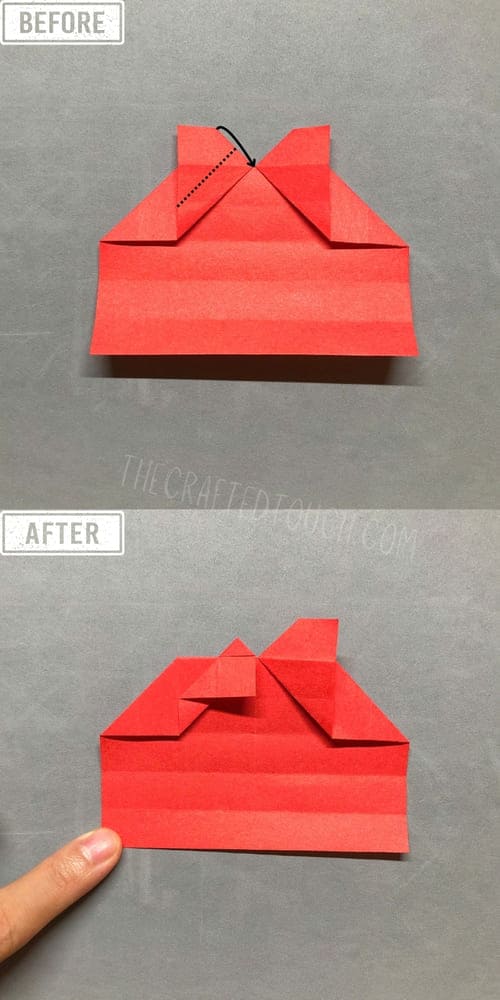
Step 31
I do the same on the right side. Now I have two small triangles at the top of the paper.
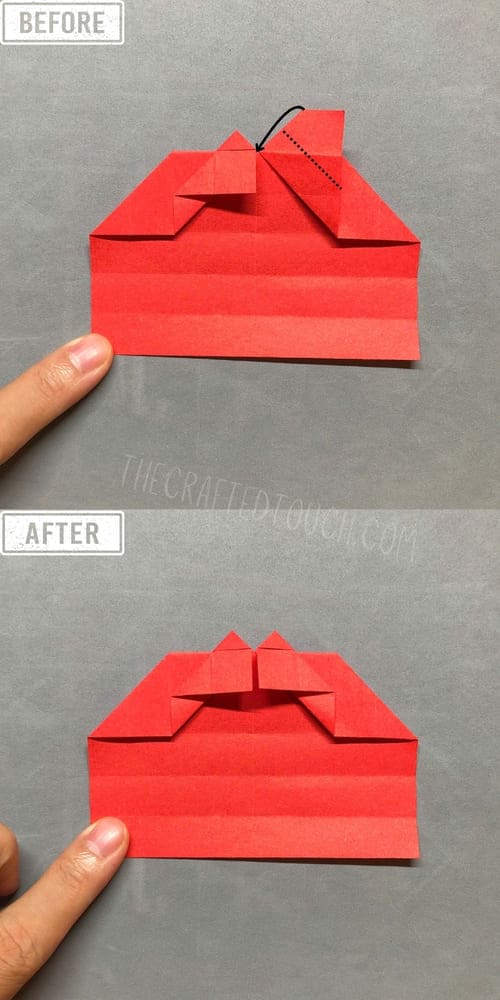
Step 32
Let’s fold the small triangle on the top left down a little, not too much, just a small fold.
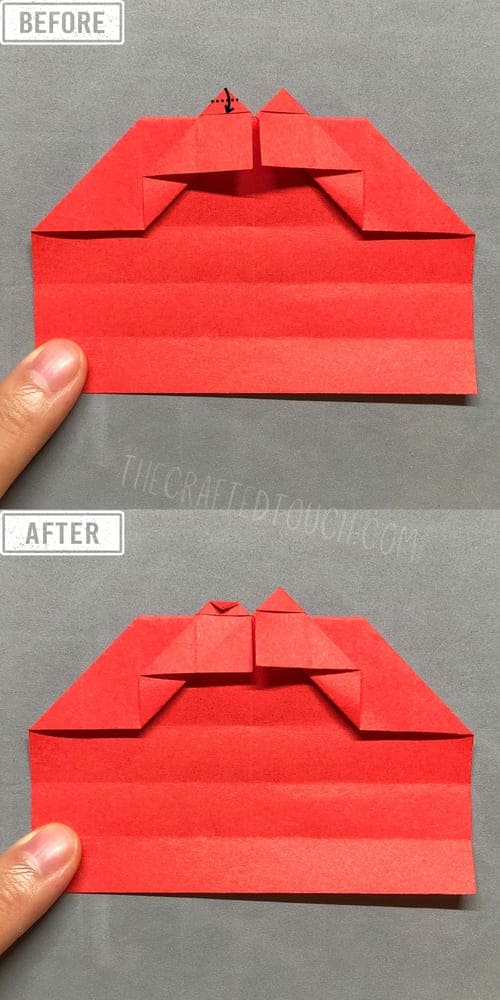
Step 33
“Now I do the same thing with the little triangle on the top right. I try to match it so both sides look the same.
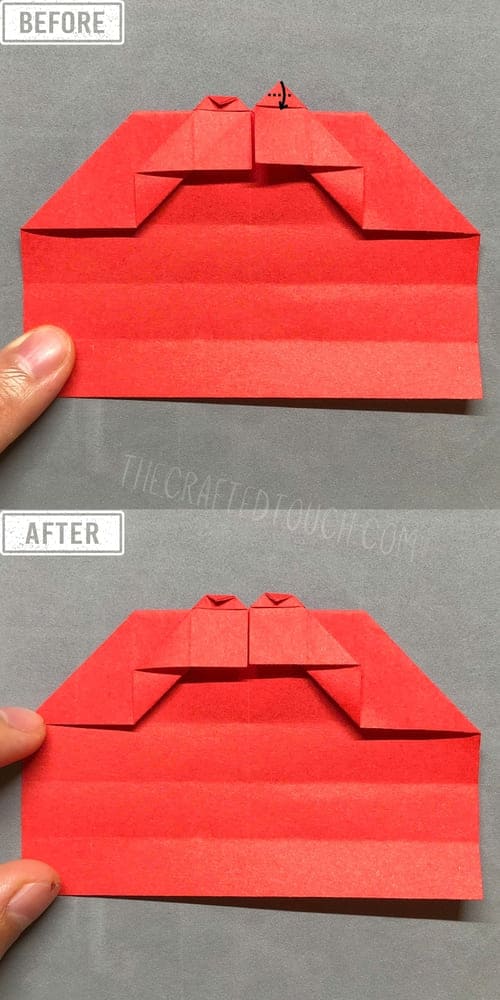
Step 34
At the bottom, I fold the little rectangle up along the line that’s already there.
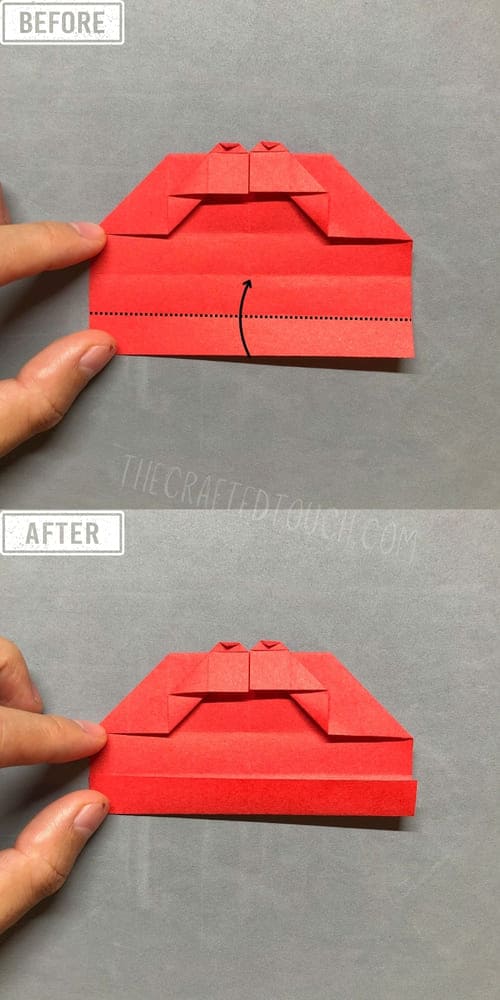
Step 35
Using the fold I made before, I fold it up one more time.
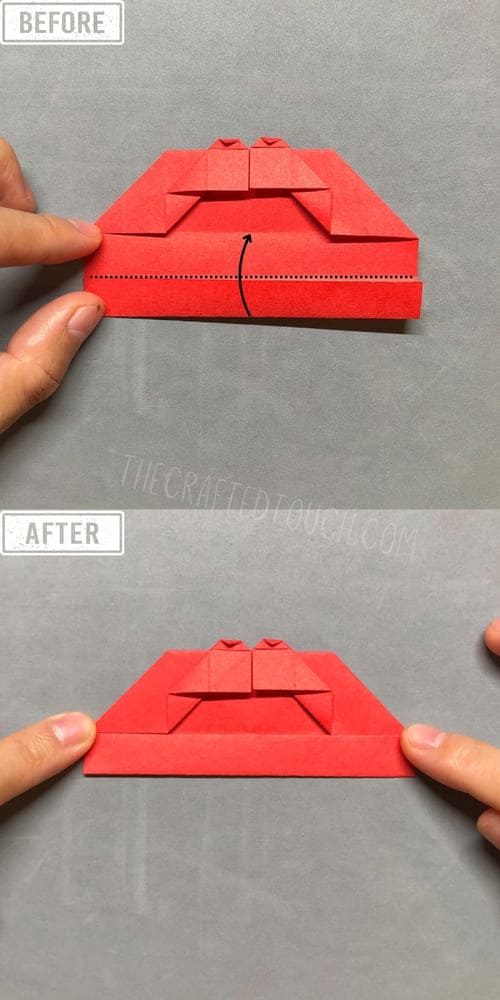
Step 36
I fold it up again
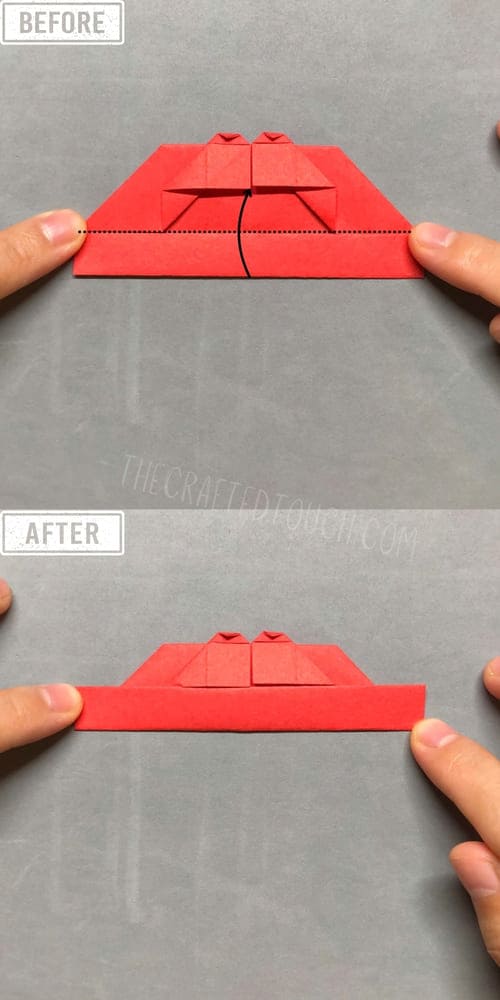
Step 37
One last time. I fold it up. Do you see a stick in the middle? it will be a ring in a few more step
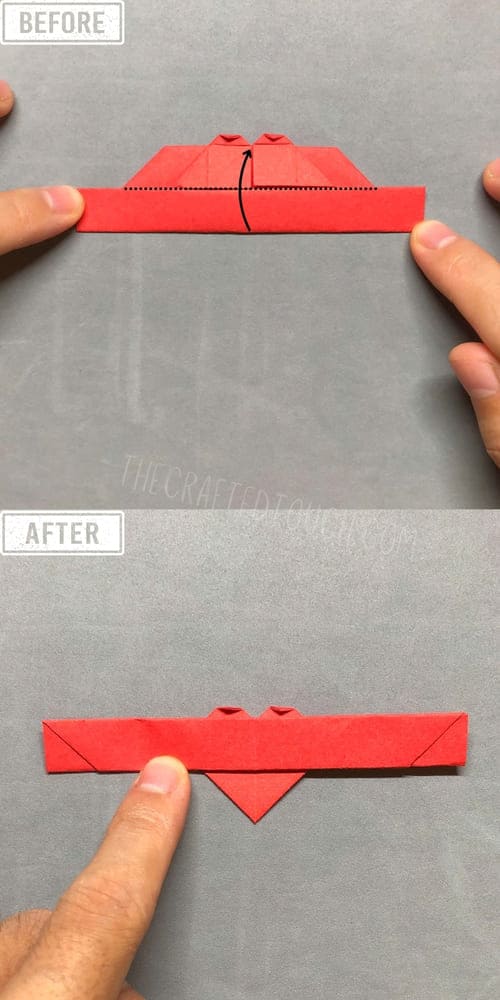
Step 38
Now to turn this little stick into a ring, I fold the top right corner down just a bit, like making a tiny triangle.
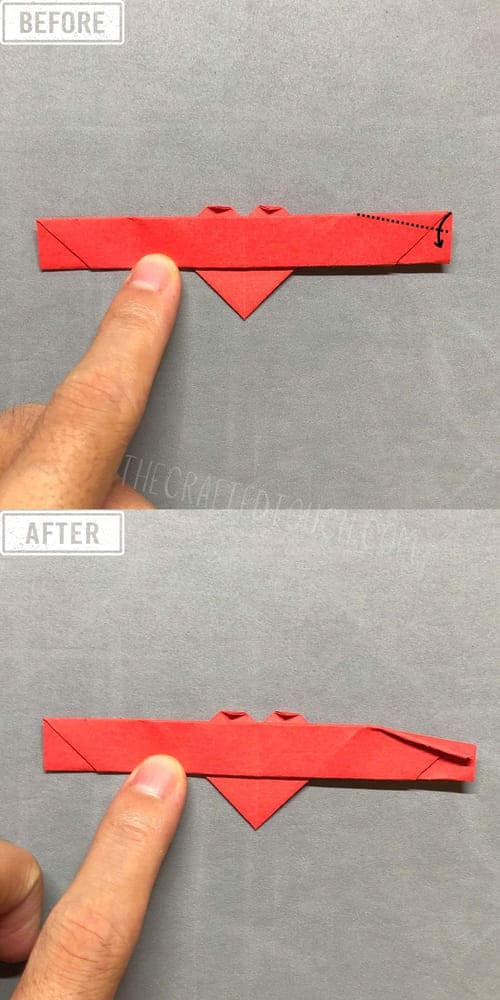
Step 39
Next, I fold the bottom right corner up to make another tiny triangle, now it matches the one at the top
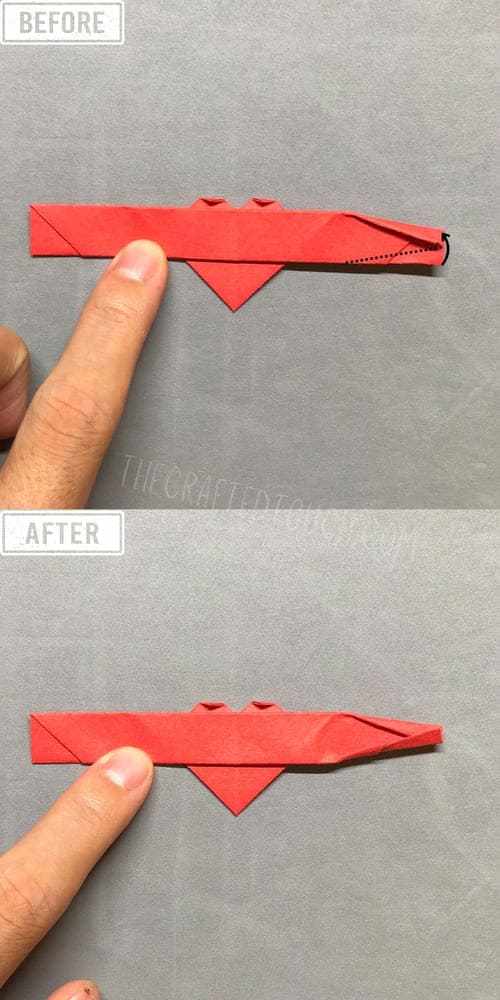
Step 40
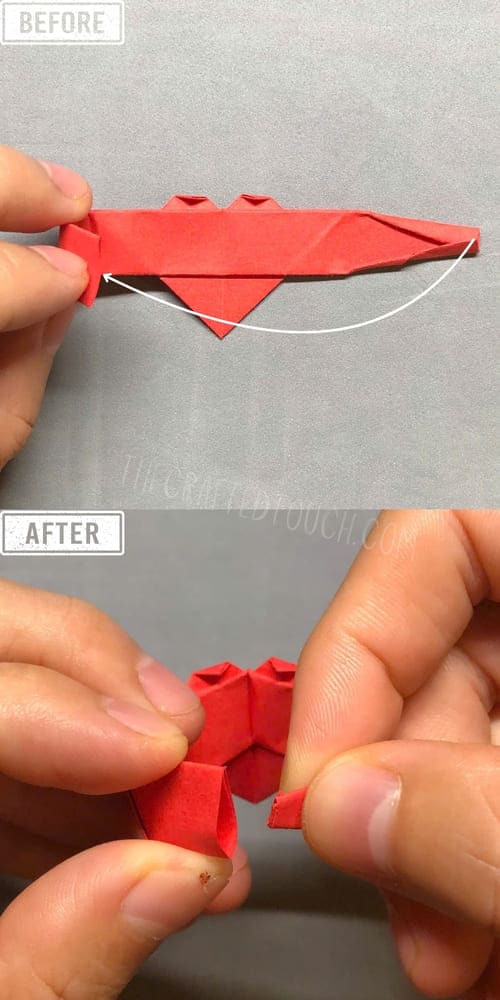
I gently pick up the left side of the stick. This is the fun part, we’re about to turn it into a ring
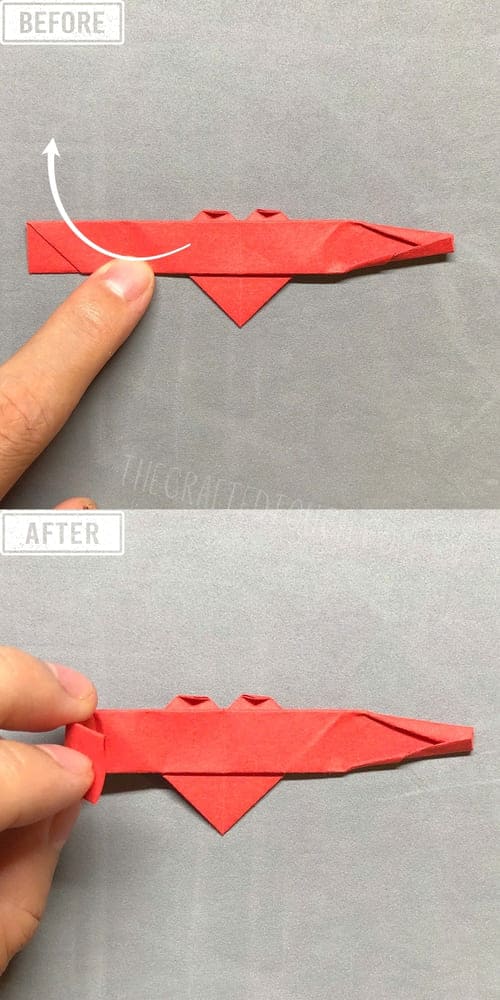
Step 41
Next, I lift the right side of the stick and at the same time, I gently press the left side to make a little hole. This will be the space where the ring connects
Step 42
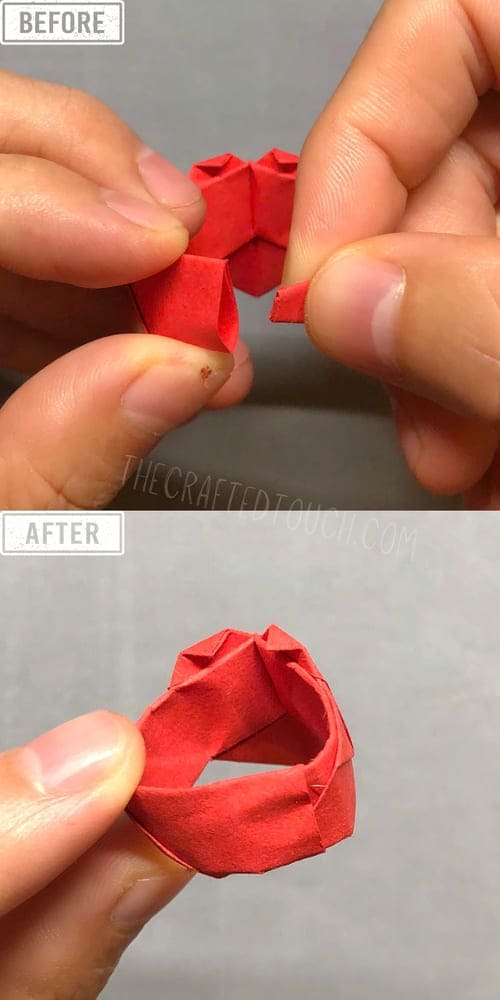
I slide the right stick into the little hole I just made. Now they’re connected.
Step 43
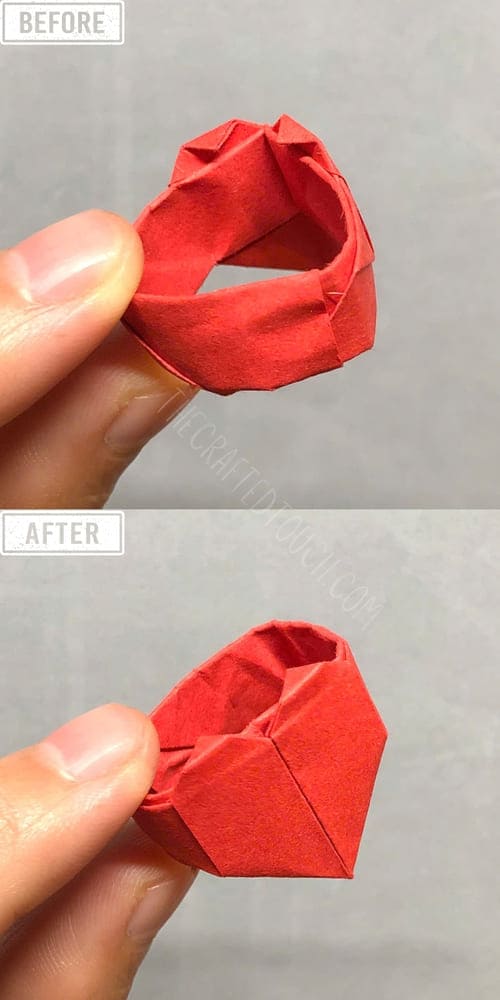
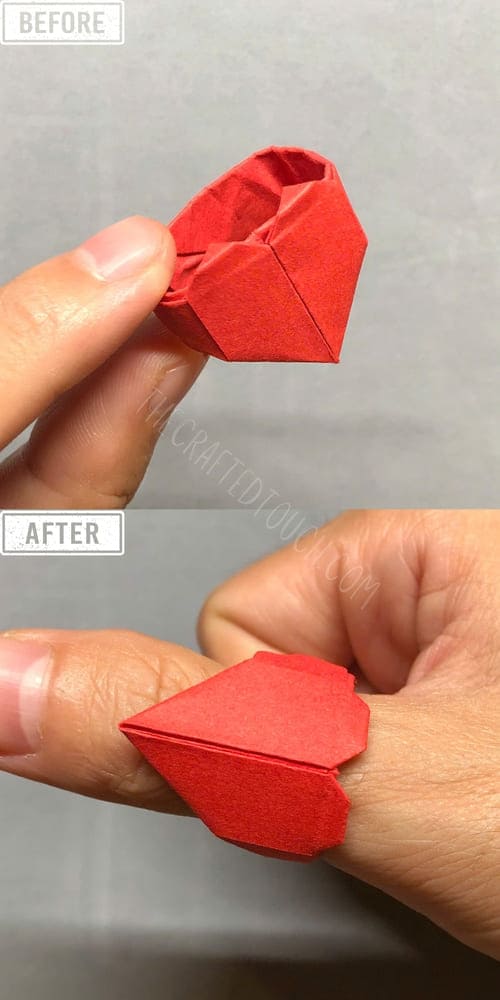
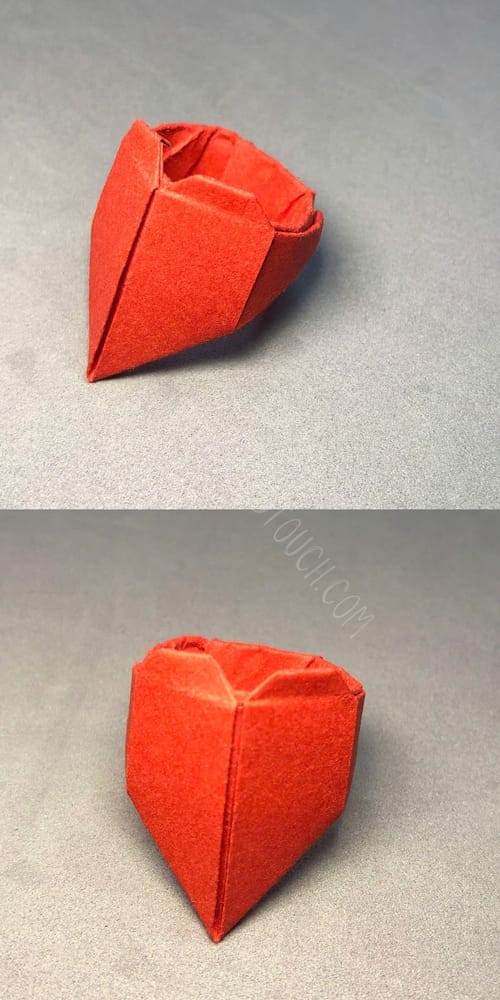
Look at this! I’ve finished it, a cute little origami heart ring made with just one piece of paper.
For the Best Result
| Tips | Result |
| Pick the right paper | Thin paper is easier to fold and looks more delicate. Thick paper can be hard to handle and might make your ring too bulky. |
| Add a special touch | If you’re giving it as a gift, try putting the ring in a tiny box like a masu box or a mini heart box. Add a card with a message to make it extra cute! |
| Make sharp folds | This makes your ring look neater and hold its shape. |
CONCLUSION
Folded origami heart Ring by your own hands, now carries a little love and care. It’s more than just a pretty shape — it’s a little symbol of love, made by you. I hope each fold as I show you how to make it will bring you a moment of relaxation and happiness. Try making another one, or a sweet gift to someone who makes your heart smile. They will be very happy about this gift.
