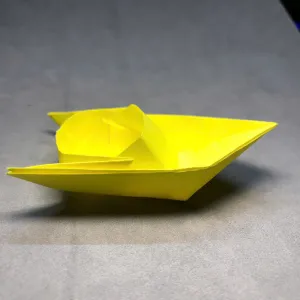
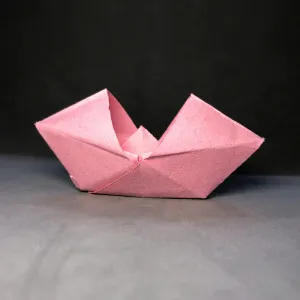
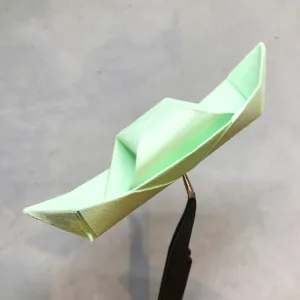
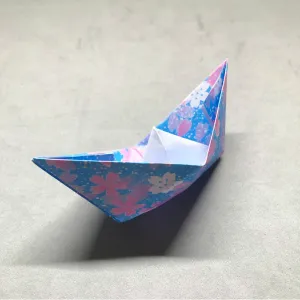
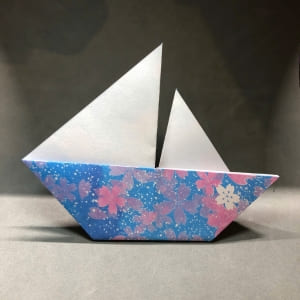
Origami boat-step by step is one of my favorite things to make with paper. It’s fun, fast, and floats if you use the right kind of paper! I’ll show you every fold and trick I use so yours turns out just like mine. Grab a 3:2 rectangle sheet and let’s begin folding together.

Materials & preparation
| Material | How I Use It |
| Paper (3:2 rectangle) | I use one sheet of paper that is longer than it is wide. The size is 3:2. For example, it can be 18 cm long and 12 cm wide, or about 7 inches by 4.7 inches. It can be colored, plain, or have a fun pattern |
| Scissors (optional) | If I don’t have the right size, I use scissors to cut a 3:2 rectangle from any paper I like. |
| Ruler (optional) | A ruler helps me measure and fold more neatly, especially at the start.I also use my fingernail to press the folds and make them sharper. |
| Flat surface | I always fold on a table or desk to help keep the folds clean and straight. |
Step-by-step instructions
I really like making paper boats. It’s one of the first origami things I ever learned. It looks cool, and guess what? If you fold it right, it can float on water. Before we start folding together, just make sure you have a piece of paper and a flat place to work on. Ready? Let’s go.
Step 1
To start making an origami boat, I stand the rectangle paper tall, with the short sides at the top and bottom. I keep the patterned side facing up. Then I fold the paper in half from bottom to top. After that, I fold it in half one more time, from right to left.

Step 2
Then I open the paper from left to right.

Step 3
The fold in the middle splits the paper into two parts. On the right side, I fold the bottom-right corner up diagonally to make a triangle. I use the middle fold as a guide.

Step 4
I do the same on the left side. I fold the bottom-left corner up diagonally too.

Step 5
With the white rectangle on top, I lift it up.

Step 6
And I fold it down along the edge made by the two triangles below.

Step 7
Then I flip the paper over.

Step 8
And I fold the rectangle down, just like in step 6.

Step 9
Do you see the small patterned rectangle lying sideways? I’m going to fold the bottom-left corner all the way up.

Step 10
I do the same with the bottom right part by folding it up diagonally. Now, the whole thing looks like one big triangle.

Step 11
Now I will stand the shape up so I can see the top part of the paper.
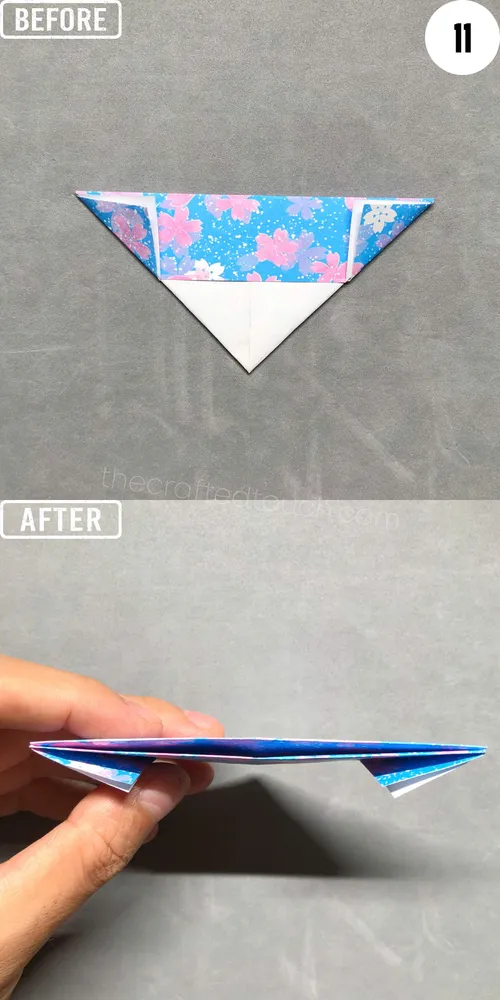
Step 12
Then I open it up a little.
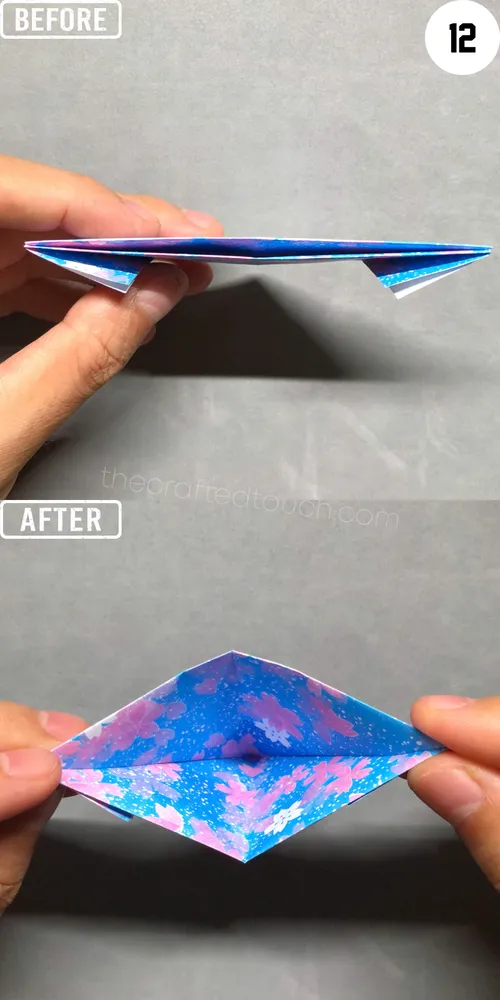
Step 13
Then I press it flat along the folds. Now the paper looks like a big diamond with patterns on the outside, and a small white diamond at the bottom.

Step 14
With the top half of the diamond, I lift one layer up.
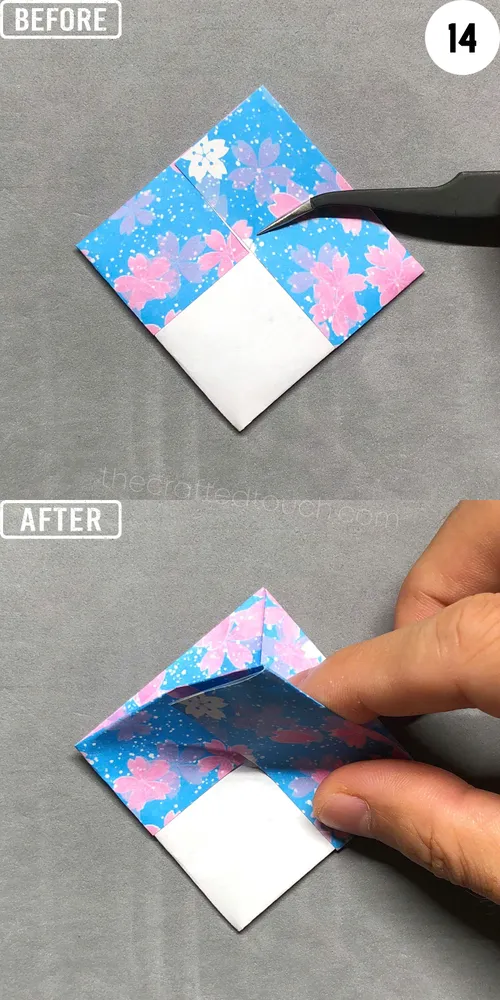
Step 15
And I fold it down in half.
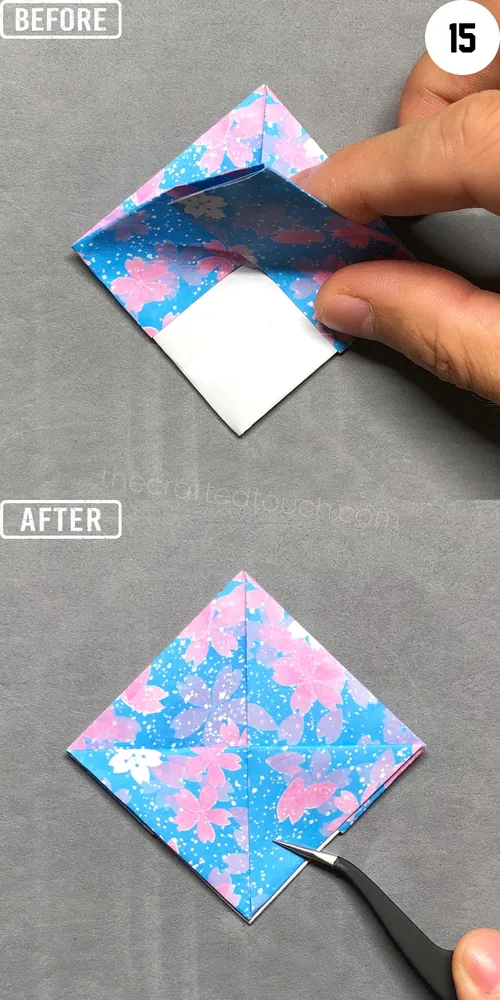
Step 16
Then I flip the paper over.
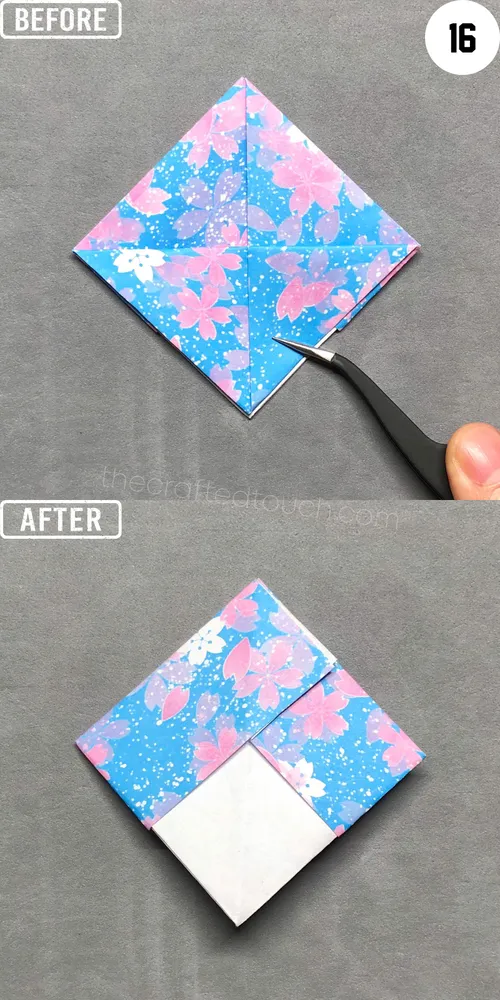
Step 17
And I do the same with the other side, I fold the top part down in half. Now I have a triangle.
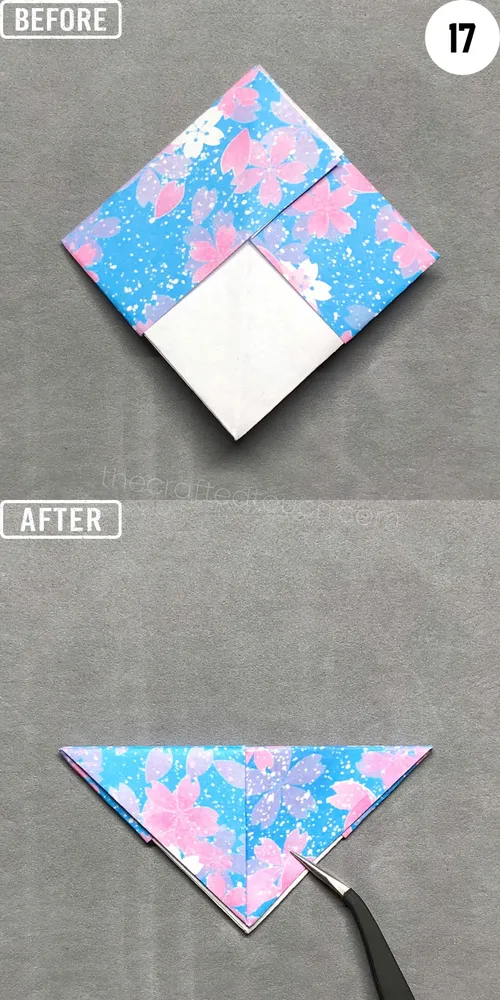
Step 18
Now I lift the paper up.
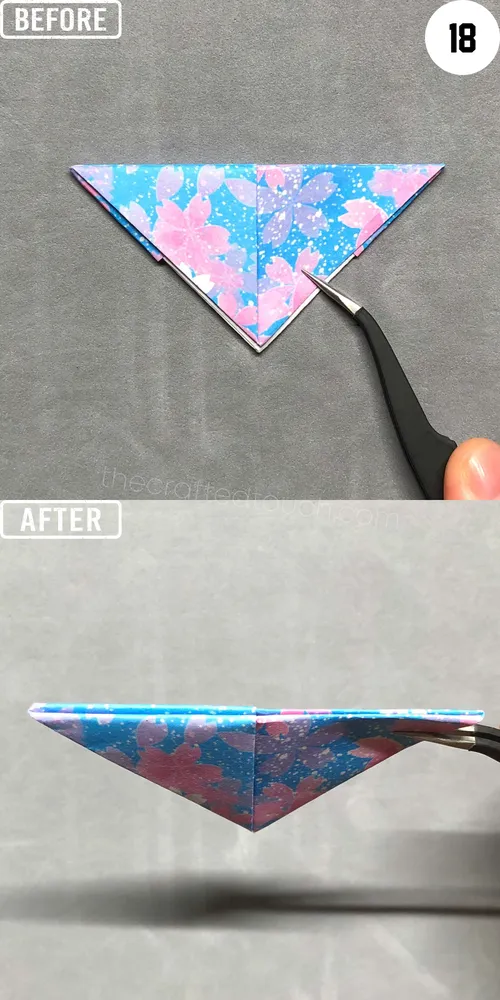
Step 19
I hold it up until I can see the top edge of the paper, ready for the next step.
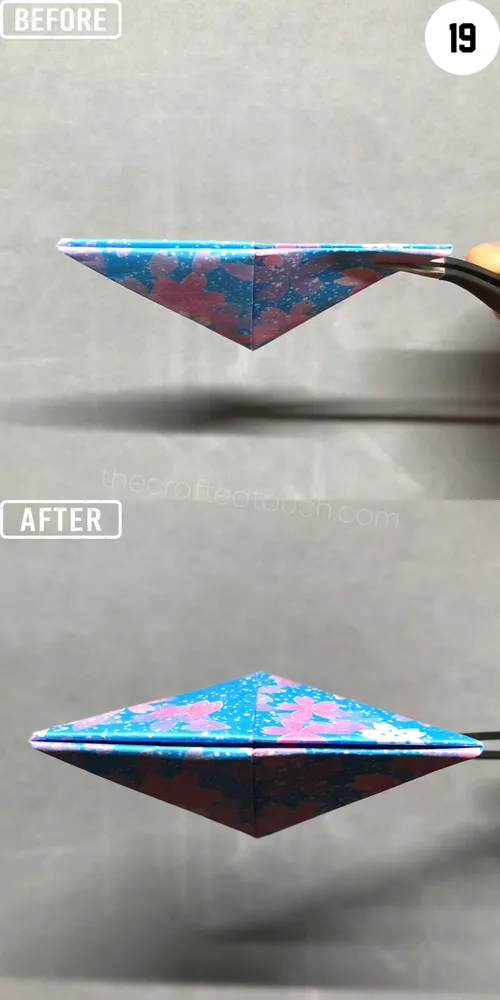
Step 20
Then I keep folding by opening the top part. I do this by gently pulling it from the top and bottom.

Step 21
Then I press the left and right sides of the paper together.
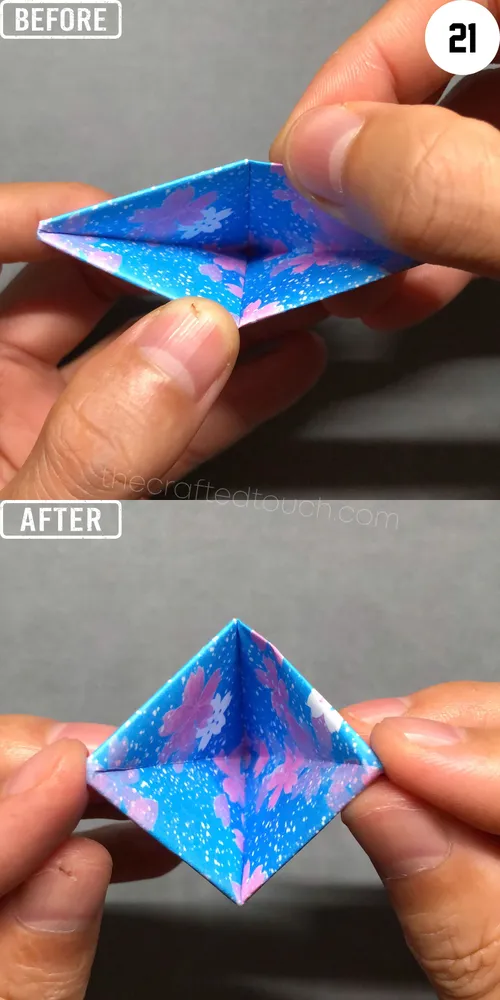
Step 22
After I press it flat, I place it on the table. Do you see the two triangles on the sides? I’m going to use them for the next step.
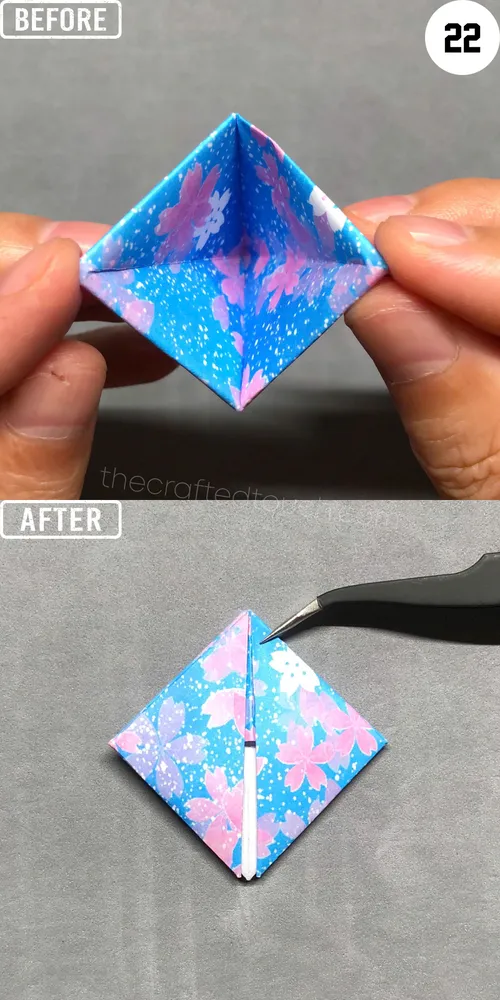
Step 23
Now I hold the paper with both hands. I use my fingers to hold the top edges, and use my thumbs to pull the two triangle tips out to the sides.

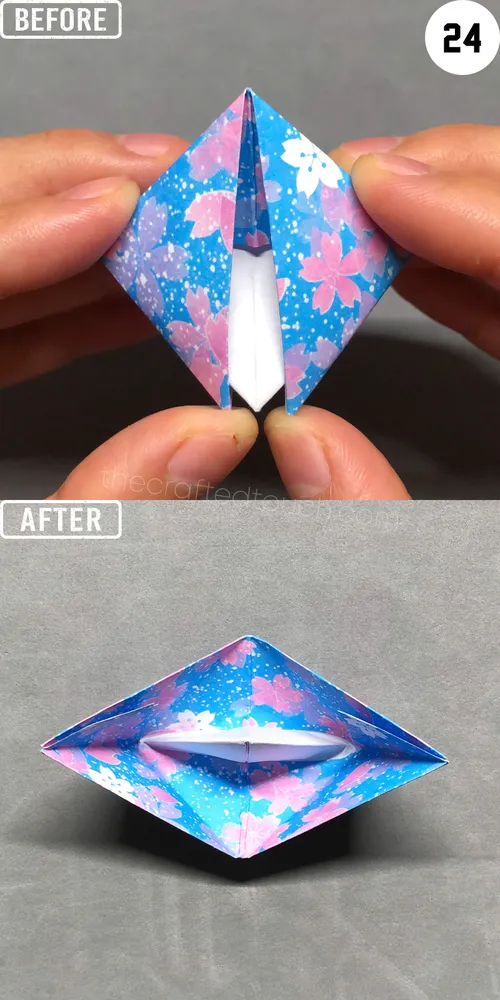
Step 24
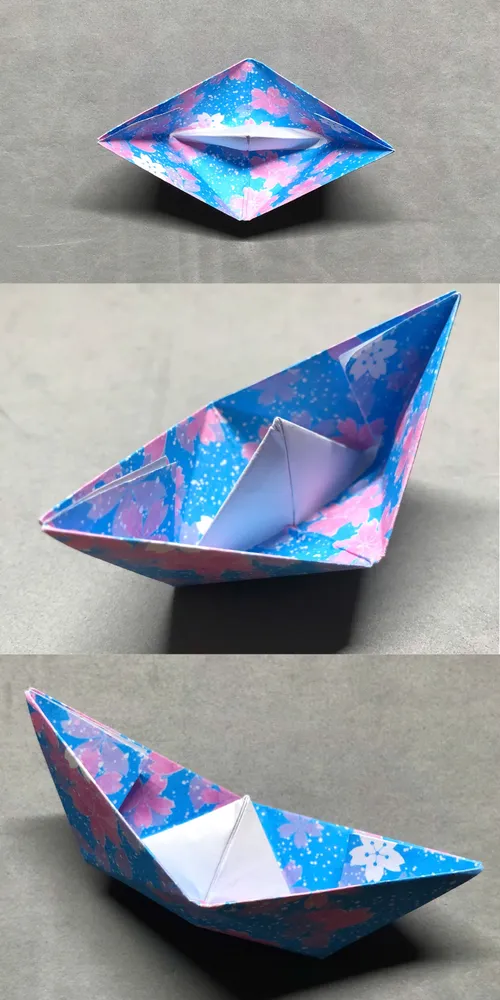
After pulling and opening the paper along the folds, I fix the shape a little and place it on the table. I’ve finished my origami boat.
| Tip | Description |
| Make sharp folds | Use your fingernail or a ruler to press each fold. Sharp creases help your boat stay strong and look neat. |
| Go step by step | Follow each fold slowly. If you skip or rush, the boat might not open up right. |
| Practice with scrap paper | Fold a few boats using old or plain paper first. That way, you can learn from little mistakes before making your best one |
| Decorate your boat | After folding, use markers, stickers, or even tiny flags to decorate. Just don’t use too much glue or heavy stuff |
| Keep your hands clean | Wash or dry your hands before folding. Clean hands help keep the paper smooth and not wrinkled. |
| Use the right size paper | Make sure your paper is a 3:2 rectangle. If not, you can cut it to size before starting. This helps the folds work better. |
Conclusion
Making an origami boat-step by step is something I always enjoy. It doesn’t need glue, tape, or anything fancy, just a piece of paper and a bit of patience. The more I fold, the better my boats get.
I hope you had fun folding with me and made a boat that you’re proud of. If it didn’t turn out perfect the first time, that’s okay. Try again, decorate it your way, and maybe even float it in water. Every boat is different, and each one you make is a little better than the last
