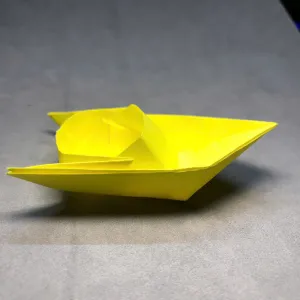
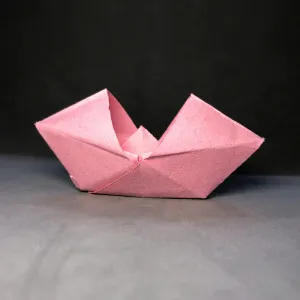
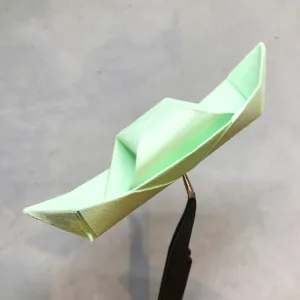
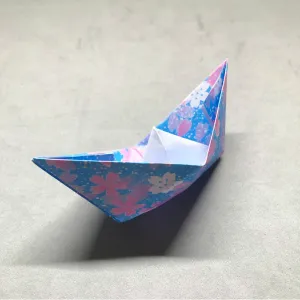
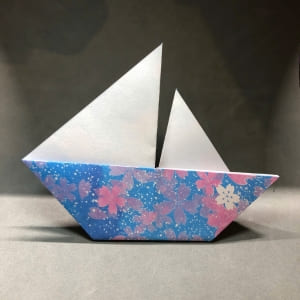
Hi there. In this guide, I will show you how to make a cool origami boat using just a piece of paper. It is simple and fun. All you have to do is follow each step carefully. You will learn how to fold the paper so it turns into a boat that floats on water. This activity helps you practice your folding skills and creativity. Let’s get folding and make your very own paper boat that you can play with or decorate.
Materials & preparation
| Material | How I Use It |
| Rectangle shaped paper | I use one rectangular sheet of paper. It can be plain, colored, or have fun patterns. I like using about 21×14 cm (like A5 size), which is easy to fold and handle |
| Scissors (if needed) | If the paper is too big or has uneven edges, I use scissors to make it the right size. I always ask a grown-up to help me with scissors because they can be sharp. |
| Ruler or fingernail | Sometimes, I use a ruler or my fingernail to press the folds so they are straight and sharp. This helps the paper stay folded better. |
| A flat table or desk | I fold the paper on a flat surface like a table or desk. This helps keep the paper steady and makes folding easier and neater. |
| Patient | Taking your time and not rushing. When you are patient, you fold slowly and carefully, even if it takes a little longer. This helps you make nice, neat folds and finish your origami well. |
Step by step instructions
Before we start folding, make sure you have a clean, flat surface to work on and a square or rectangular piece of paper. Take your time and be patient with each fold, neat folds will make your boat look better and hold its shape. Remember, origami is all about having fun and being creative, so don’t worry if it’s not perfect the first time. Ready? Let’s begin!
Step 1
To start, I place the rectangle-shaped paper vertically on the table, then fold it in half from top to bottom, making sure the edges line up well.

Step 2
After making a nice crease, I fold the paper in half again, but this time from right to left.

Step 3
Then I open the last fold. Now there’s a straight crease running down the middle of the paper, going from the top edge all the way to the bottom edge.

Step 4
Then I fold the top right corner down at an angle to make a triangle shape.

Step 5
I do the same with the top left corner—folding it down at an angle to make the second triangle.

Step 6
Below the two triangles, there’s a rectangle. I fold it upward along the bottom edge of the triangles.

Step 7
Then I flip the paper over to the other side so I can work on the back.
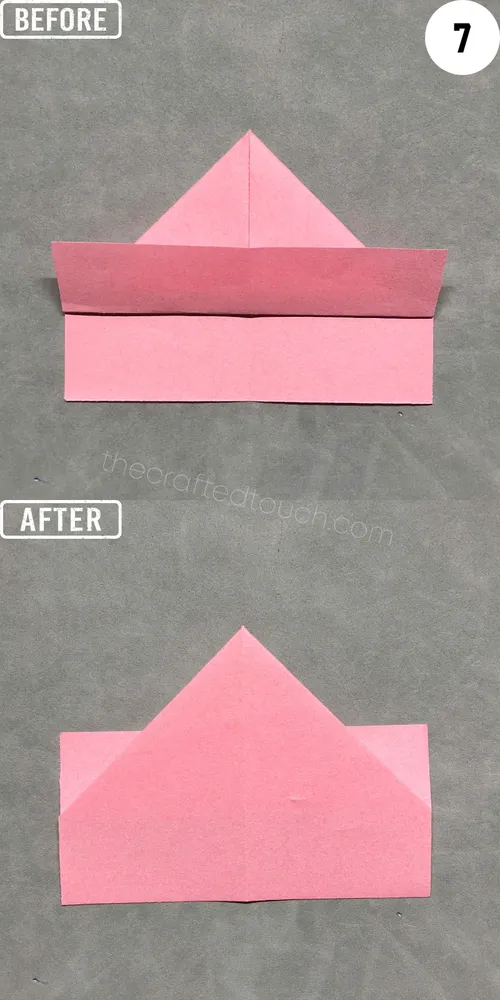
Step 8
And then I fold the bottom part up again, just like I did on the other side. making sure the edges line up neatly.
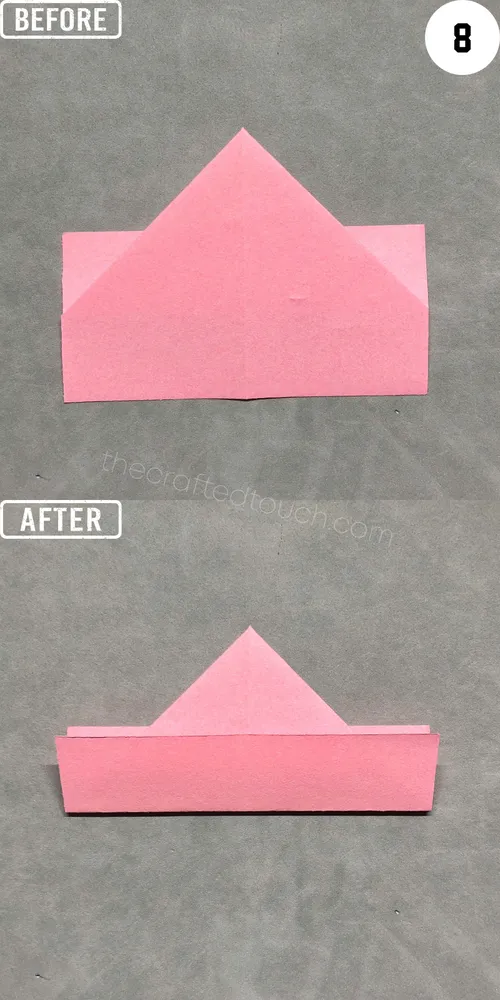
Step 9
Then I lift the paper up so I can clearly see the bottom part. Getting ready for the next folds.
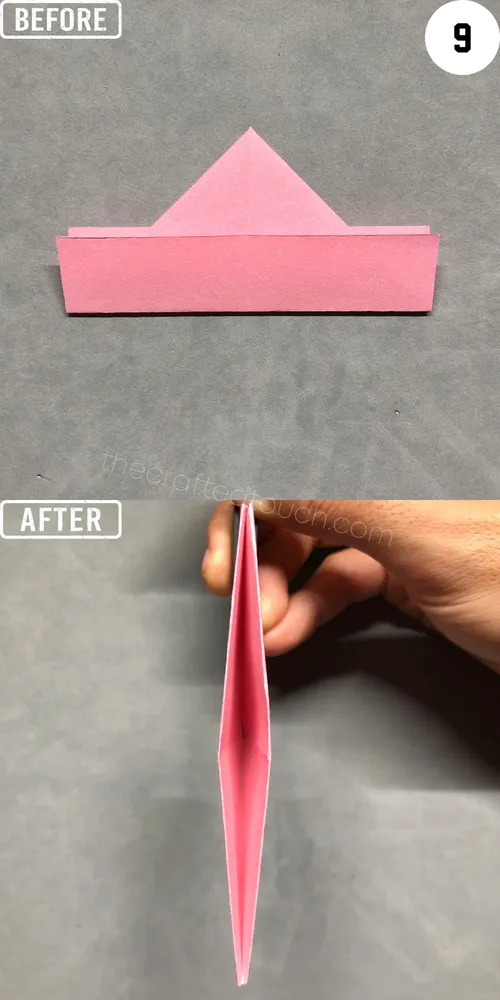
Step 10
After that, i open it up by gently pulling the two side edges out to the sides.
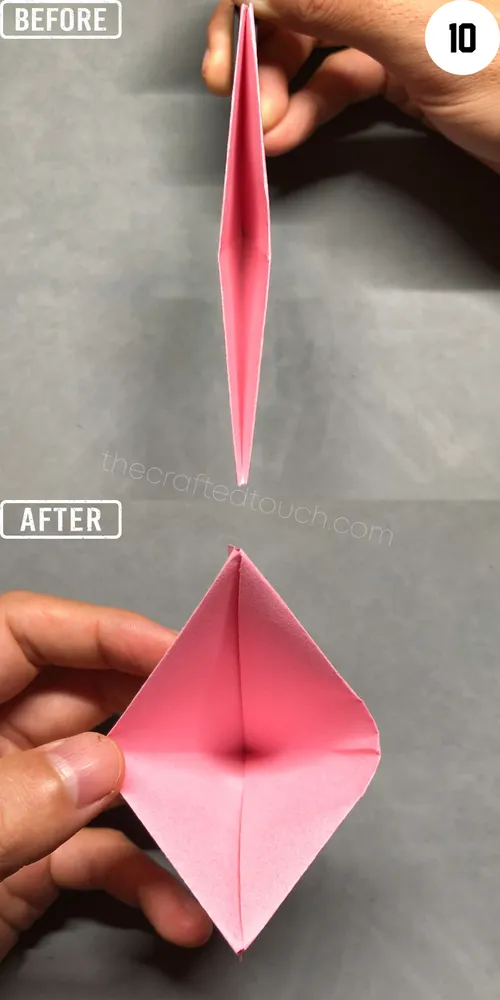
Step 11
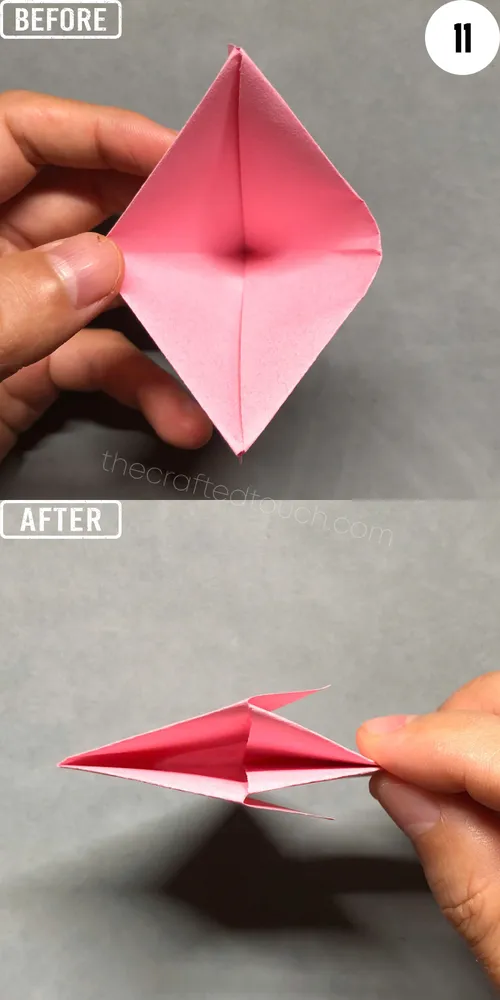
And I press the top and bottom points of the diamond down to flatten the paper.
Step 12
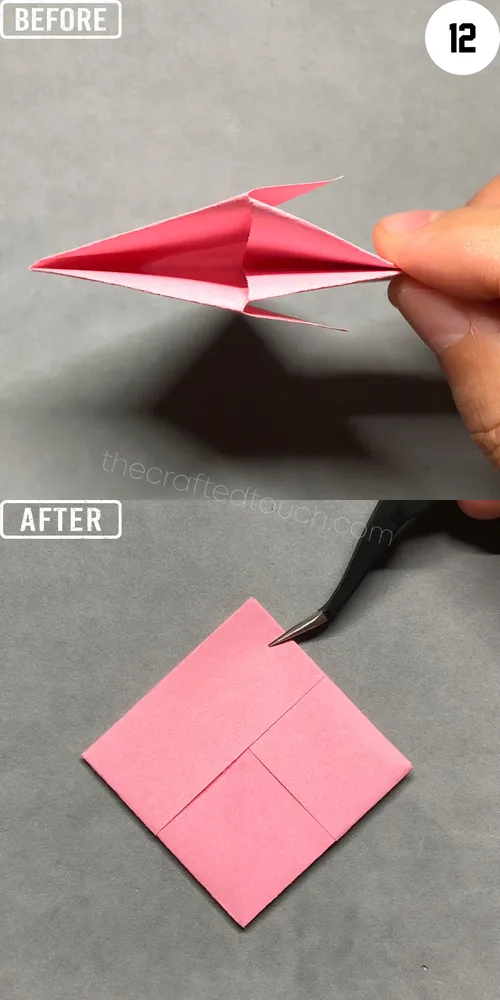
Next, I put the paper on the table like in the picture to get ready for the next step.
Step 13
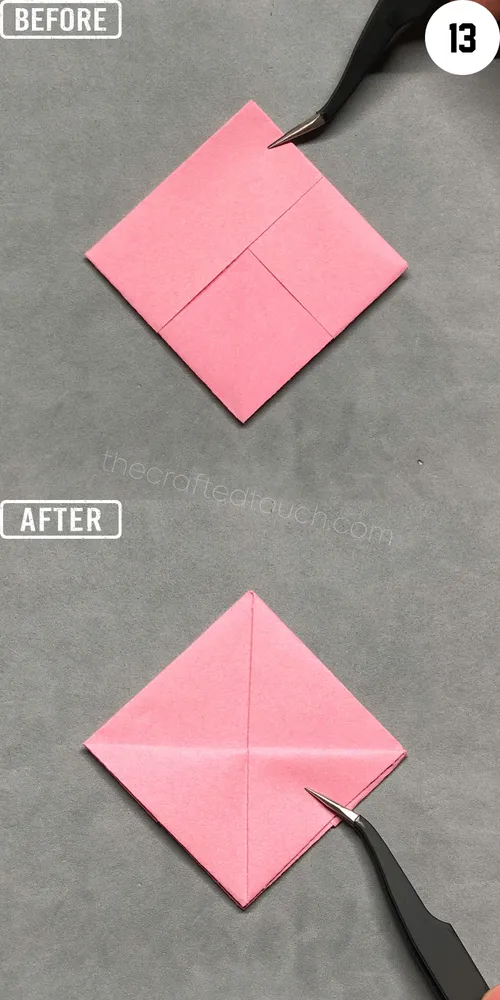
Now I fold the top part of the triangle in half by flipping it down. Lining up the edges carefully.
Step 14
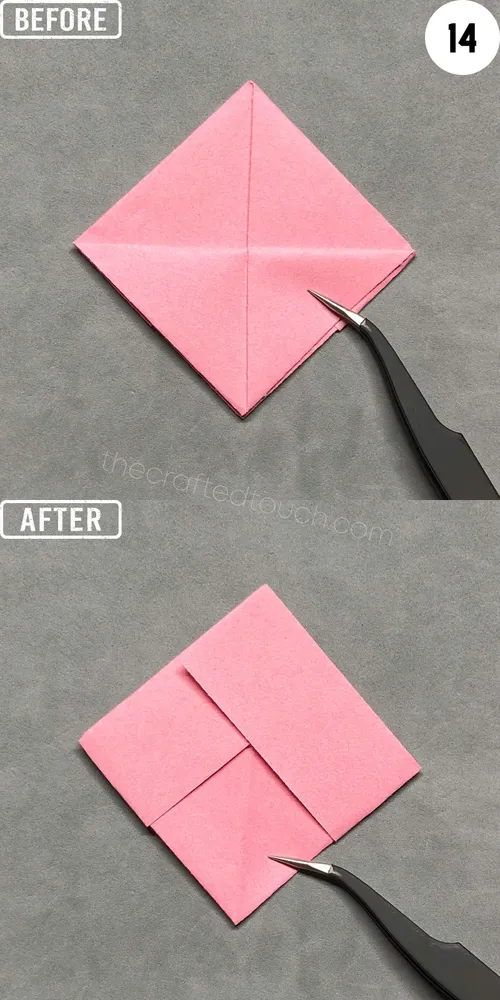
After pressing the fold to make it neat, I turn the paper over.
Step 15
Then I fold the top part down again to turn the paper into a triangle.

Step 16
Now I turn the paper again and stand it up so I can see the top edge.
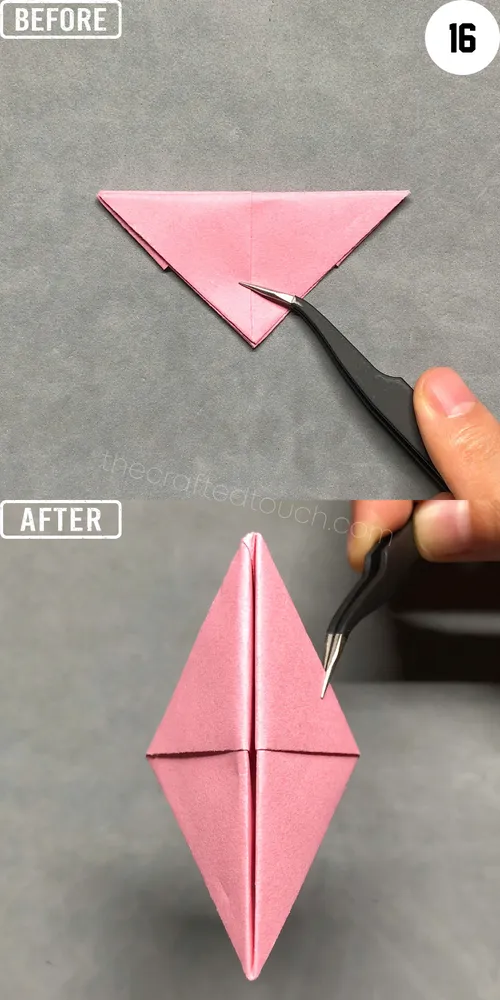
Step 17
Now I will open up the inside part I’m looking at by pulling its two side edges outward.
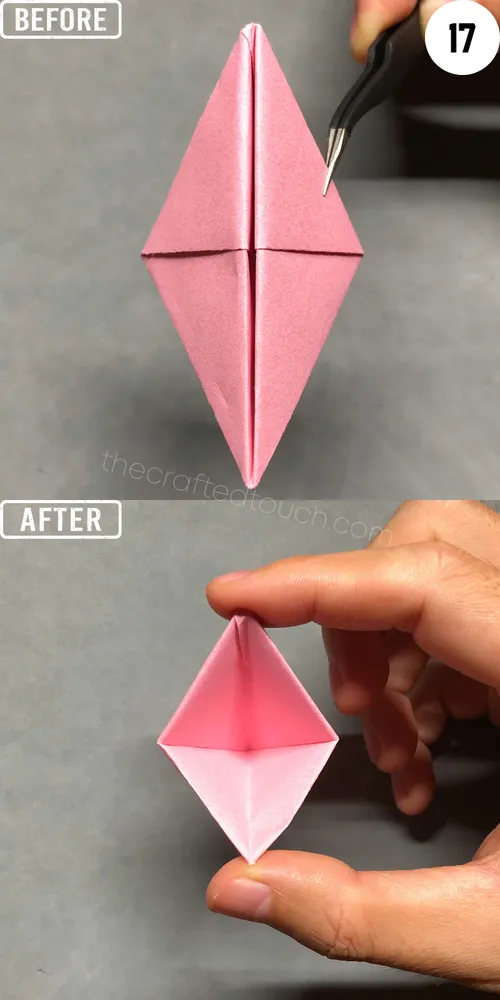
Step 18
And press the top and bottom points down to flatten the paper.
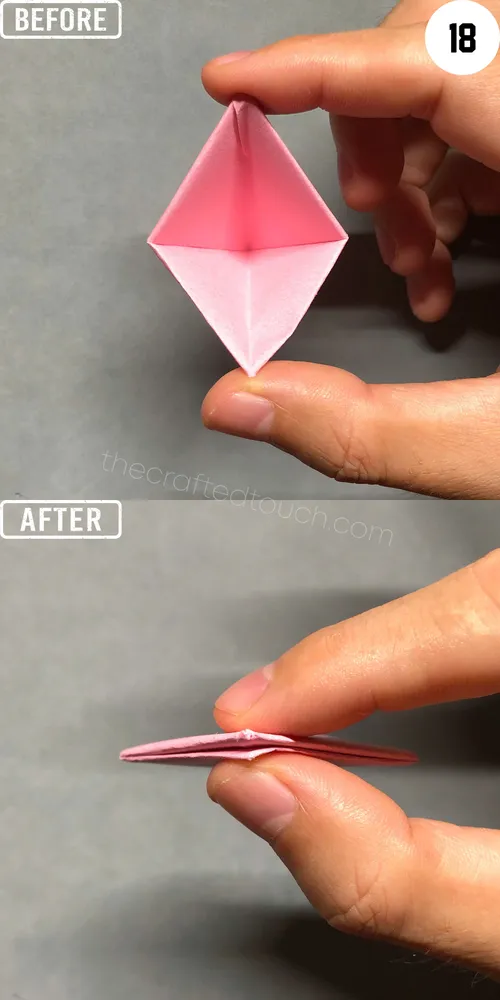
Step 19
Then I place the folded paper on the table just like in the picture.
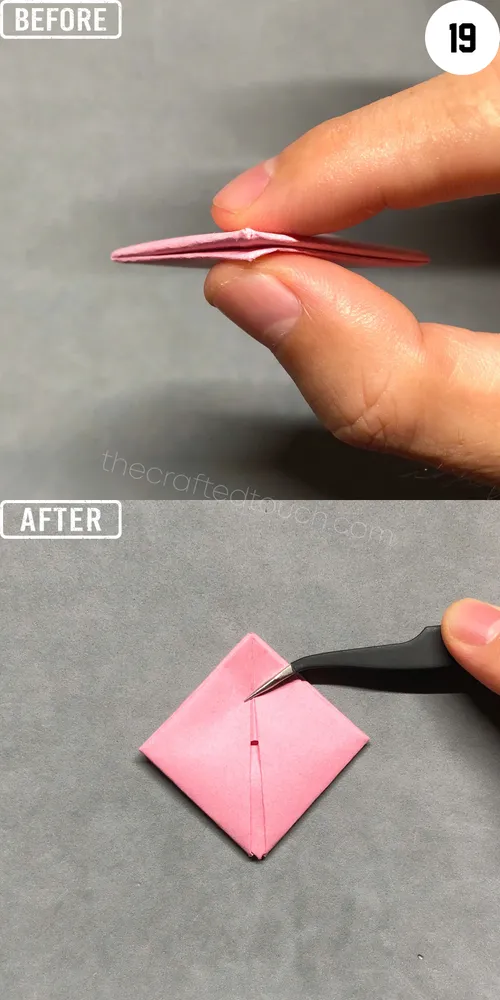
Step 20
I will fold it in half by flipping just the top part of the diamond down while keeping the diamond shape.
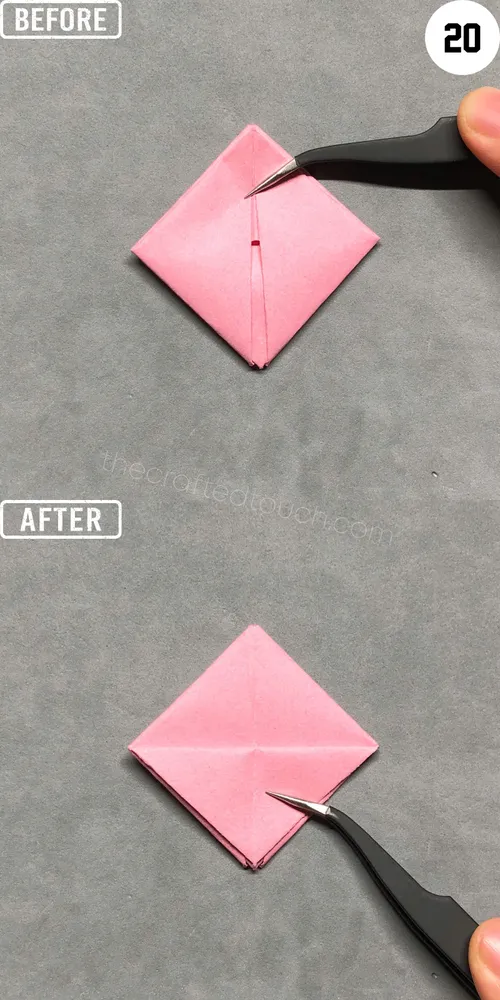
Step 21
After that, I turn the paper over to continue folding.
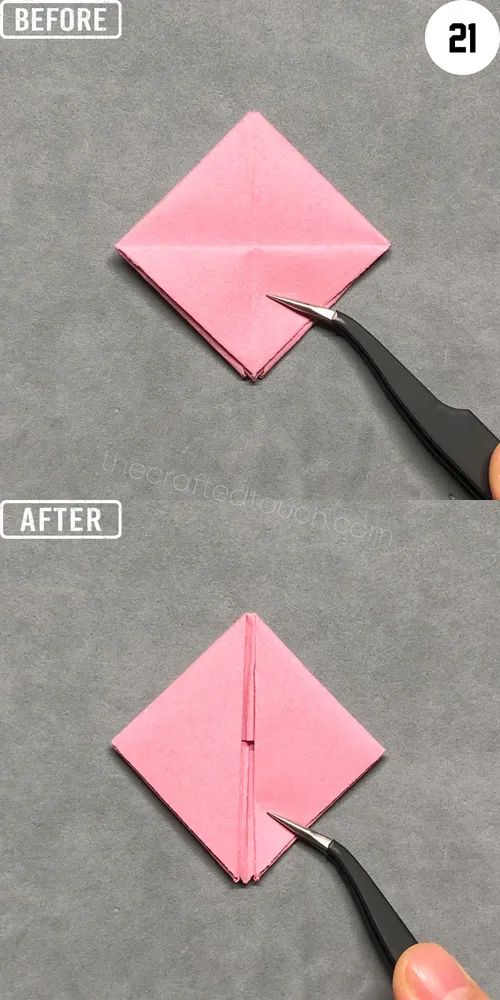
Step 22
And I fold the diamond in half again by flipping the top part down. Now I have a big triangle
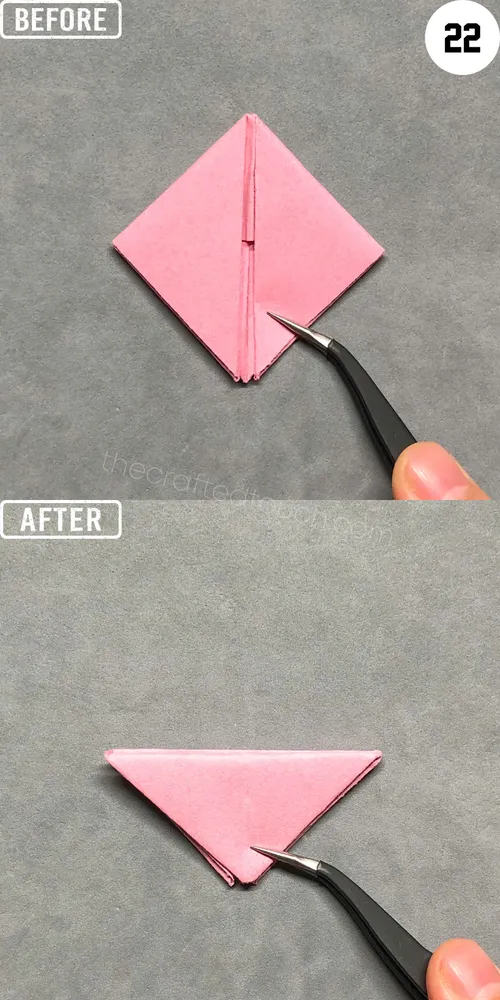
Step 23
I turn and lift the paper up vertically so I can see the top edge of the triangle I just folded.
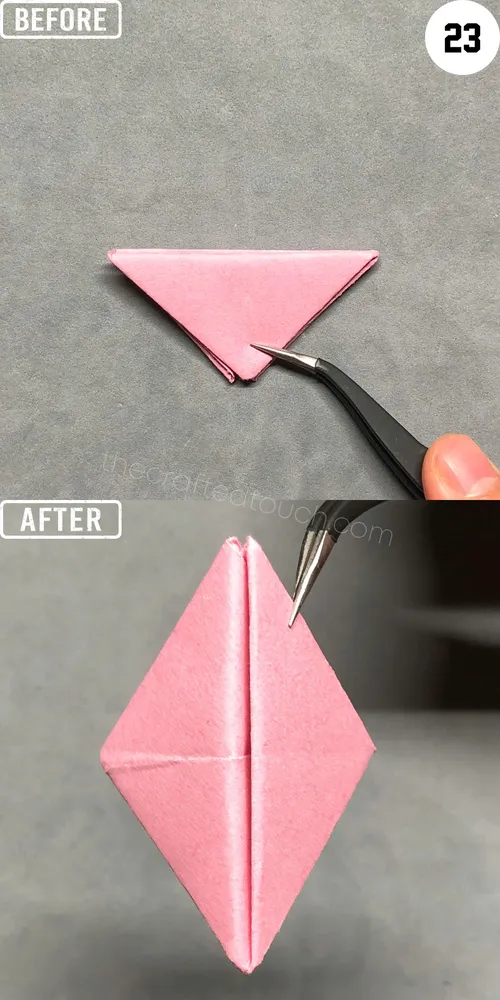
Step 24: Now I will open up the inside part of what I’m looking at.
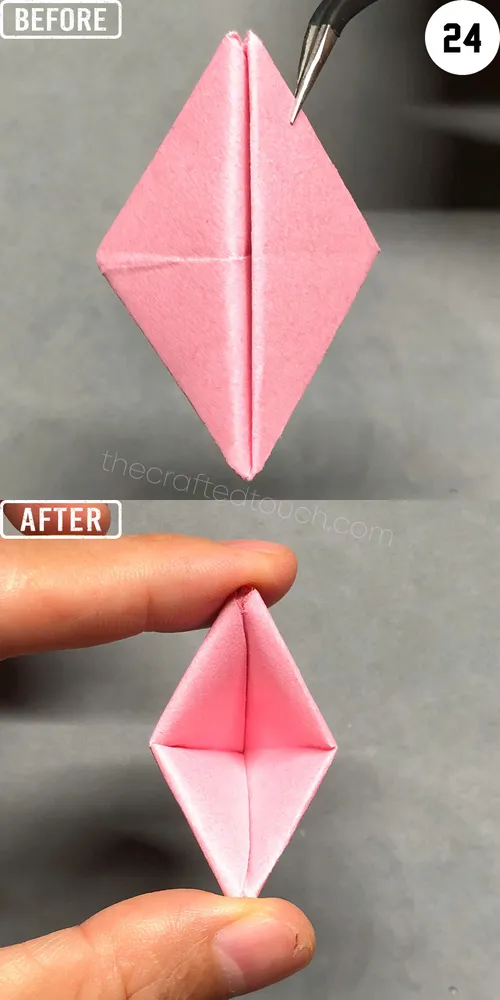
Step 25: And press the top and bottom points of the diamond down so they touch each other, making a flatter shape.
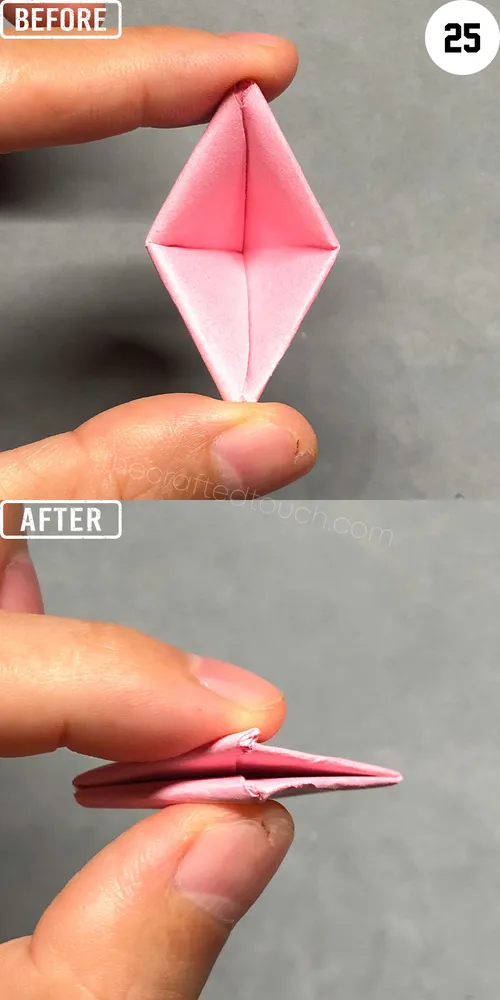
Step 26: Now I place the paper back on the table to get ready for the next step.
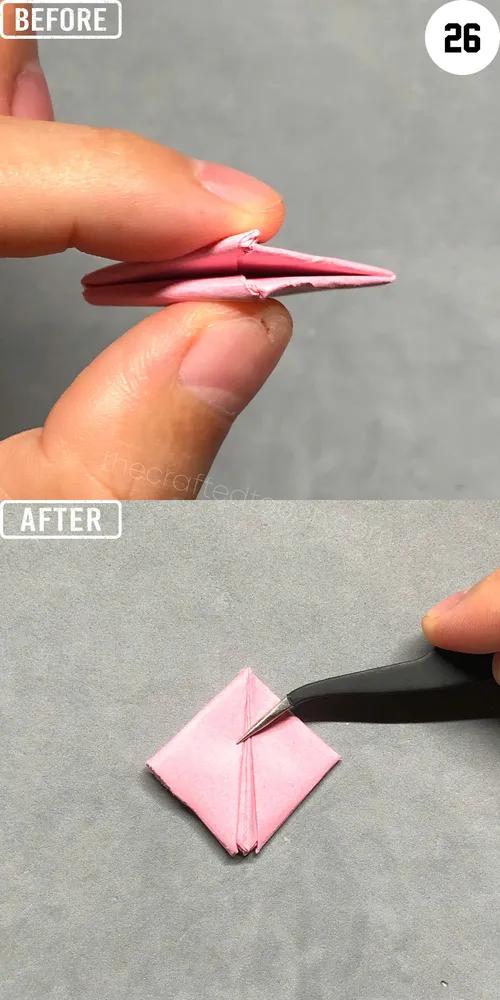
Step 27: Then I lift it straight up so I can see the bottom of the shape I just folded
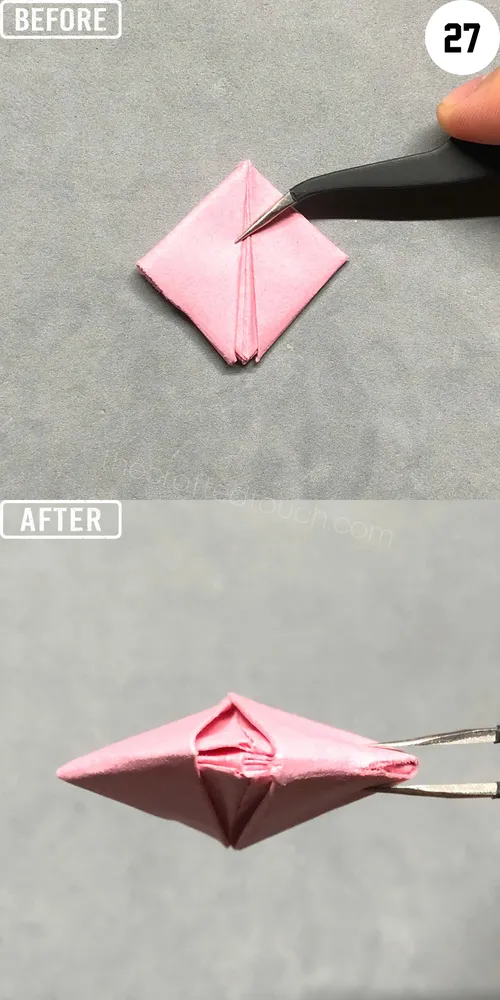
Step 28: After that, I will pull both sides of the shape I’m looking at outward along the fold lines to make the boat shape.
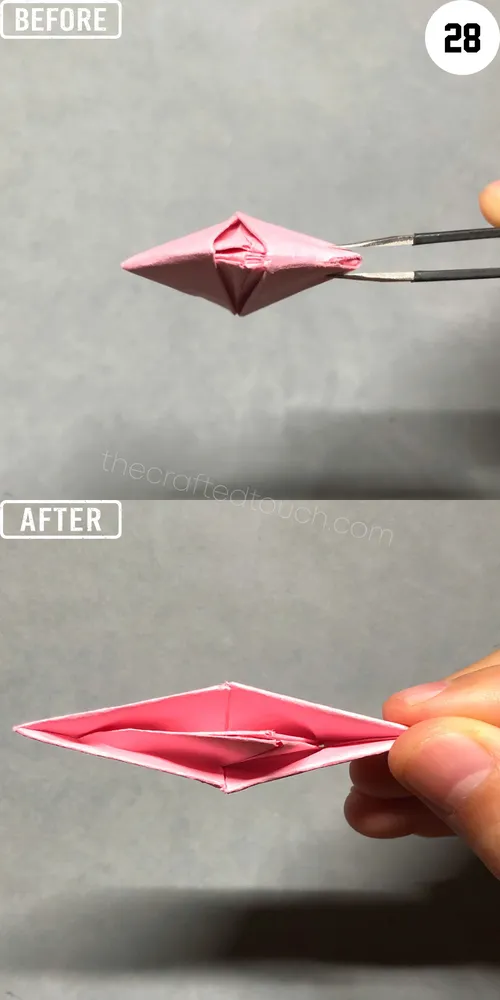
Step 29: I tilt the boat a little so I can see its side edge.

Step 30: Inside the boat, I will pull the back inner part outward.
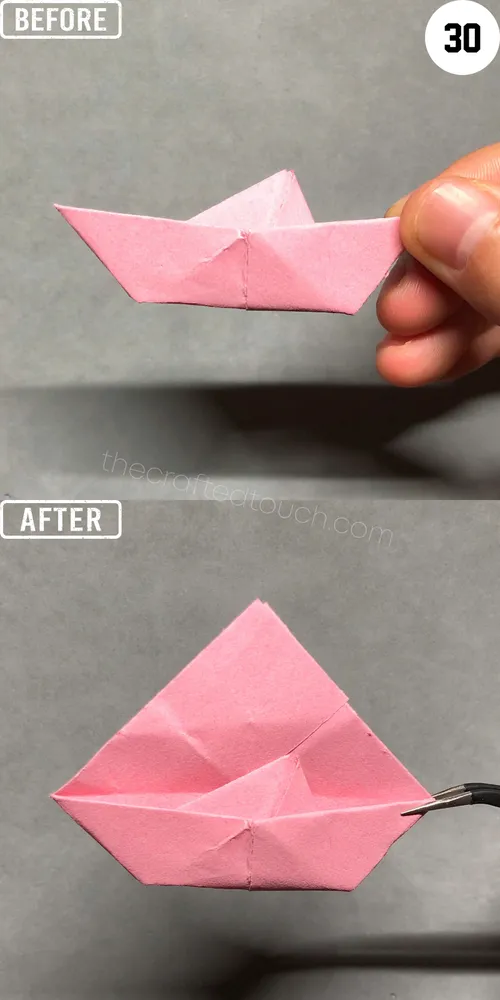
Step 31: After that, I turn the paper over
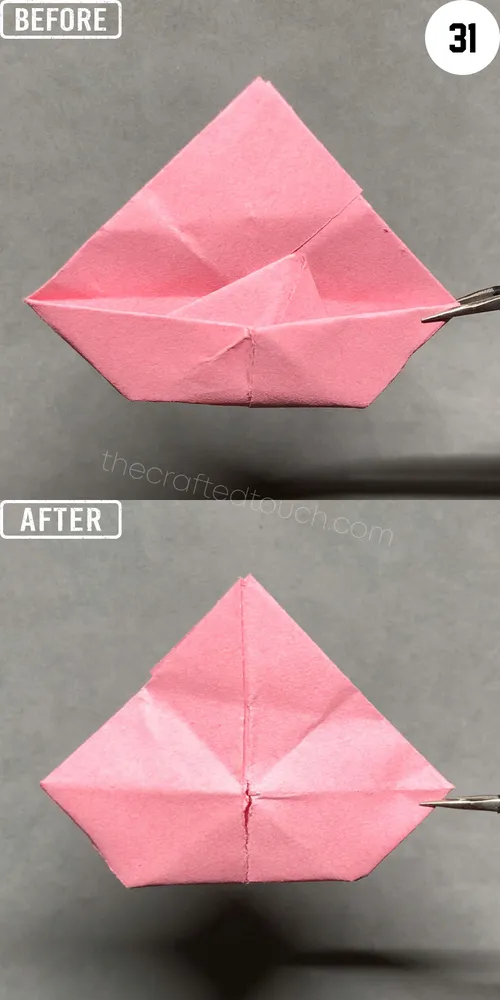
Step 32: Then I fold the top part of the paper down along the existing horizontal fold to make a big triangle at the bottom.
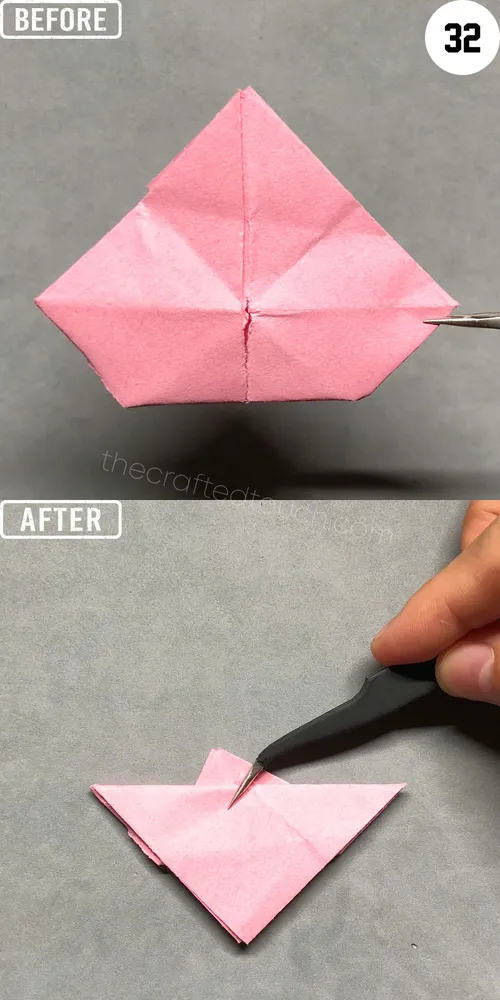
Step 33: Now I lift the paper up and turn it a bit so I can see the bottom vertically, then I press it to open it up.
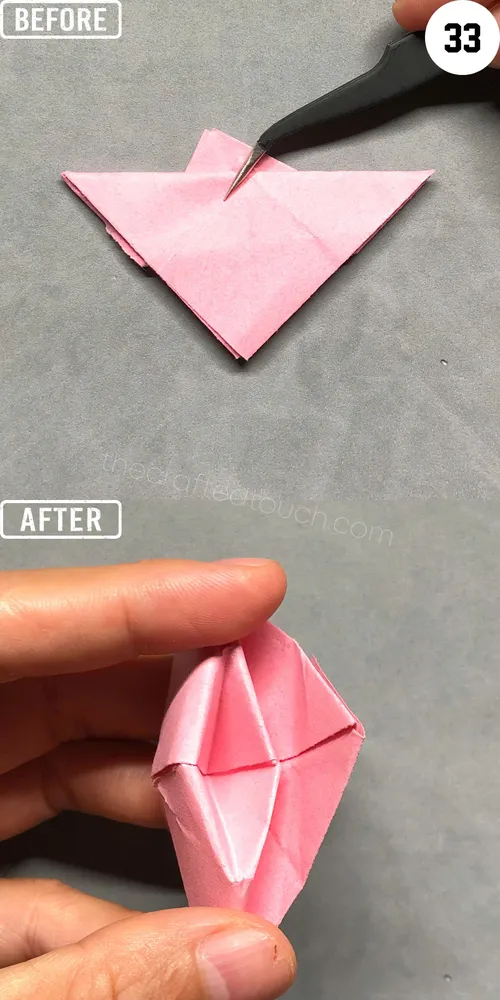
Step 34: Now I will tuck the extra paper on the right side into the area I just opened up.

Step 35: Then i turn the boat upside down so i can see the top part of the boat.
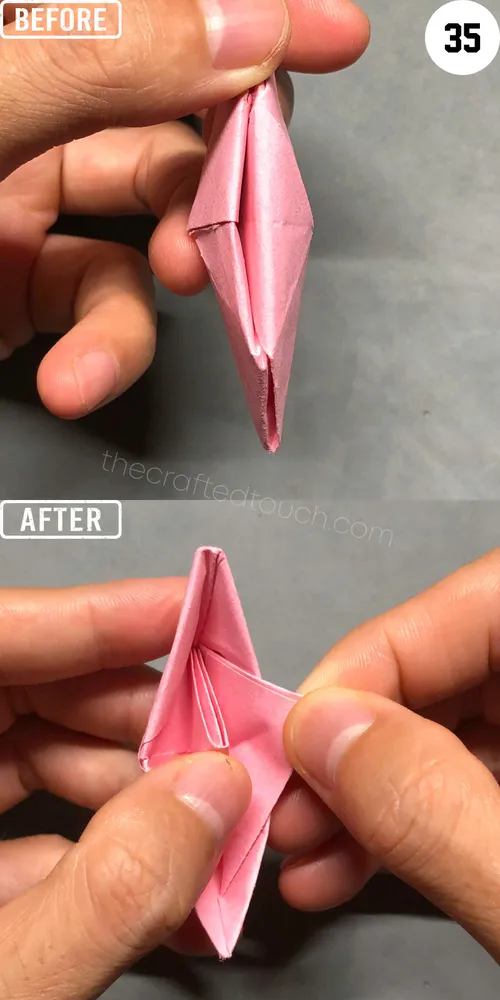
Step 36: I keep lifting the raised part on the right, then place the paper on the table and turn it over so it looks like the picture.
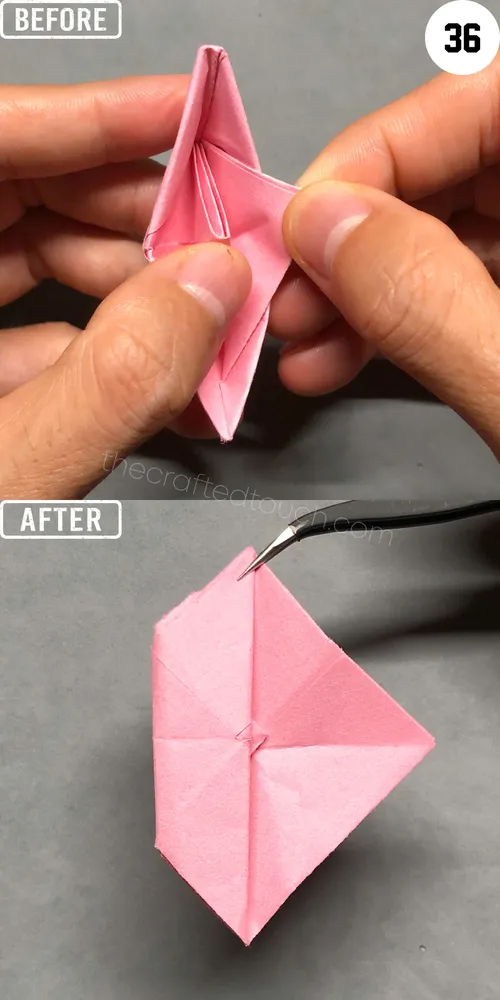
Step 37: I turn the paper from right to left. Now it looks like an upside-down diamond
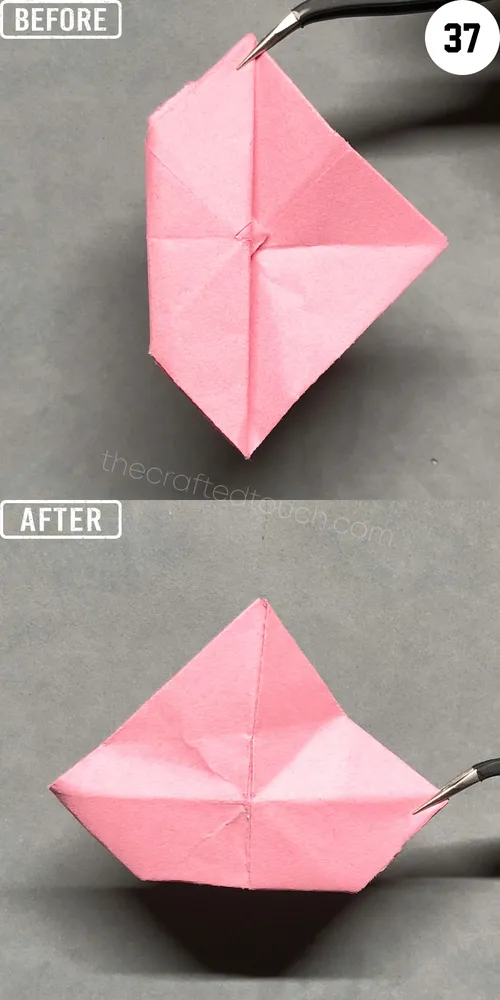
Step 38: Now I fold the big triangle at the top of the paper down along the fold line.
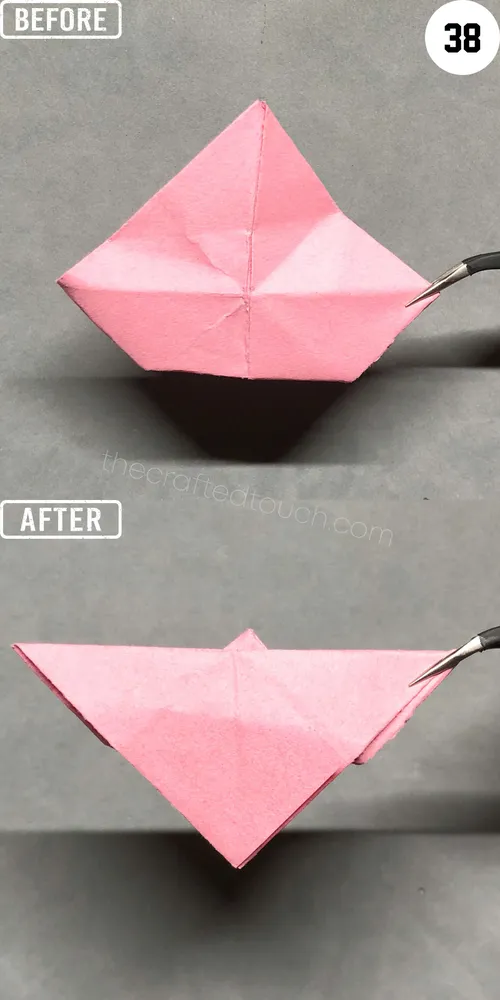
Step 39: I turn the paper over and rotate it vertically so the triangle I just made is on the right side of the paper.
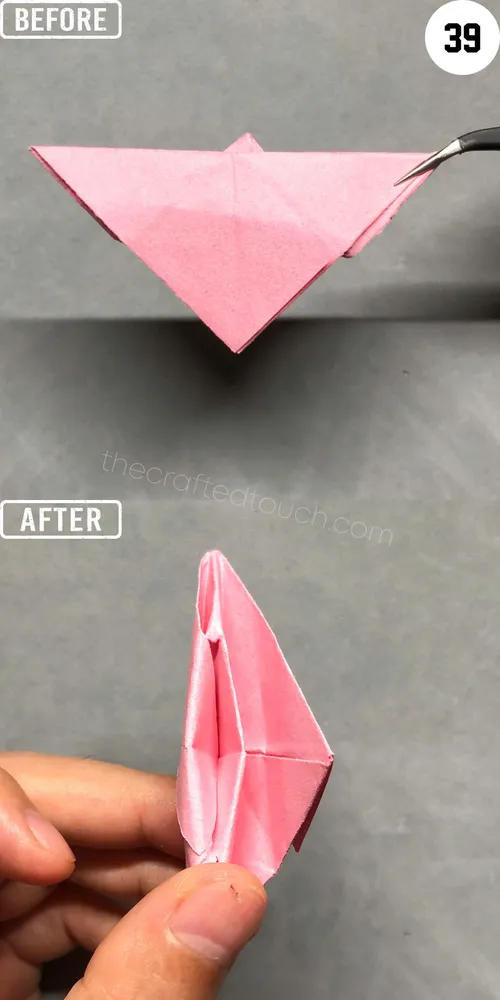
Step 40: I gently open the bottom part on the left, then I tuck the tip of the triangle on the right into the part I just opened.
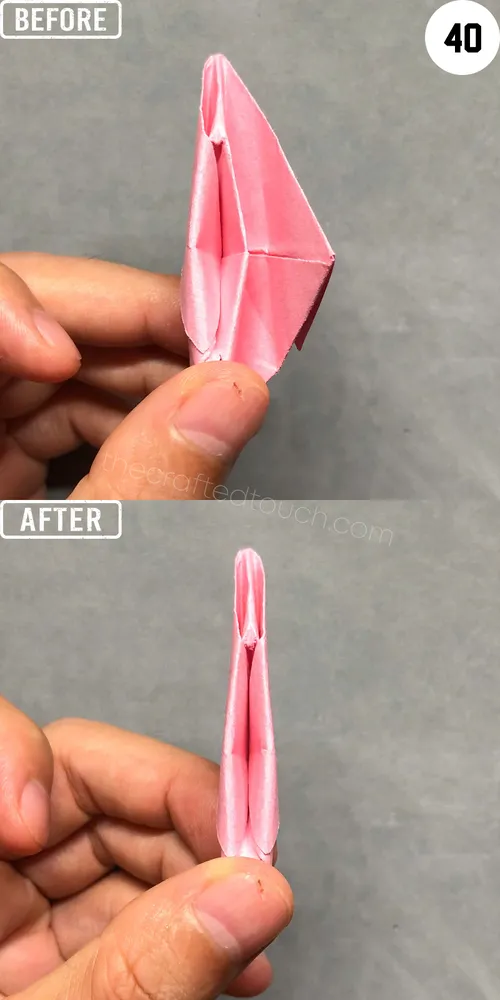
Step 41: Now I turn the folded paper upside down so I can see the top part of the boat.
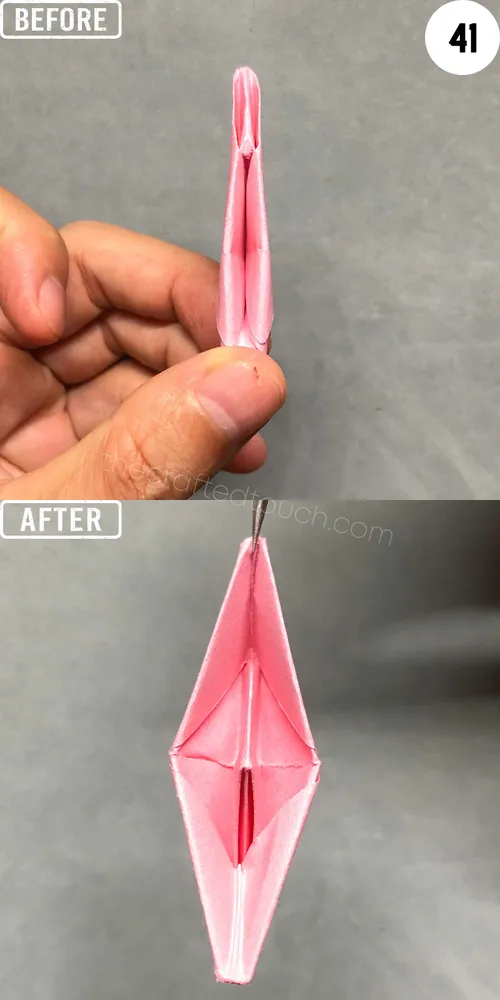
Step 42: Inside the boat, I pull the inner paper out so it sticks out fully.
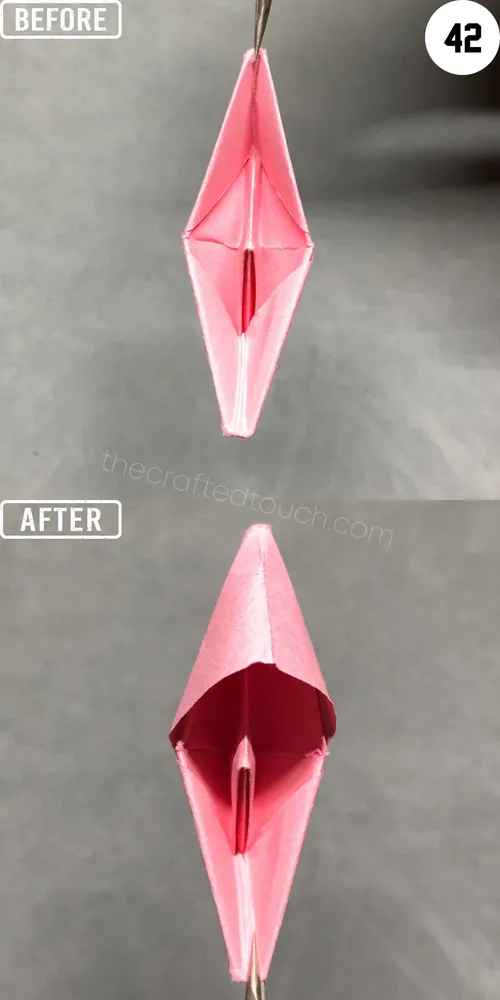
Step 43: I keep pulling the bottom part inside the boat outward.
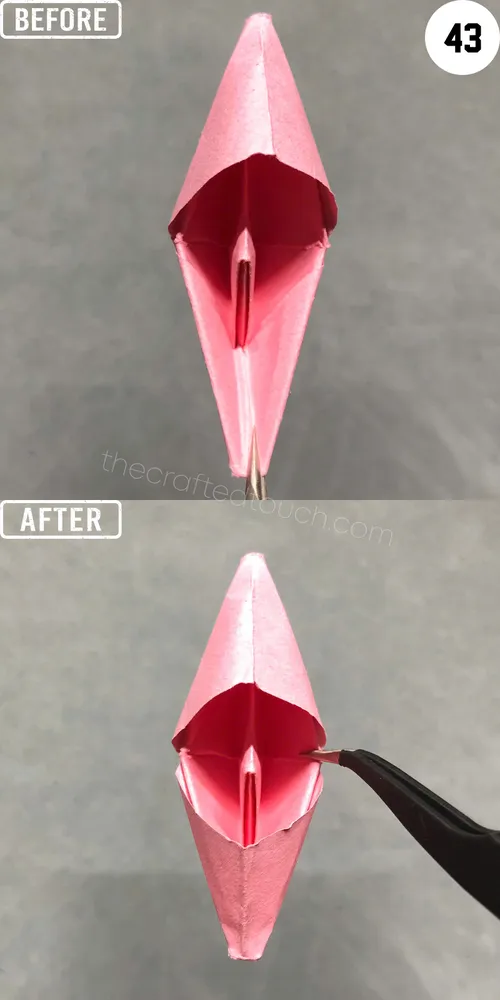
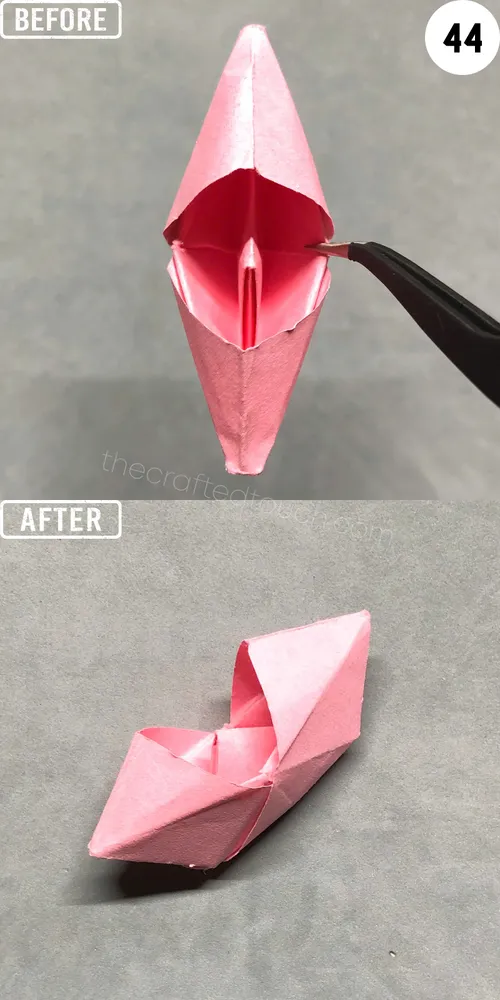
Step 44: I put the paper on the table, and there it is! I have finished making the origami boat.
Tips for a better result
| Tip | Description |
| Use clean hands | Make sure your hands are clean and dry before folding so the paper stays nice and doesn’t get dirty or wet. Dirty paper can be hard to fold and doesn’t look pretty. |
| Fold on a flat surface | Always fold on a hard, flat surface like a table to make your folds sharp and neat. |
| Take small breaks | If you feel tired or frustrated, take a short break and come back with fresh eyes. |
| Follow steps one by one | Don’t skip any step or rush. Folding in the right order helps your paper turn into the shape you want. Missing a step can make the final boat look different or not work. |
| Be gentle when unfolding | If you need to fix a fold or try again, open the paper slowly and carefully so it doesn’t tear. Paper can be delicate, and gentle hands keep it safe. |
| Try different papers | Using different types of paper can be fun. Thin paper is easy to fold, thick paper is stronger, and colored or patterned paper makes your boat look special and colorful. |
Conclusion
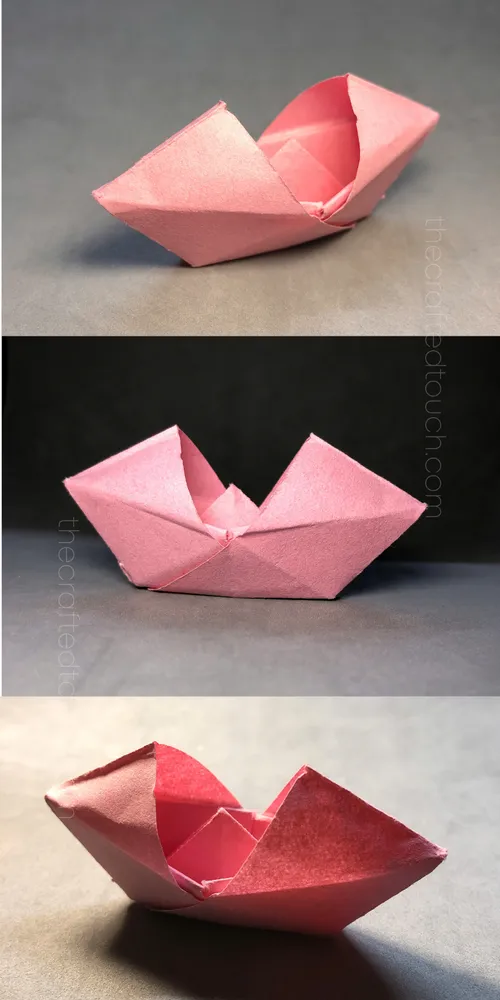
Great job following all the steps to make your origami boat! Now you have a cool paper boat that you made all by yourself. You can play with it, decorate it, or even float it on water carefully.
Remember, practice makes perfect, so don’t worry if your first boat isn’t perfect. Keep folding and have fun with paper! Origami is a wonderful way to be creative and use your hands. Happy folding!
