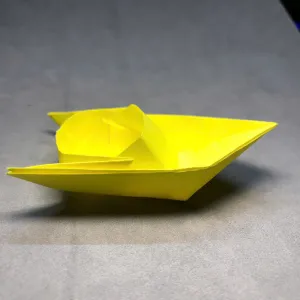
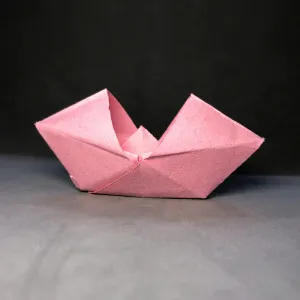
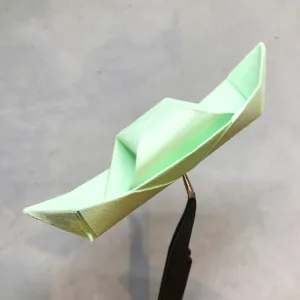
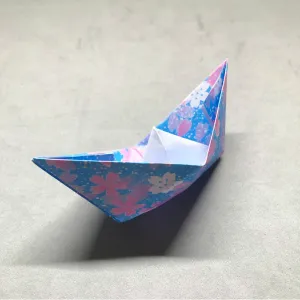
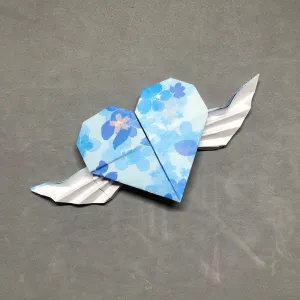
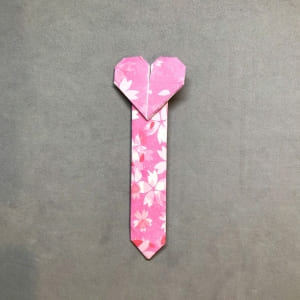
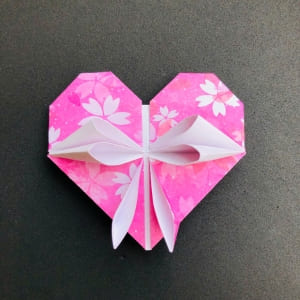
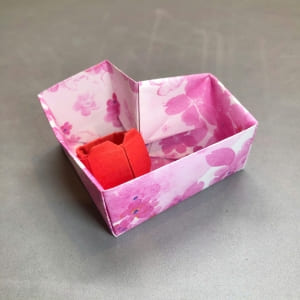
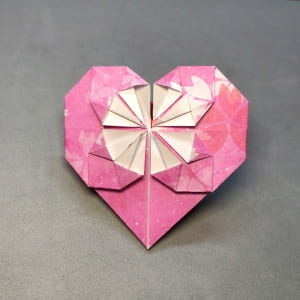
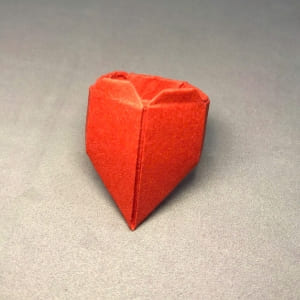
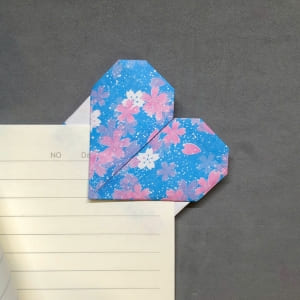
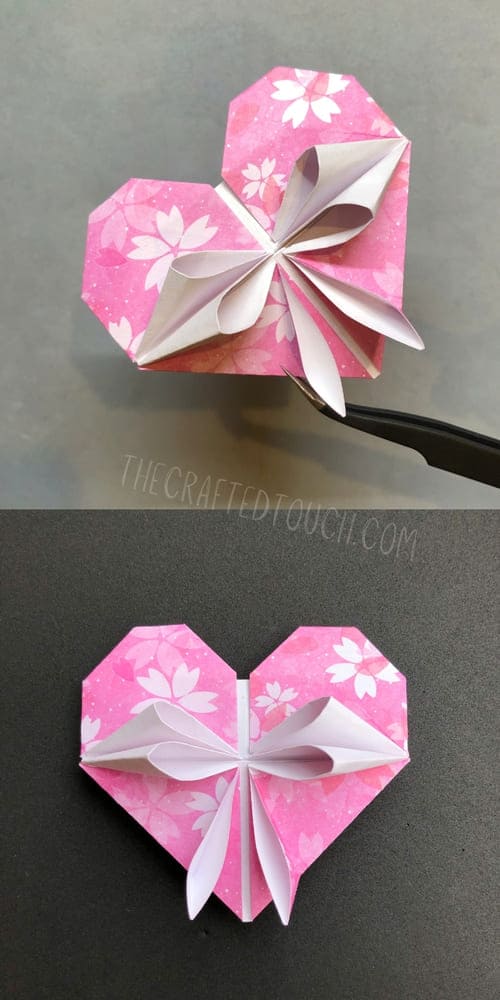
One day, I found a super cute origami heart and wanted to share it! You don’t need anything special just one square piece of paper and your hands. No scissors or glue. The steps are simple, and I’ll guide you one by one. You can follow along and fold your own heart bow. It’s a great way to have fun and make something lovely. Let’s get started!
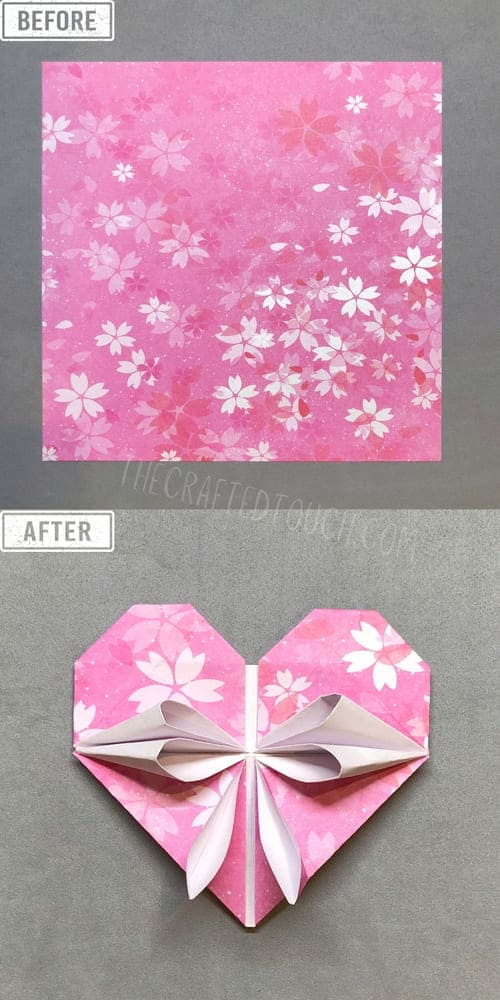
MATERIALS NEEDED
| Material | How I Use It |
| Square paper | i choose paper that is square (same length and width). You can also use bigger paper if you want a bigger heart. Try to use paper that is not to thick, so it’s easier to fold. |
| Optional: Ruler | You can use a ruler to help press the folds to make them sharper and neater. But it’s okay if you don’t have one your fingers work just fine. |
| Optional: Pens or Stickers | i can decorate my heart bow after folding. Draw little faces, write sweet messages, or add stickers to make it even cuter. |
STEP BY STEP INSTRUCTION:
Now that I have everything ready, I’m going to start folding! If this is your first time, don’t worry, i’ll go slowly and carefully. You’ll see how easy and fun it is to make your very own origami heart. Let’s begin.
Step 1
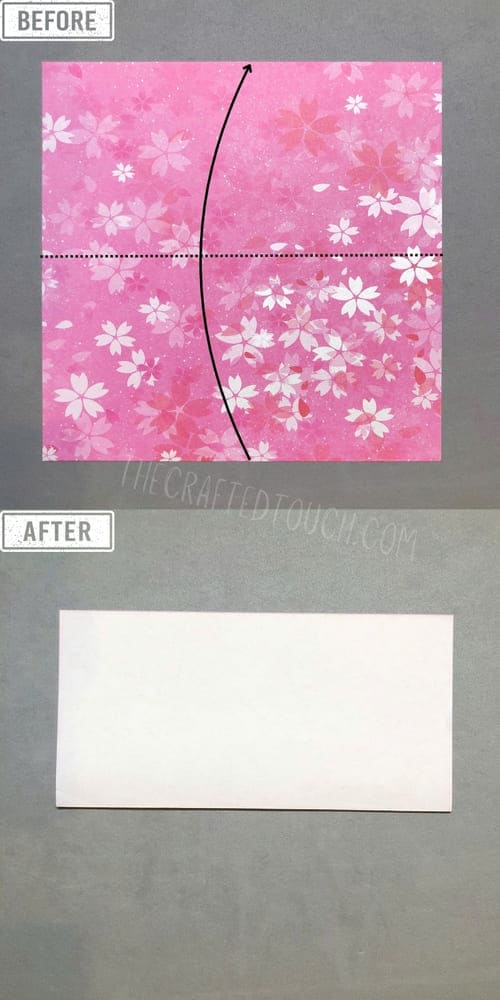
To make a Heart Bow Origami, I used a square paper with a flower pattern on one side and white on the other. This makes the heart look prettier. I will start folding with the flower side facing up
Step 2
Now I will fold the paper in half from bottom to top, and press it a little to make a nice crease.
Step 3
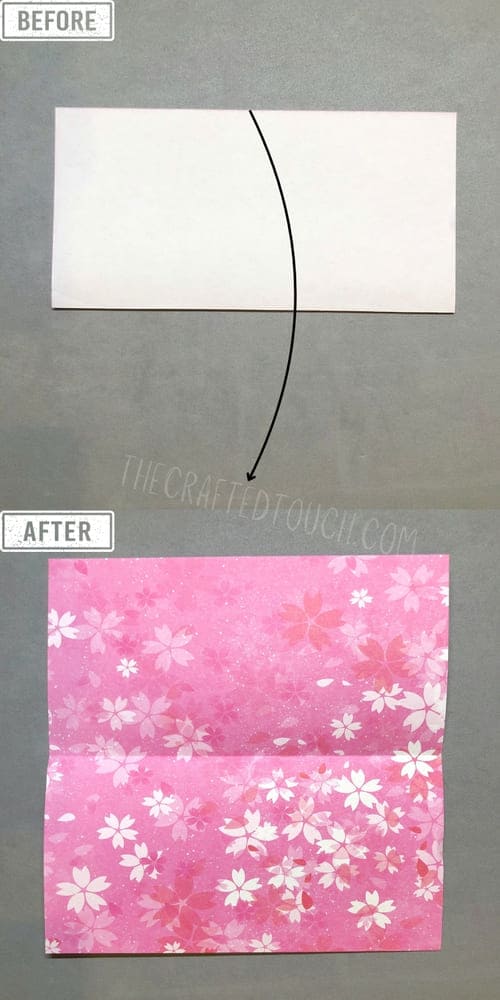
Then I open it back to its original shape.
Step 4
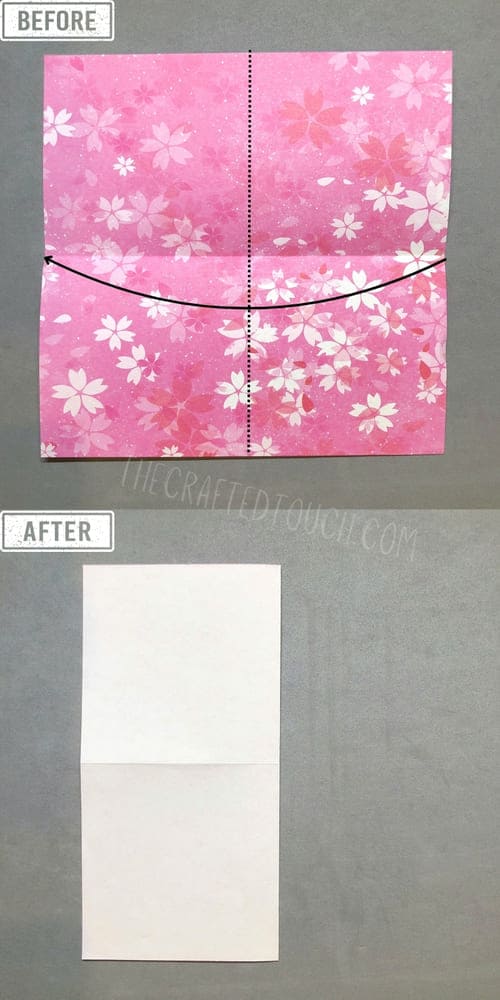
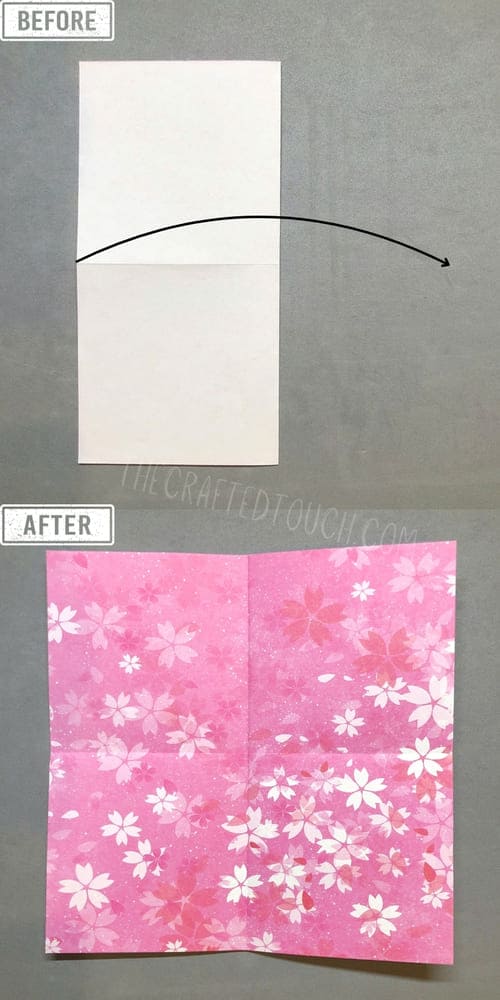
Now I’m folding it from the right side over to the left.
Step 5
Then I open it up again to mạke a big plus sign (+)
Step 6
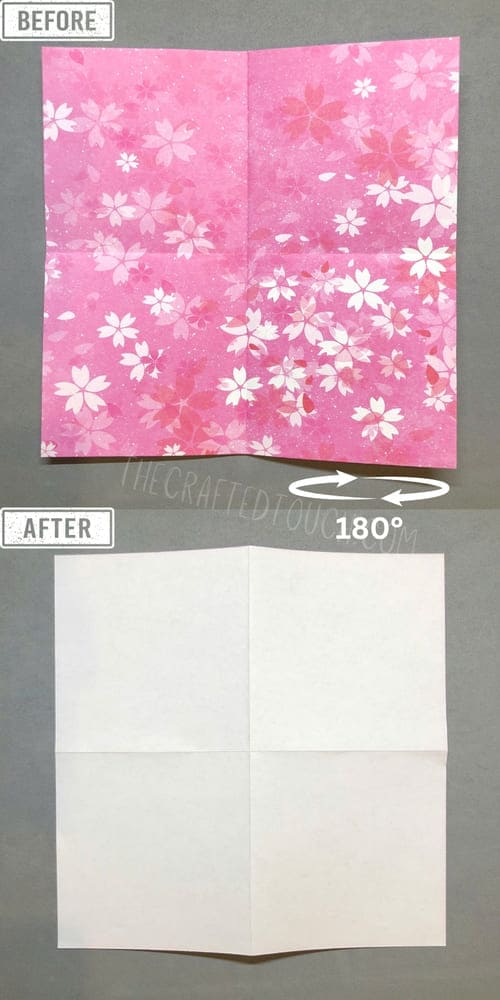
After that, i flip the paper over so the white side is facing up.
Step 7
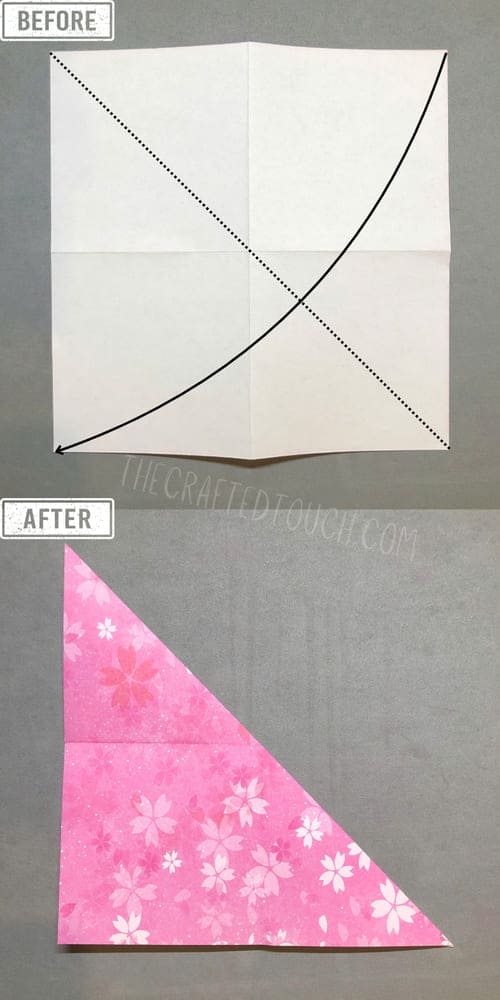
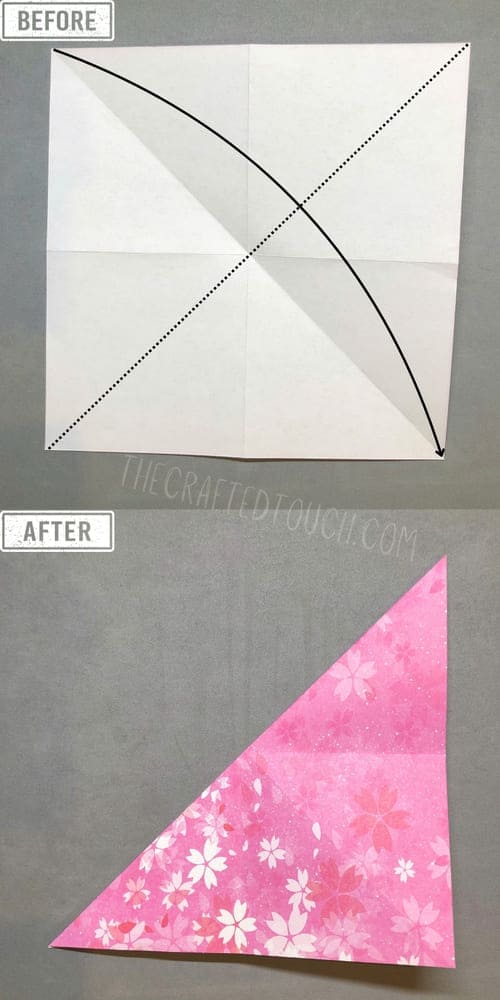
With the white side on top, I take the bottom left corner and fold it up to the top right corner. It makes a triangle.
Step 8
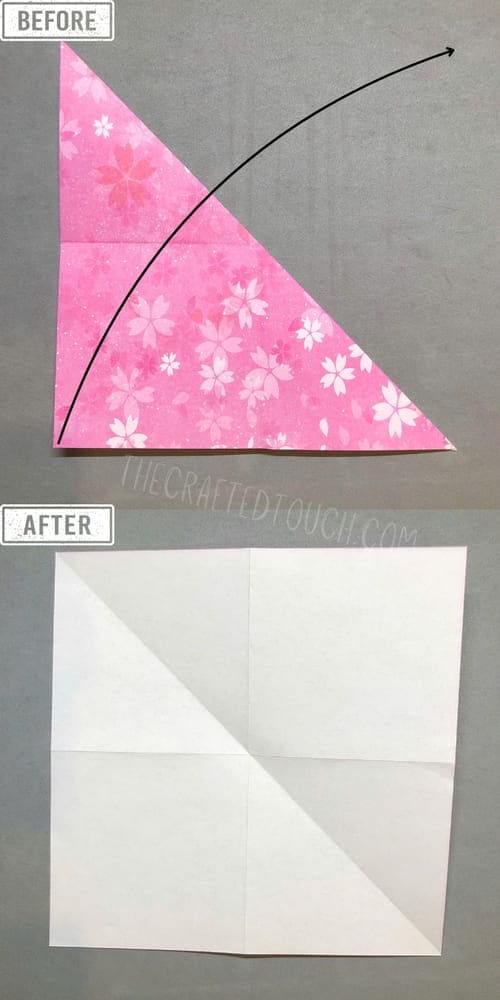
Then I open it back to the square shape.
Step 9
Next, I make another triangle by folding the top left corner down to the bottom right corner.
Step 10
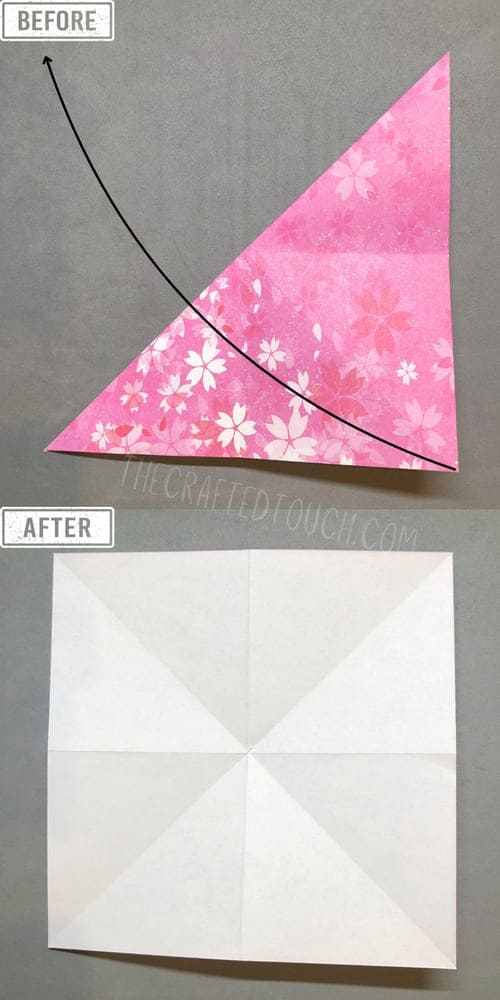
Then I open it up again. Now I have a big plus sign (+) and an X on my paper.
Step 11
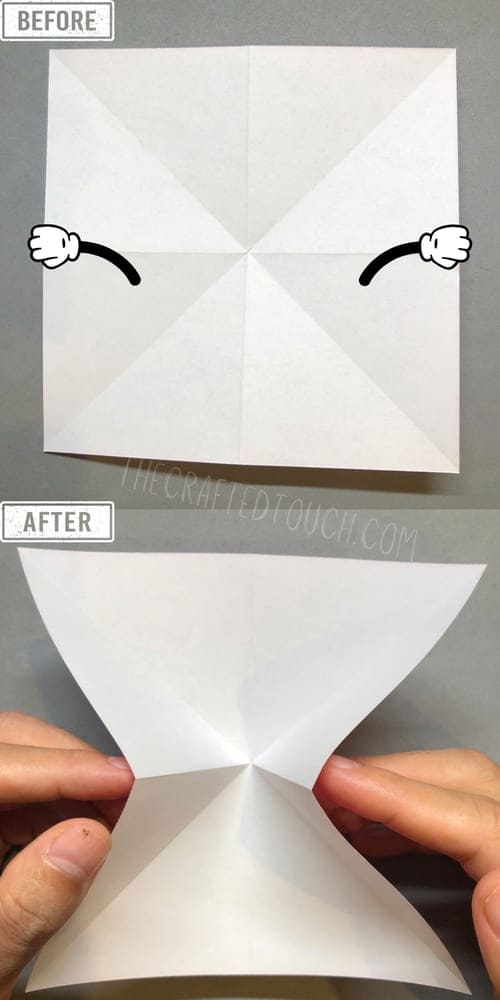
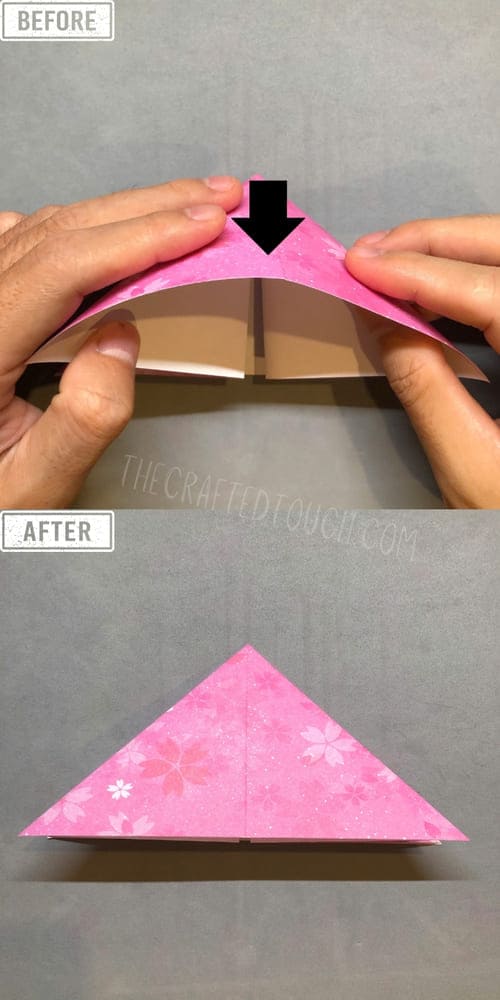
Using the folds I just made, I bring the two edges of the paper closer together.
Step 12
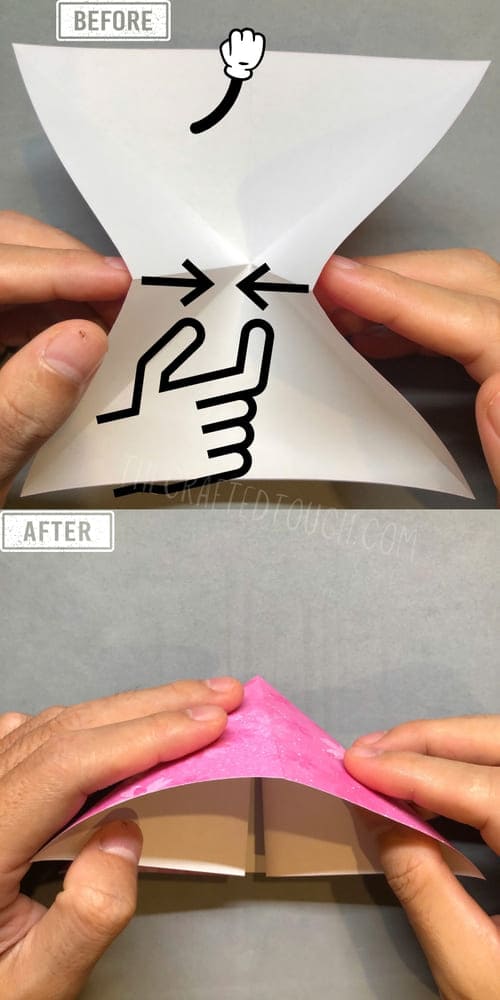
At the same time, I pull the top edge down.
Step 13
And I press the top edge down to make a triangle.
Step 14
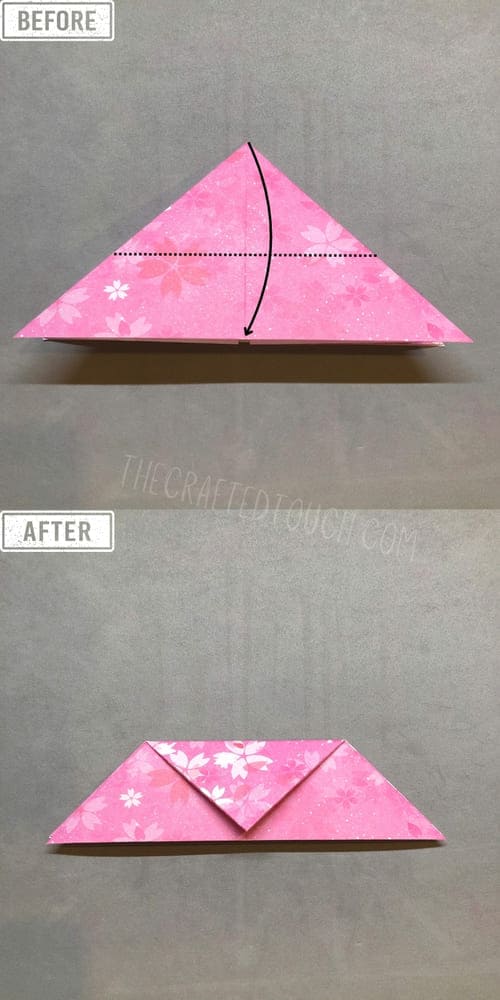
Then I fold the triangle by bringing the top point down to the bottom edge.
Step 15
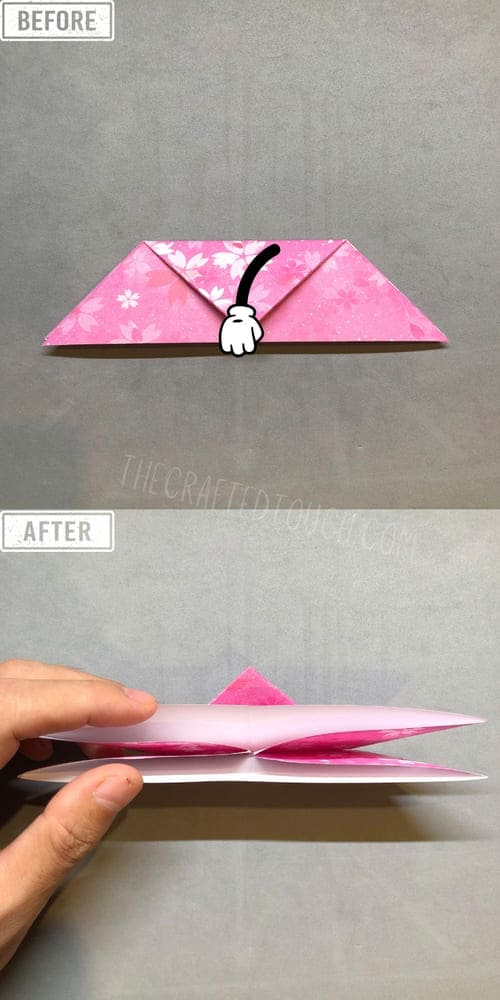
I turn the shape over so I can see the bottom part.
Step 16
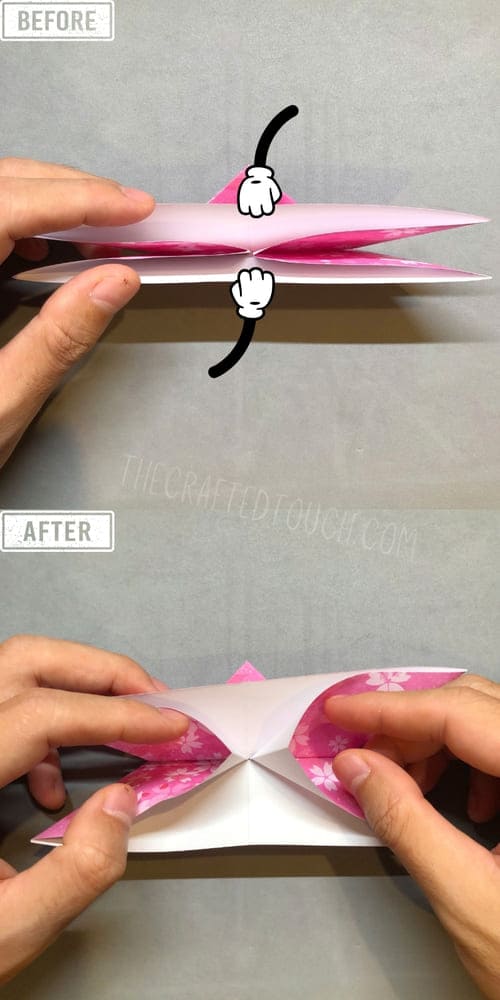
I pull and open the bottom part by gently moving it up and down.
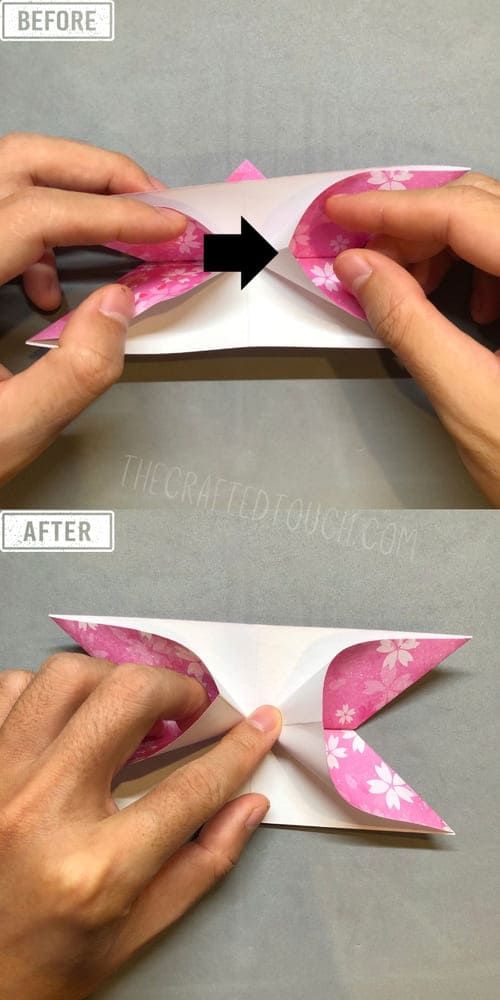
Step 17
And I press down the part that is sticking up on the right side.
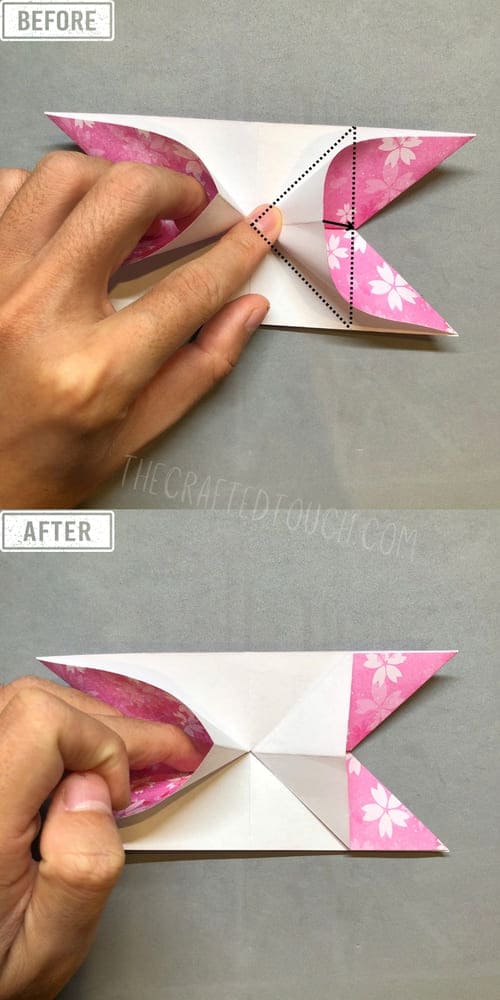
Step 18
And I press it down to make a triangle on the right
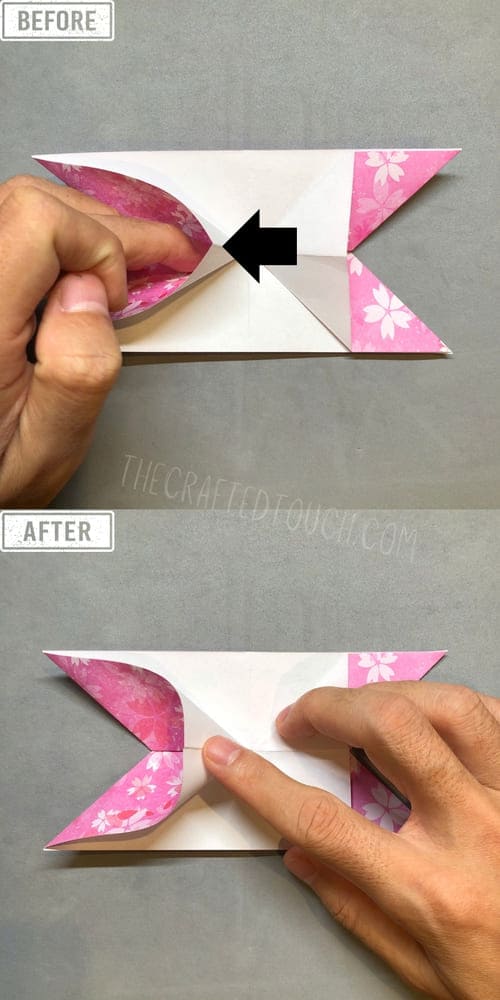
Step 19
I do the same with the part sticking up on the left side
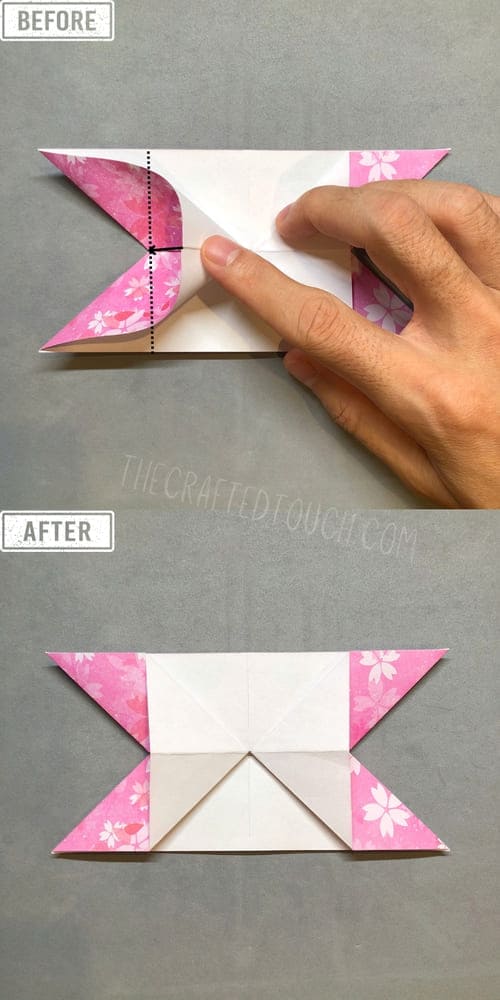
Step 20
And I make another triangle on the left side.
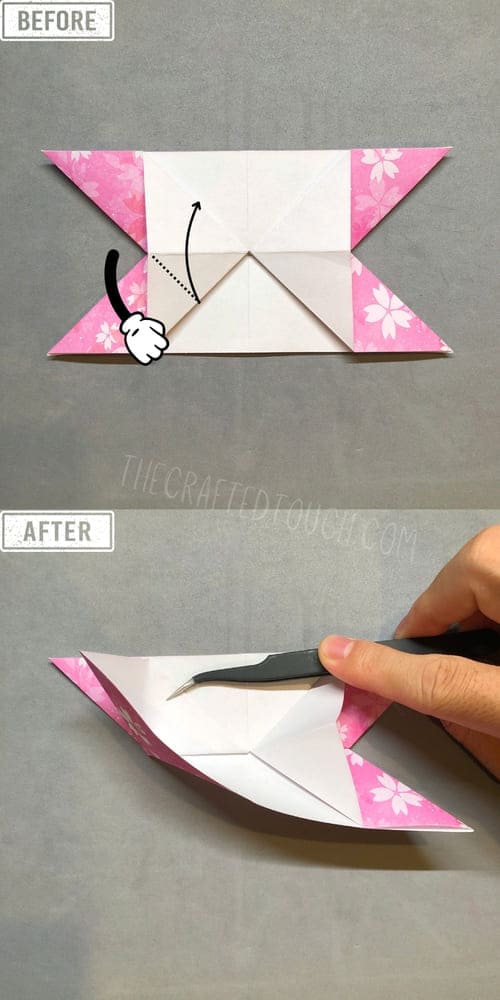
Step 21
At the bottom left, I open the flap and fold it upward along the center crease. Look closely at the dashed line in my picture. I’ll use it in the next step.
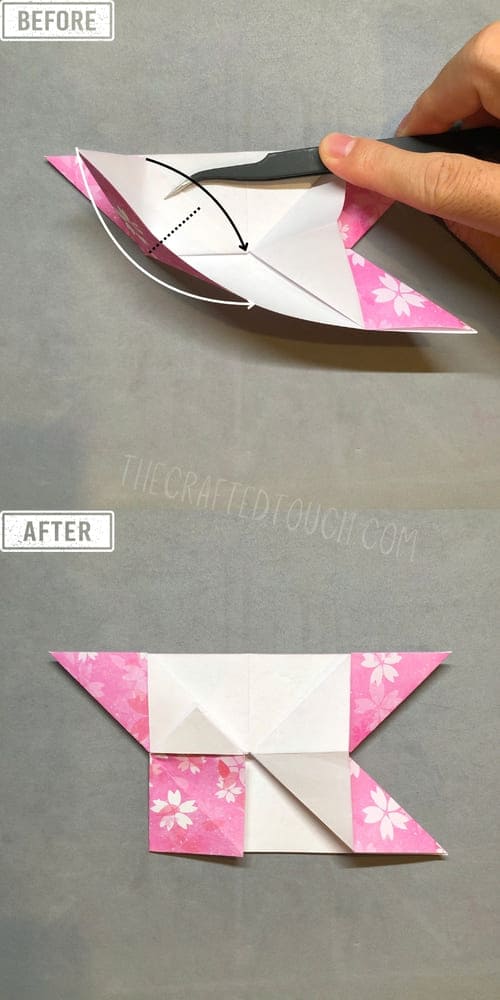
Step 22
Now it’s time to use the dashed line! I press and fold the flap on the left side down along the line, and press it firmly. This makes three triangles and one small square on the left side.
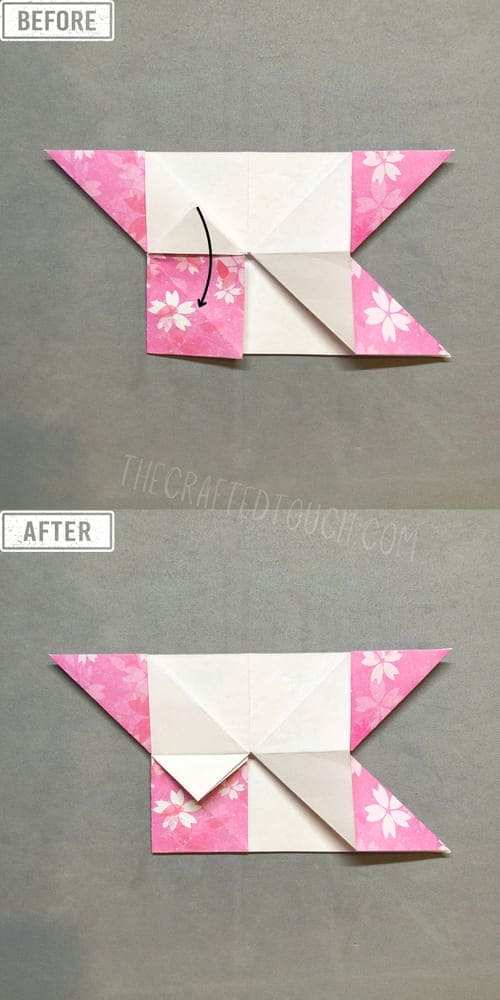
Step 23
I take the small triangle on top and fold it down.
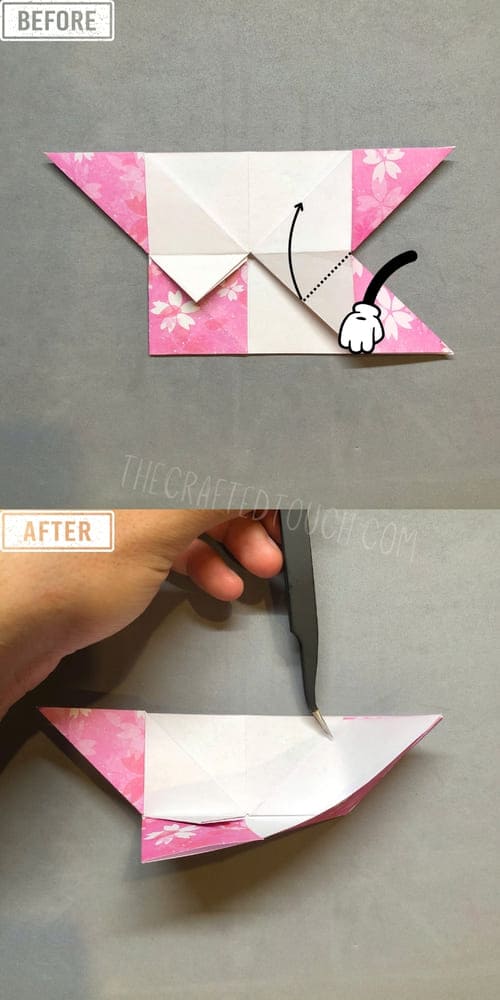
Step 24
Now I repeat step 21 on the right. I lift the bottom right part and open it up.
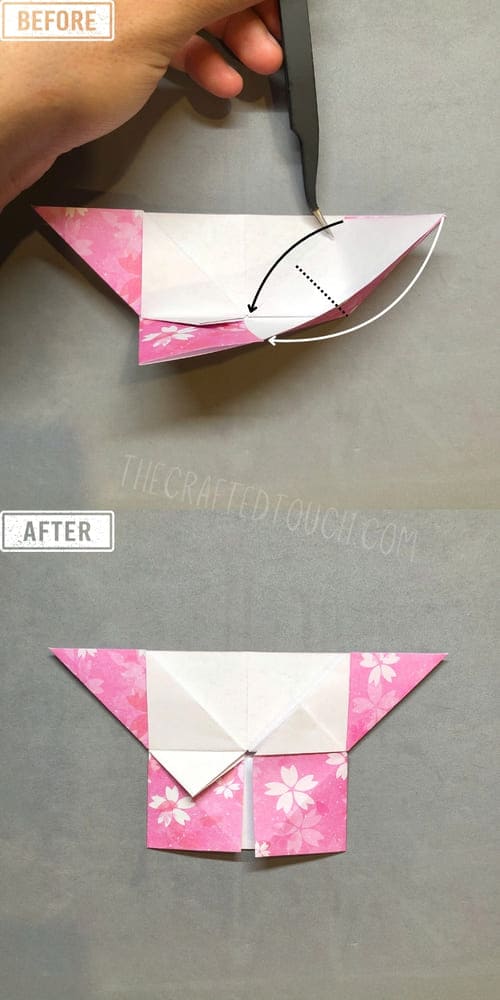
Step 25
Then I press it down along the dashed line. I use the edges as guides to make the folds neat and the shape look nicer.
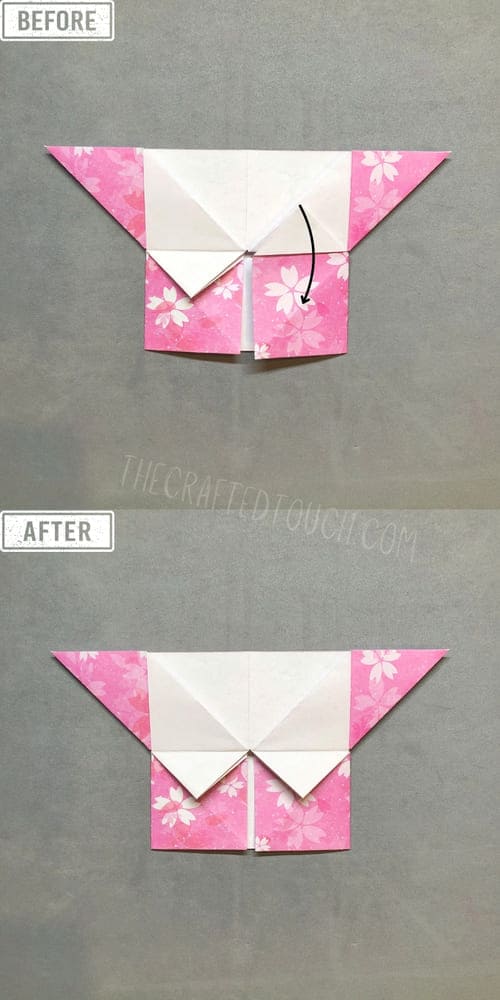
Step 26
Next, I fold the little triangle on the right from top to bottom. Now the two sides match
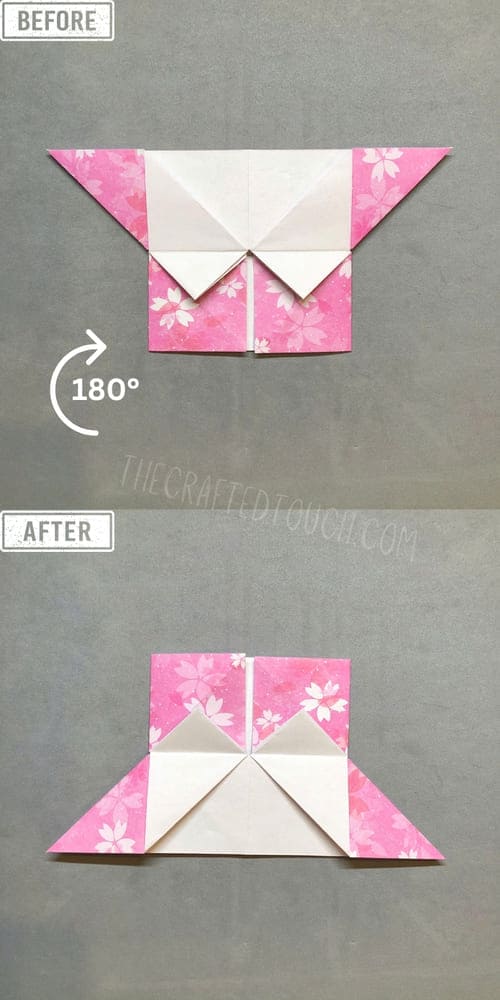
Step 27
I place the folded shape on the table and turn it from left to right, so the top and bottom switch places.
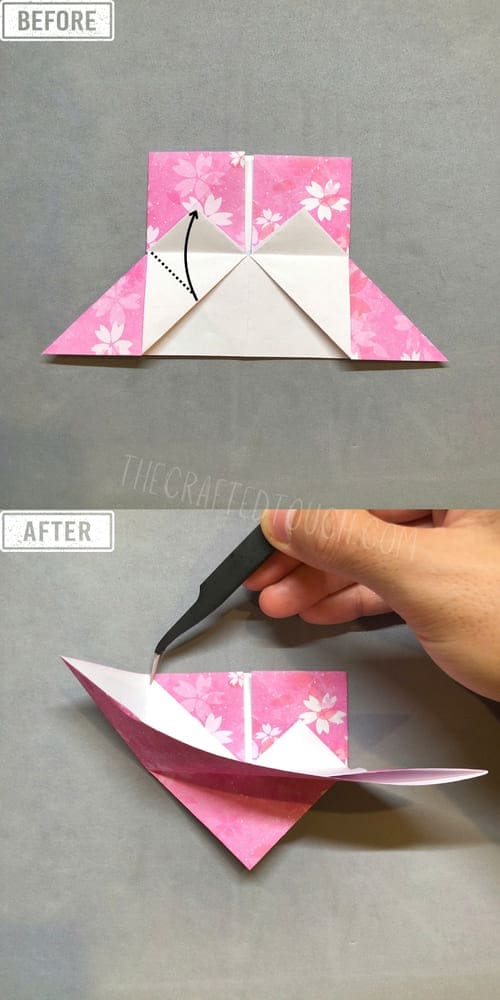
Step 28
Do you see the bottom part? It looks familiar, right? Now I’ll repeat the steps from step 21, starting by opening the bottom left flap and I fold it upward.
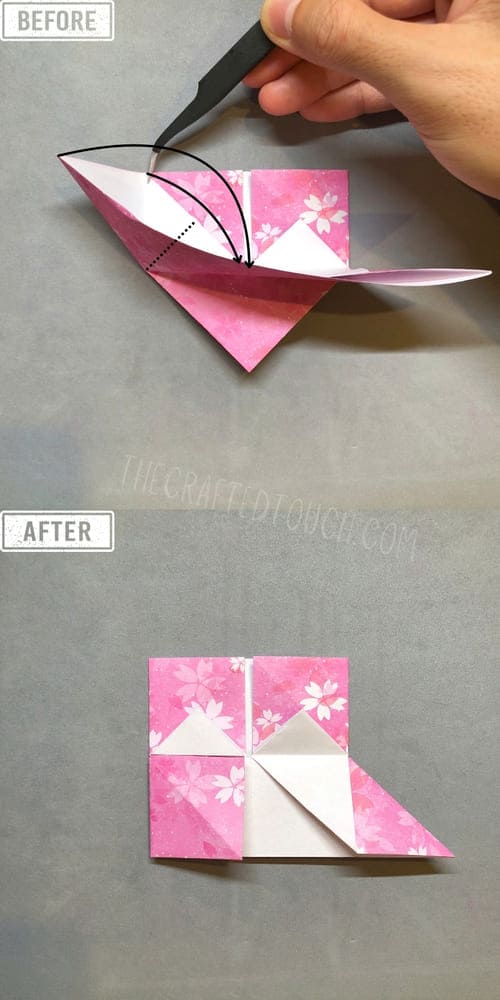
Step 29
And I fold it down along the dashed line.
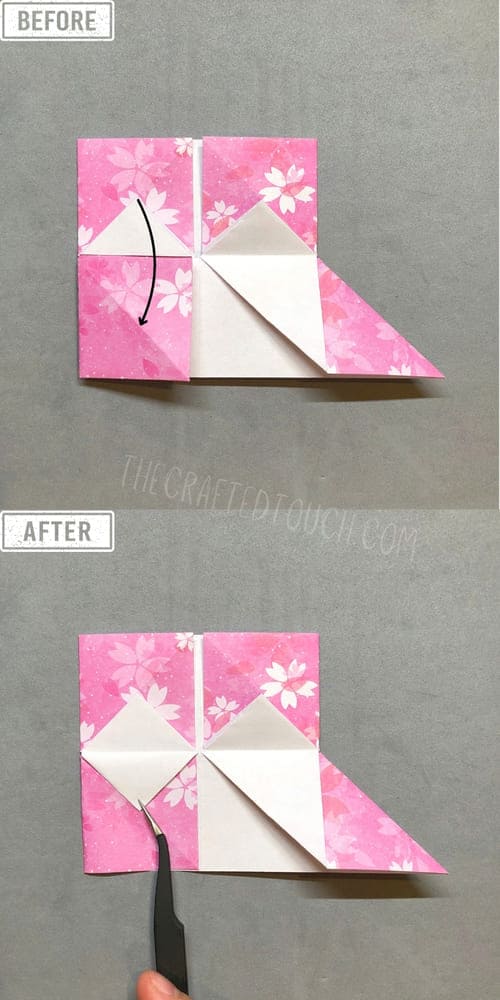
Step 30
Then I fold the small triangle at the top down. Just one small triangle
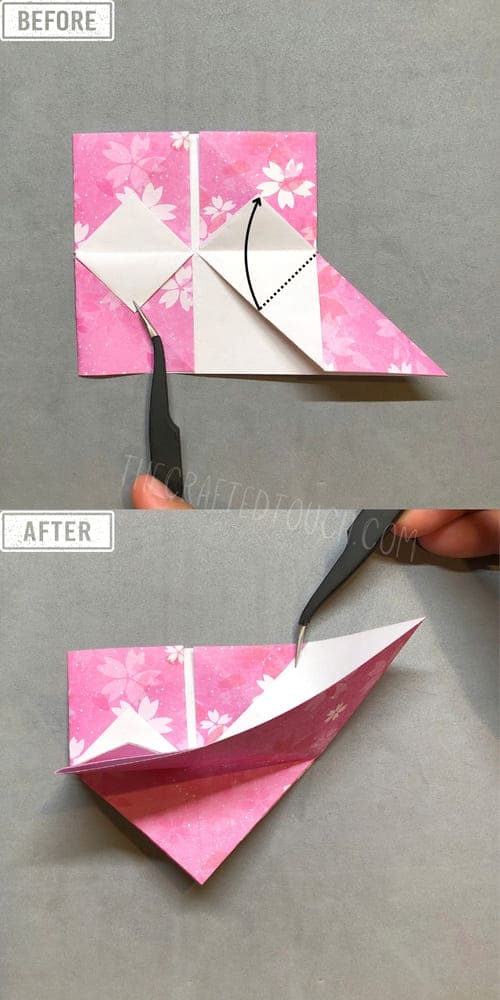
Step 31
Let’s do the same with the bottom right flap. I lift it and open it up!
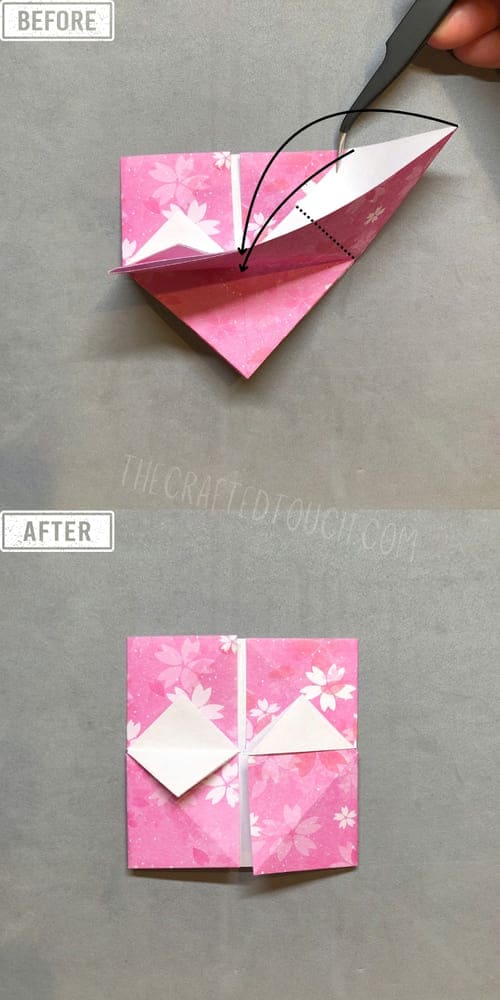
Step 32
Using the dashed line, I press the flap down flat. I press it tight so the shape looks clean and pretty.
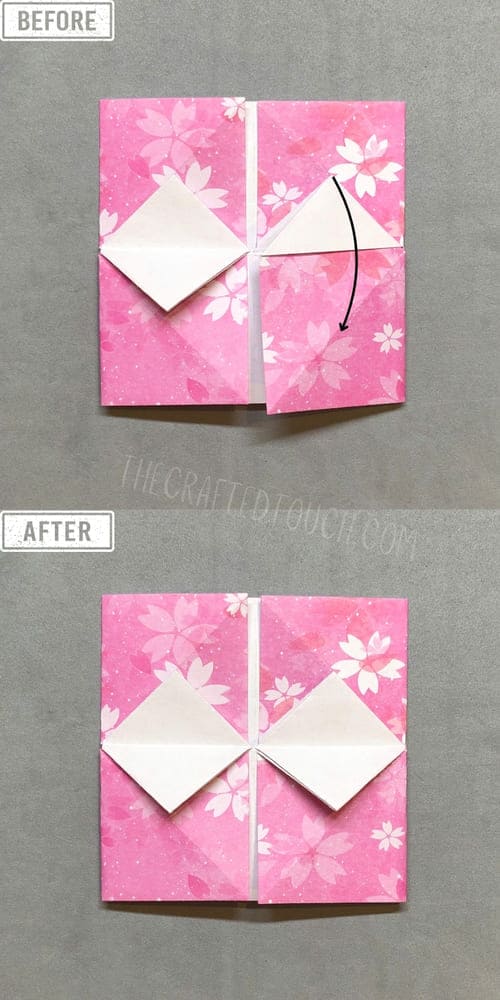
Step 33
Next, I fold down the little triangle on the right, just like I did before. Now I’ve made two small squares inside one big square.
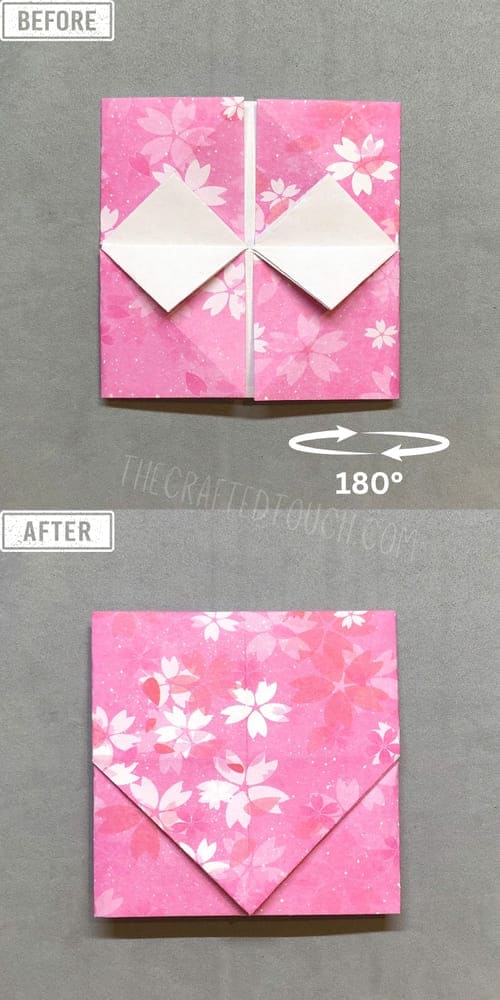
Step 34
Then I flip the paper. Do you see the diamond shape? That means I’m folding it the right way!
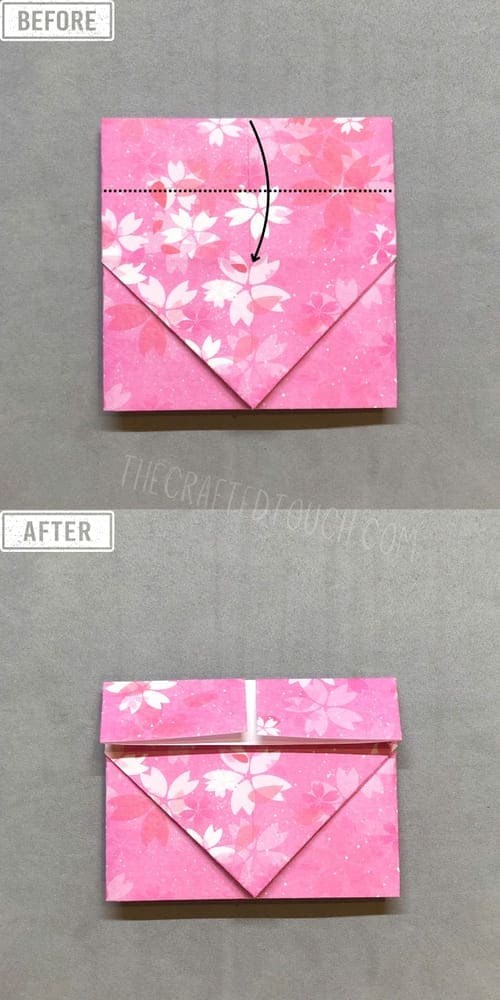
Step 35
Now I fold part of the top down, following the middle line so the folds look neat and even.
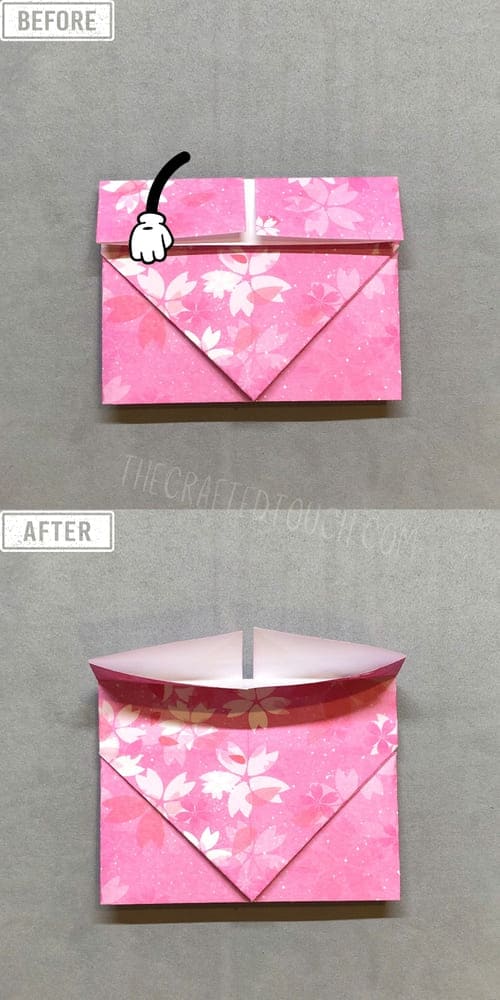
Step 36
After pressing the fold to make it neat, I open it up a little.
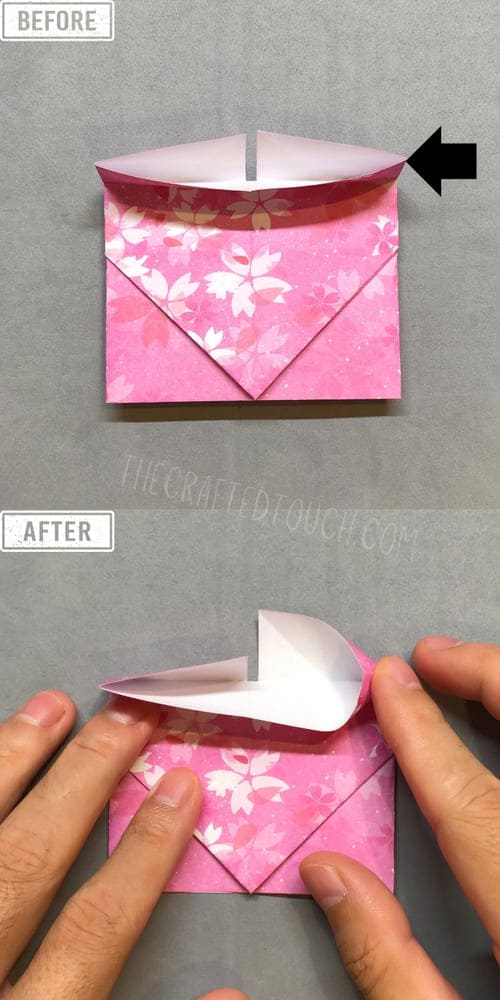
Step 37
At the top right corner of the part I just folded up, I press the corner down a little.
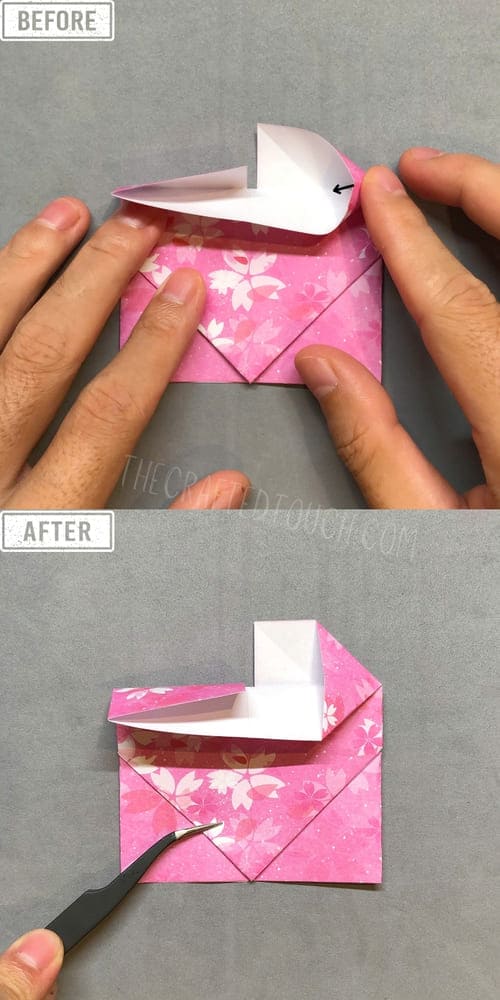
Step 38
After adjusting to make it even, I press it down firmly to create a neat and balanced small triangle.
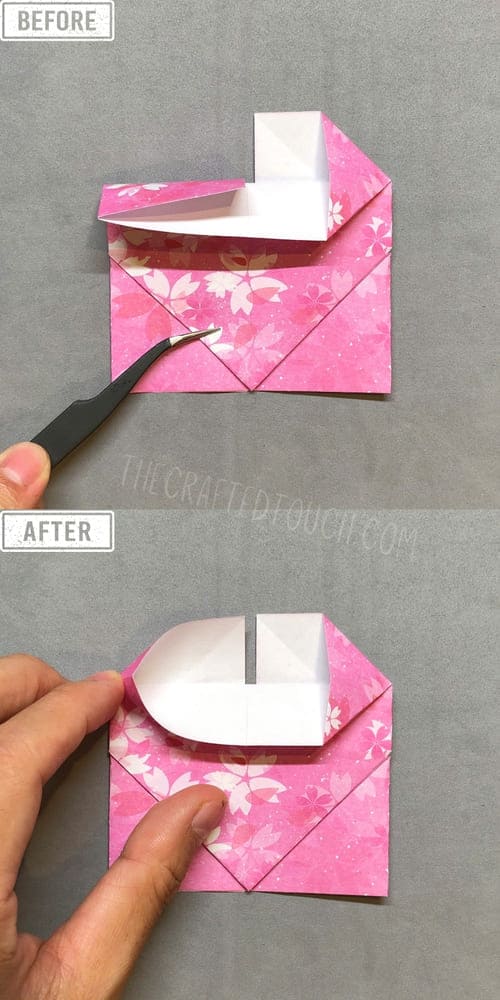
Step 39
Now I’ll do the same on the left side, starting by gently opening the top part a little.
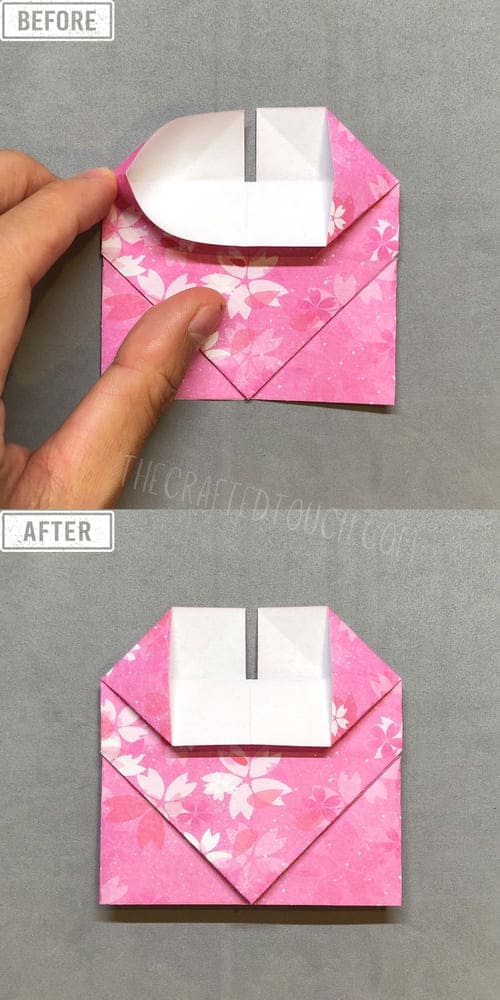
Step 40
Then I press it down to make a neat and even triangle.
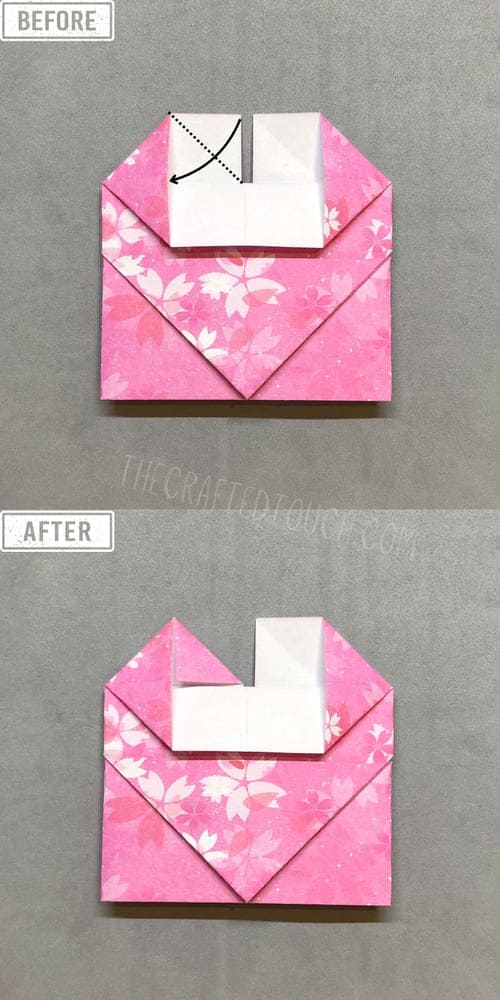
Step 41
With the small white square at the top right, I fold it down from right to left to make one side of the heart’s top.
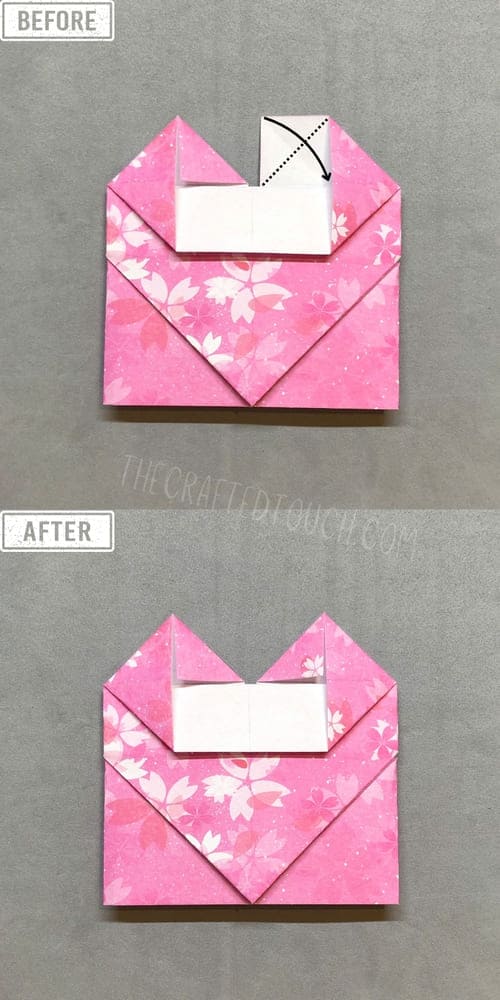
Step 42
I also fold down the white square on the left to make the other curve of the heart.
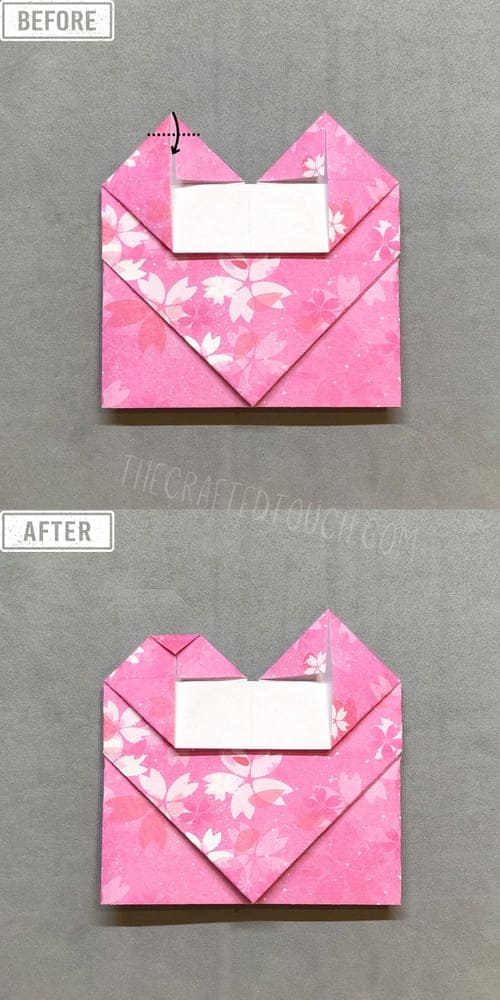
Step 43
Now I fold down the left tip of the heart a little bit to make the shape look nicer.
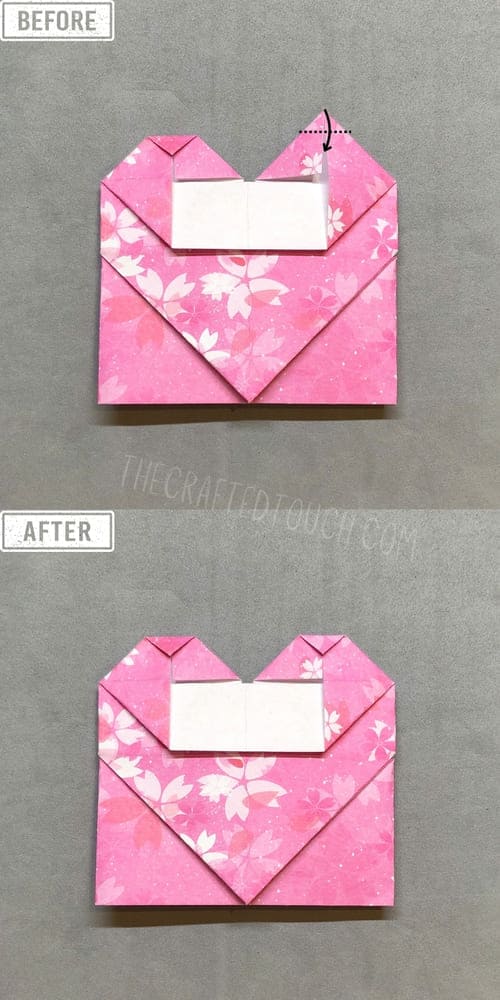
Step 44
I do the same with the right tip of the heart. I want both sides to look even and balanced.
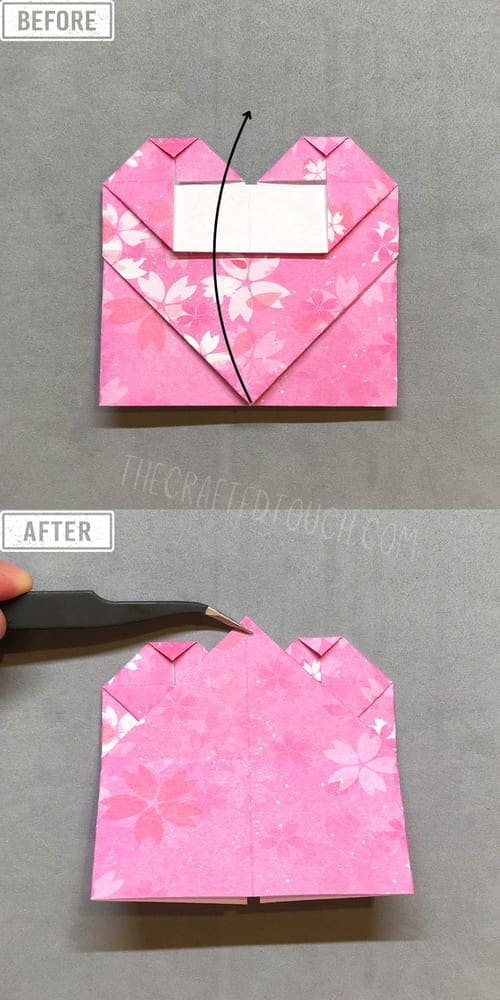
Step 45
For the triangle at the bottom center of the heart, I fold it up from the bottom to the top.
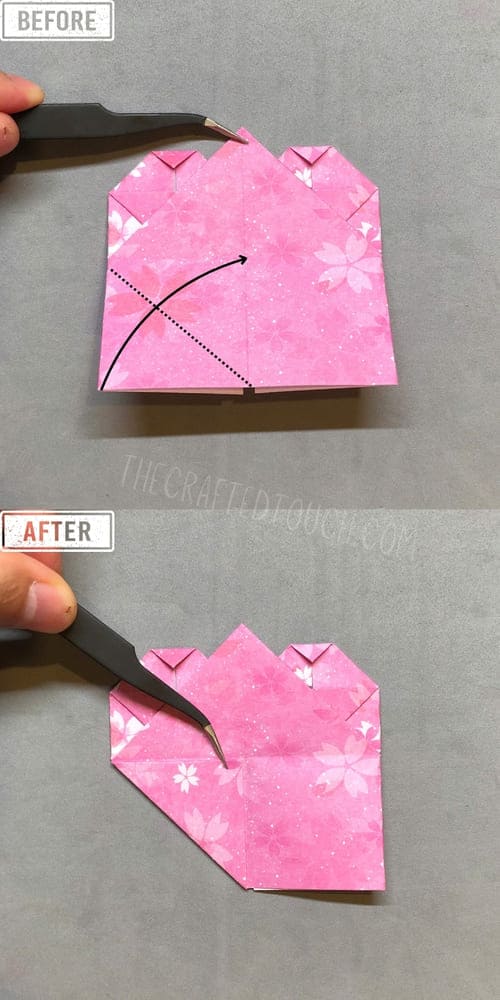
Step 46
I fold the bottom left corner up to make a small triangle along the dashed line
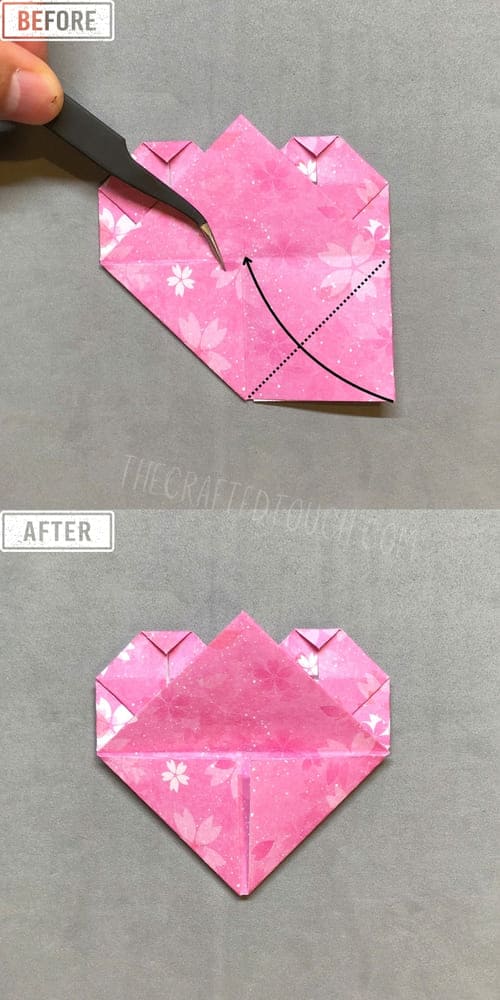
Step 47
Then I do the same with the bottom right corner to make two small triangles at the bottom.
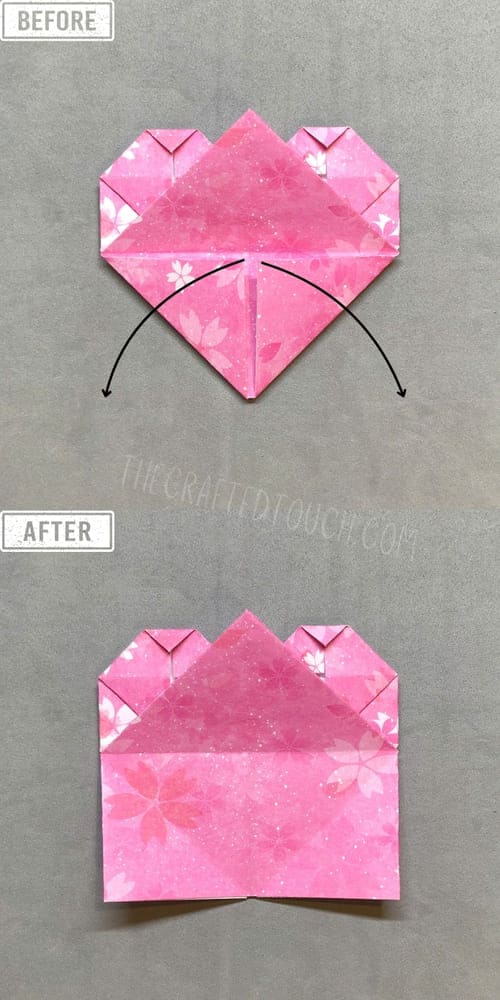
Step 48
After making neat and clean creases, I open up the two small triangles again.
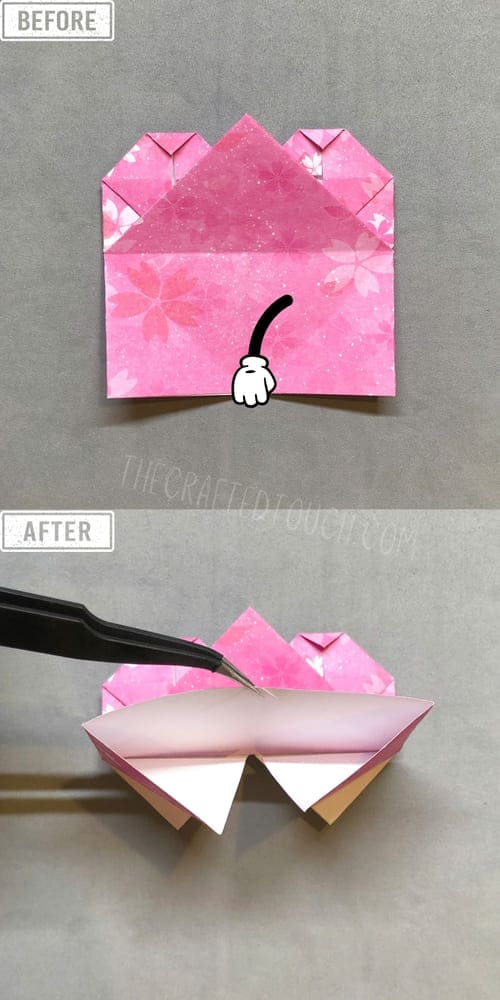
Step 49
Then I pull the bottom part of the paper up and open it out.
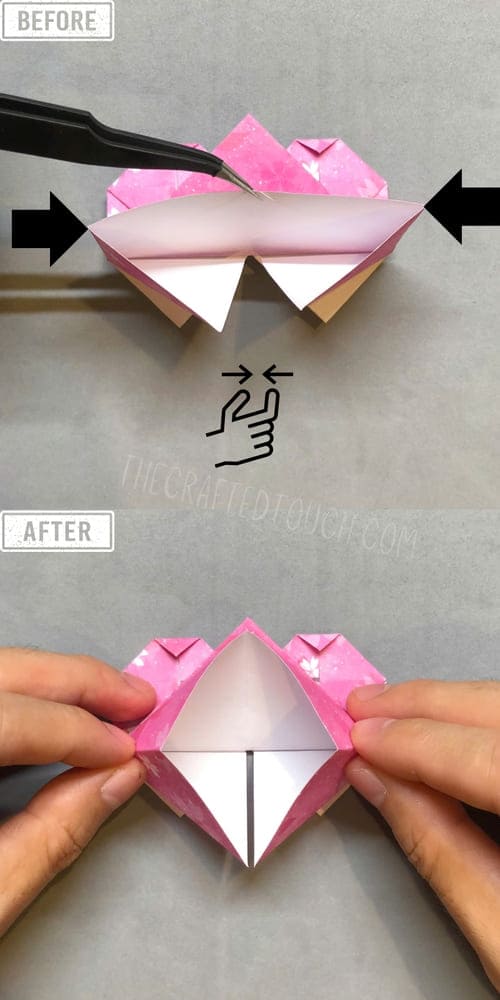
Step 50
Using the folds made by the two small triangles in steps 46 and 47, I press the sides of the paper inward.
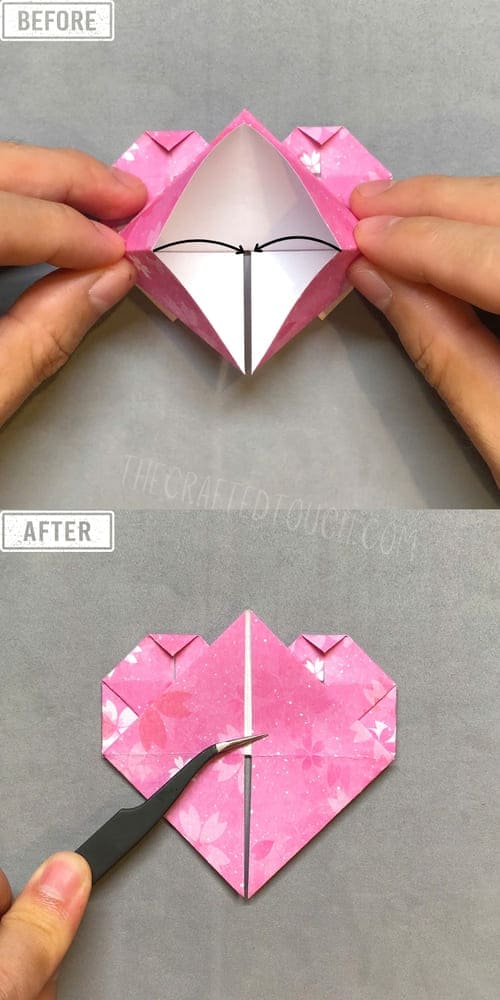
Step 51
Then I press it down, and I can see a diamond formed by two triangles.
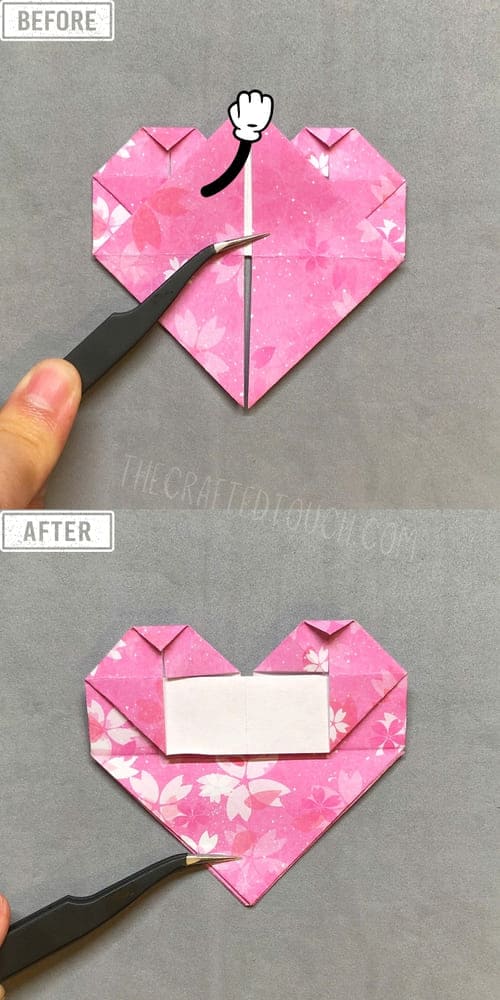
Step 52
Next, I pull down the top of the diamond shape along the existing crease. Basically, I’ve made a pretty nice heart shape.
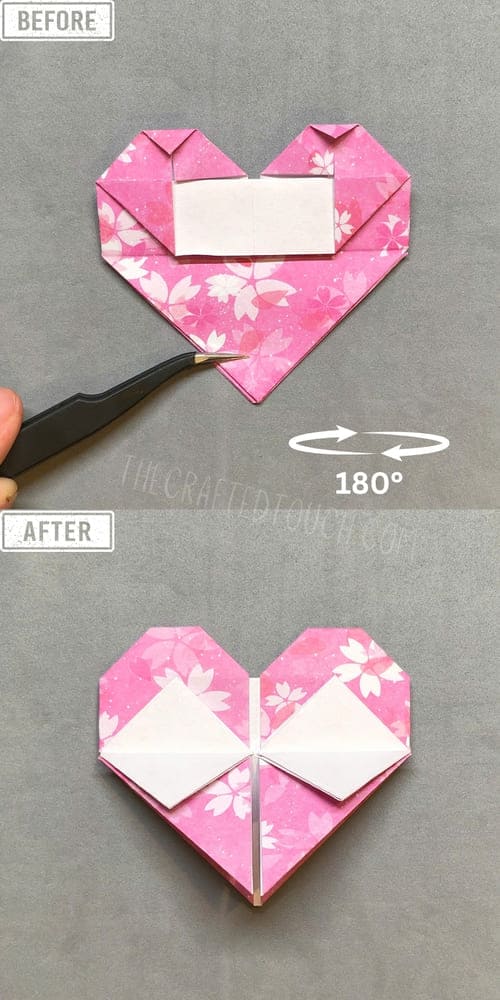
Step 53
Now I’m going to flip the heart over to add more details.
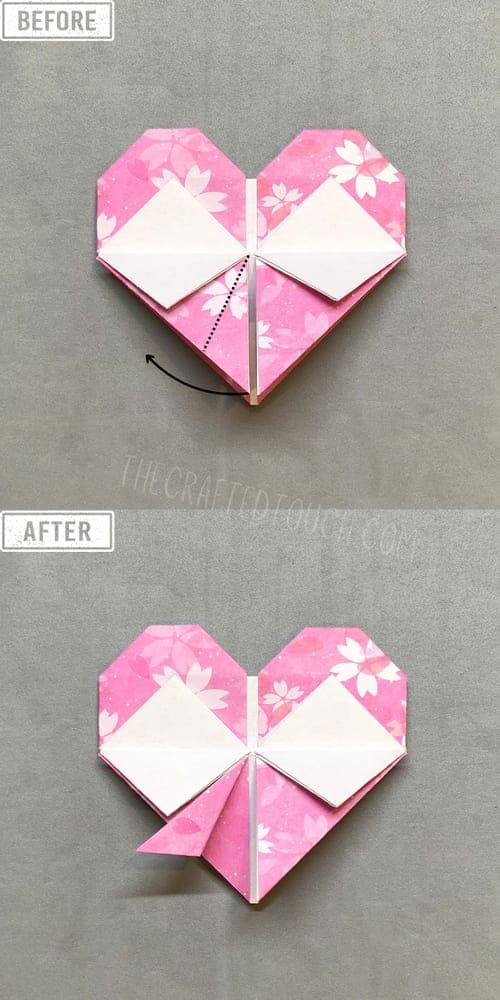
Step 54
Do you see the small triangle at the bottom left corner? I’m going to fold it upward so it touches the edge of the white part.
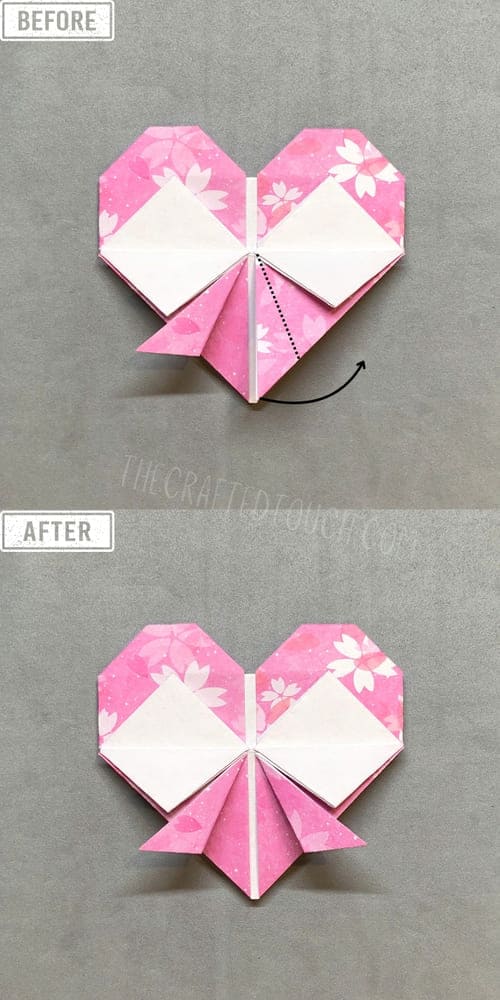
Step 55
I’ll do the same with the bottom right triangle.
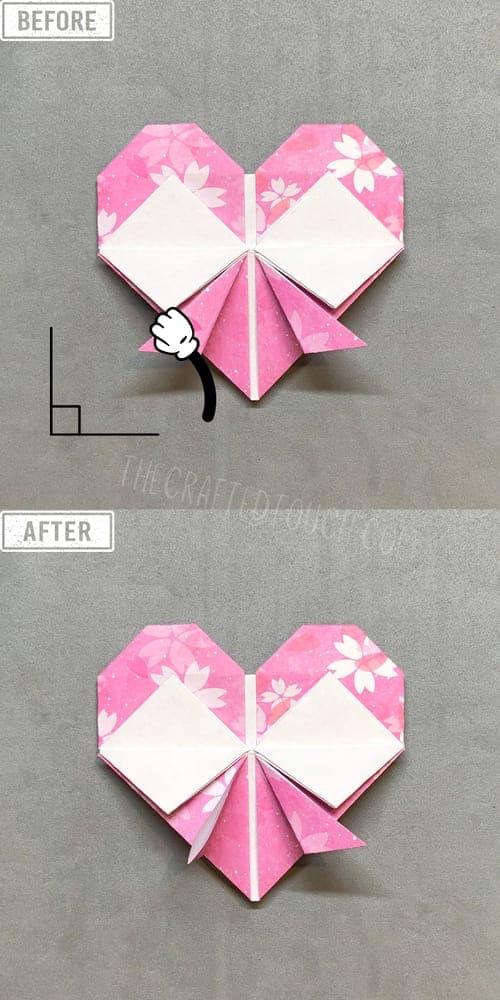
Step 56
.Now I stand up the left triangle at the bottom that I just folded.
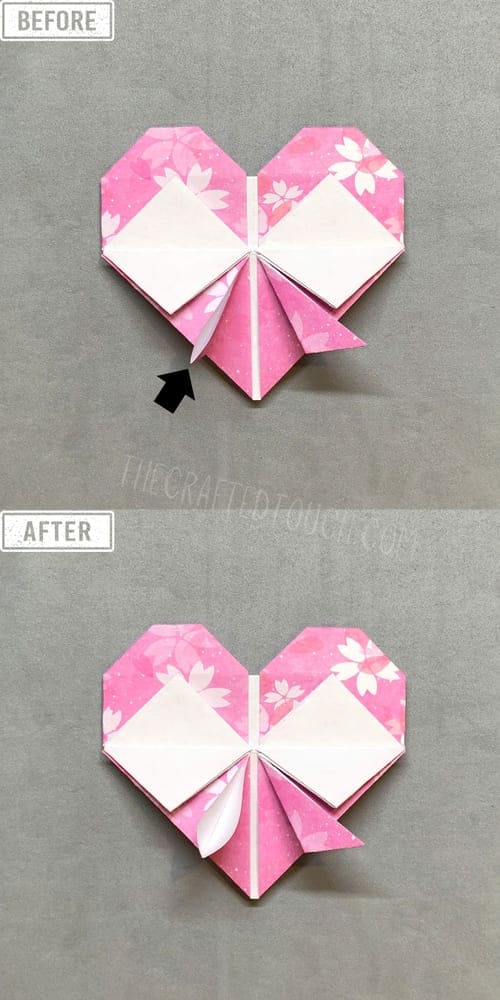
Step 57
And open it up a little more.
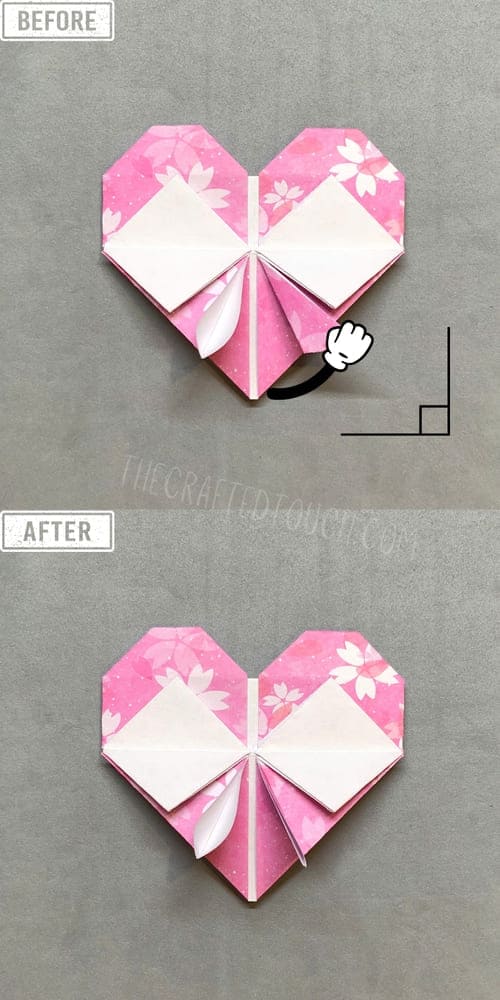
Step 58
also stand up the triangle at the bottom right.
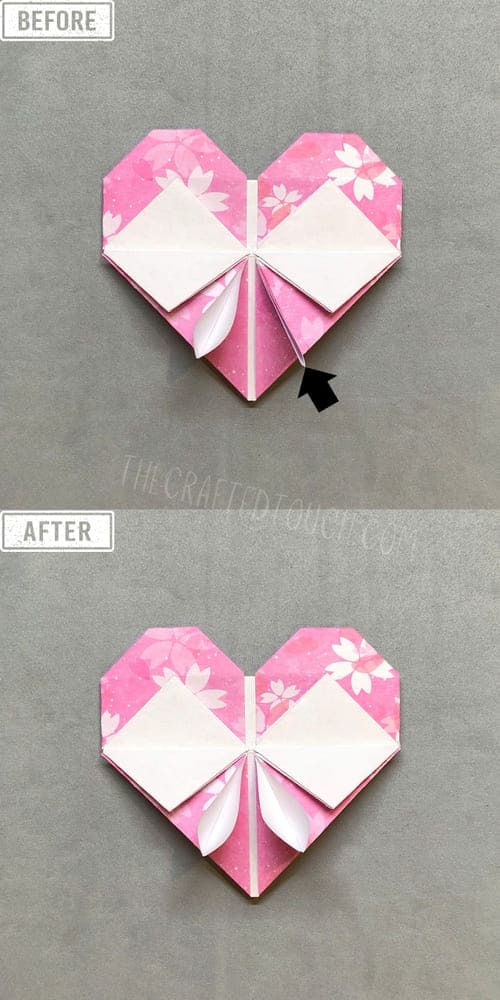
Step 59
And open it up just like I did with the left side.
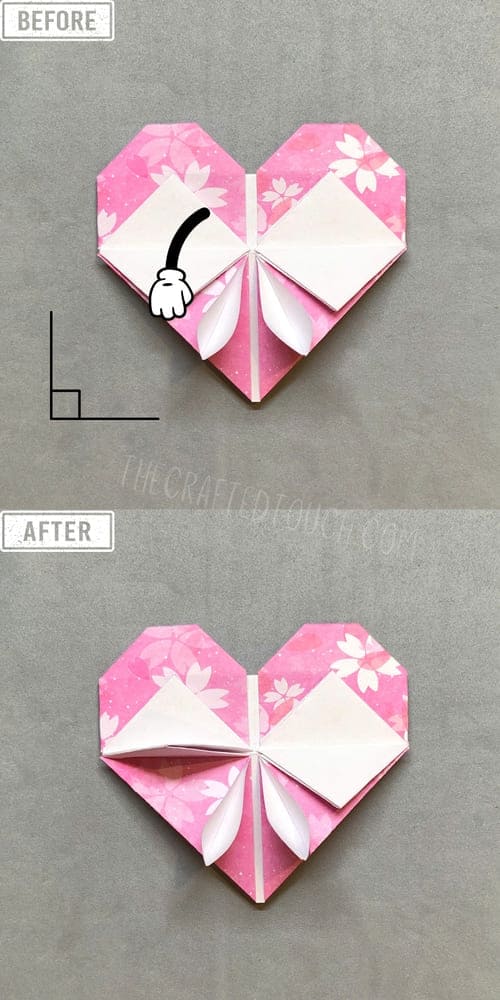
Step 60
Next, I stand up the white square that’s in the center on the left side.
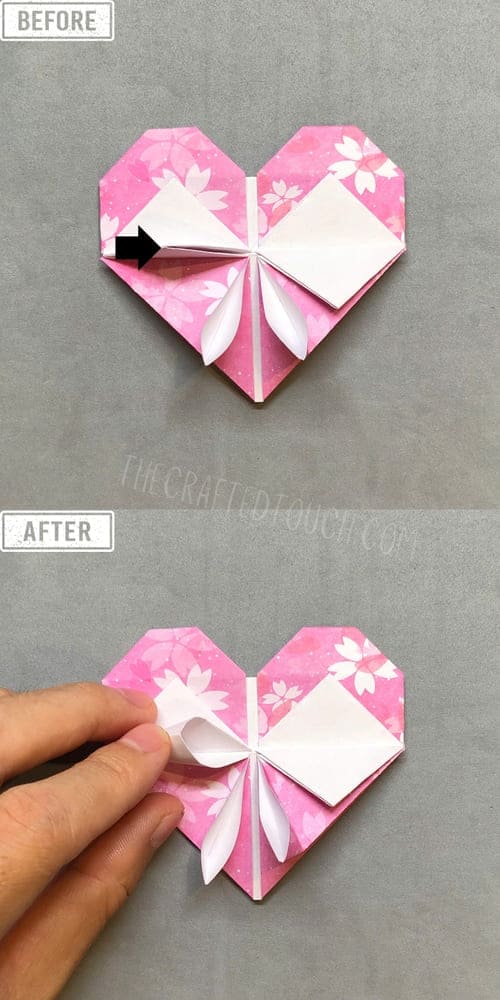
Step 61
And press it to open it up a little bit.
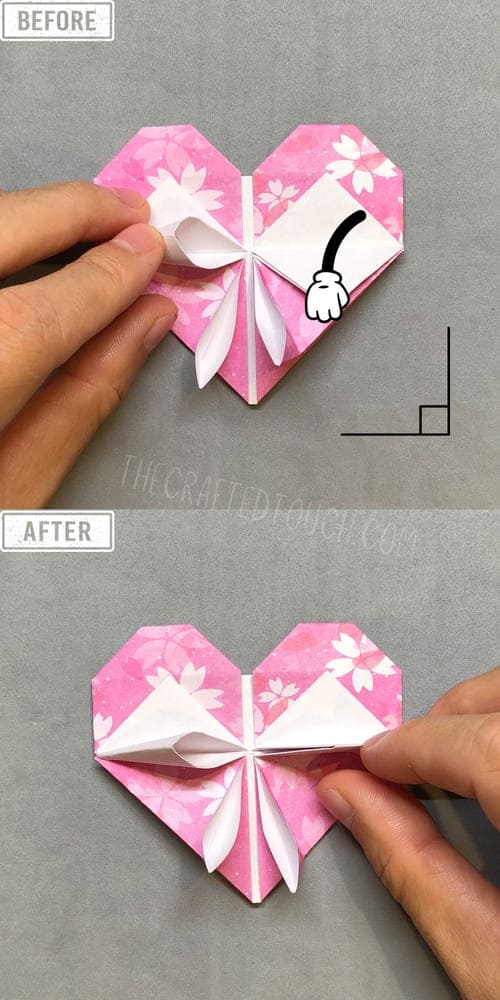
Step 62
I do the same with the white square on the right side and lift it up.
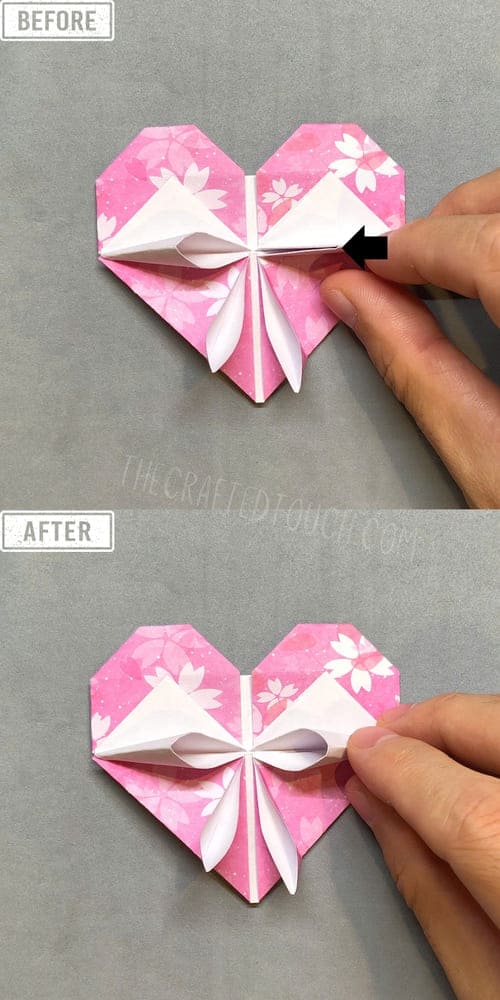
Step 63
I open it a little bit so both sides look the same. Now I’ve made two shapes that look like flower petals
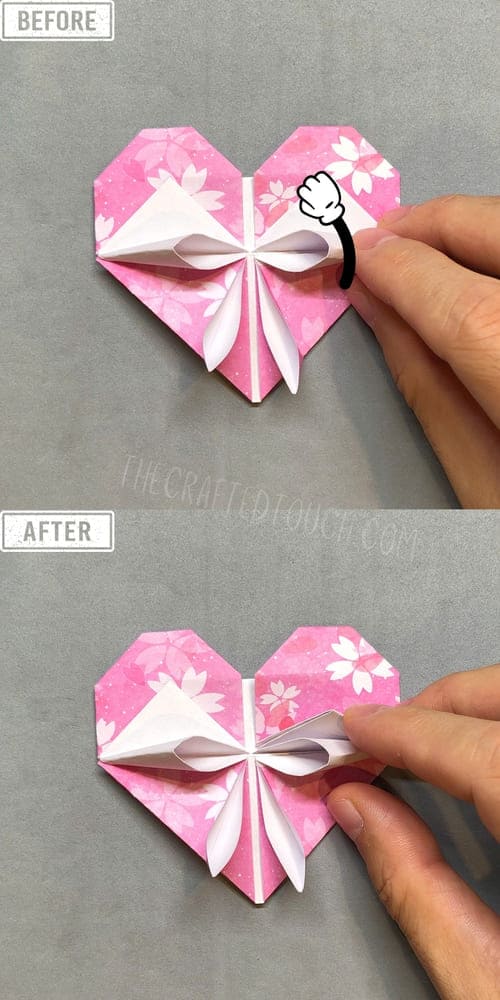
Step 64
Can you see the little white triangle on top of the petal I just made? Now I’ll pull the right triangle down first.
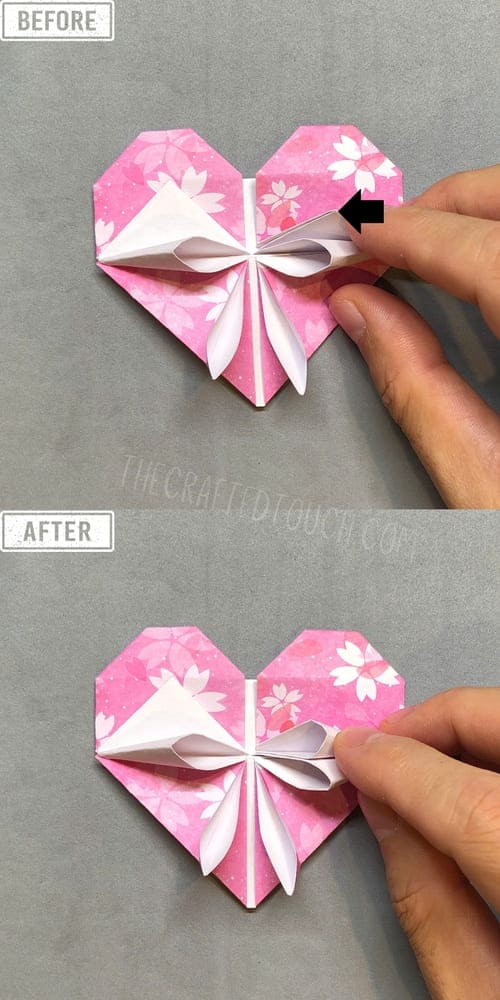
Step 65
Then I press it down and open it a bit to make the next petal.
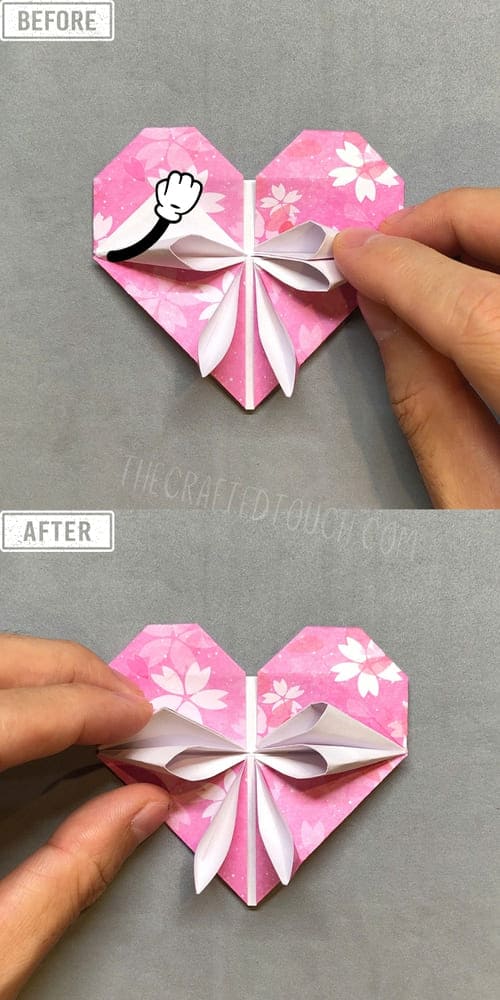
Step 66
Now I do the same with the left white triangle. I fold it down from the top.
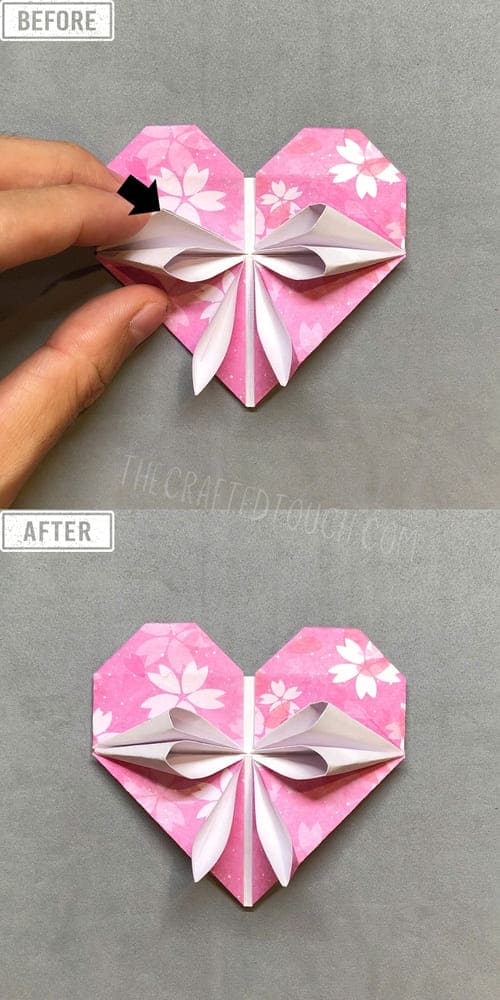
Step 67
And i press it down to open it up, just like the other petals.
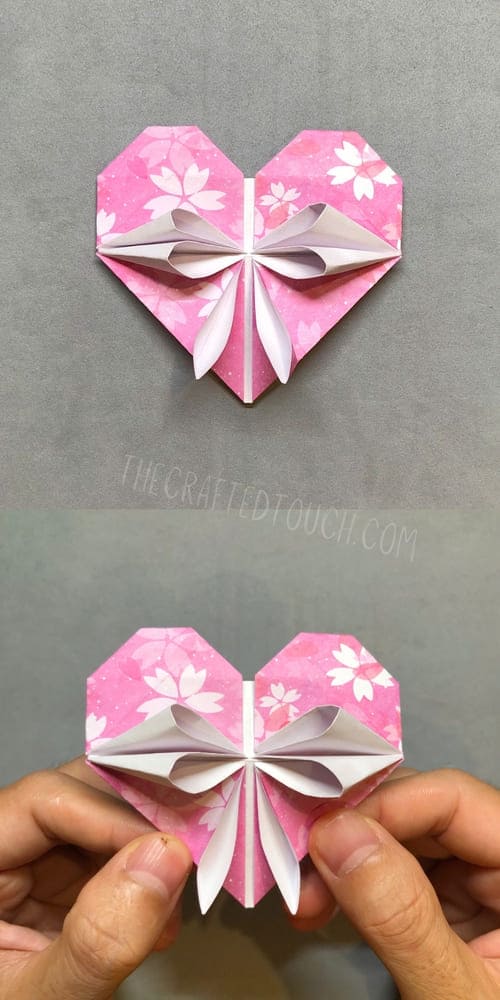
Step 68
And that’s it, my heart bow origami is all done!
TIPS FOR BETTER RESULT
| Tips | Result |
| Fold the basic folds accurately | Create even diagonal and horizontal folds to make the next steps more precise and balanced. |
| Smooth and crisp folds | Use your fingernail or a ruler to smooth out the folds – this will make the heart look crisp and beautiful. |
| Decorate (optional) | Draw or attach small stickers to add more appeal to the product. |
Color Tips
- Choose a brighter color if you want to write a cute message on the heart.
- Colors to match different moments: red for love, yellow for friendship, green for luck, etc.
- Use double-sided paper in contrasting colors or with glitter for a fun folding effect!
CONCLUSION
A beautiful origami heart bow, you have created a simple, lovely origami heart bow, perfect for preserving a sweet memory or sharing a little love. Whether you keep it for yourself or gift it to someone special, it is sure to bring a smile. With just a sheet of paper and a few simple folds, you have created something meaningful.
