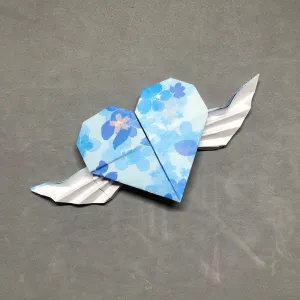
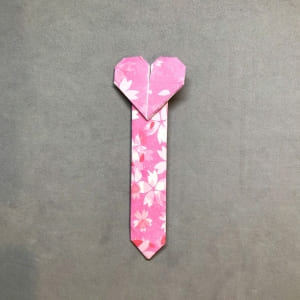
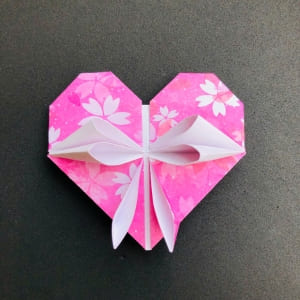
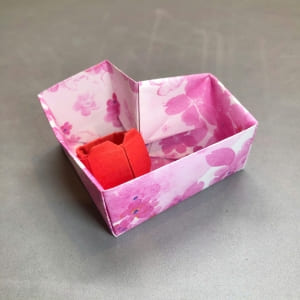
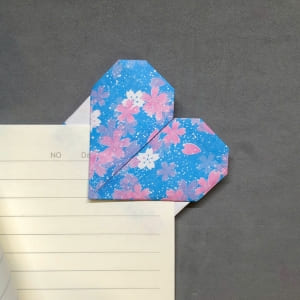
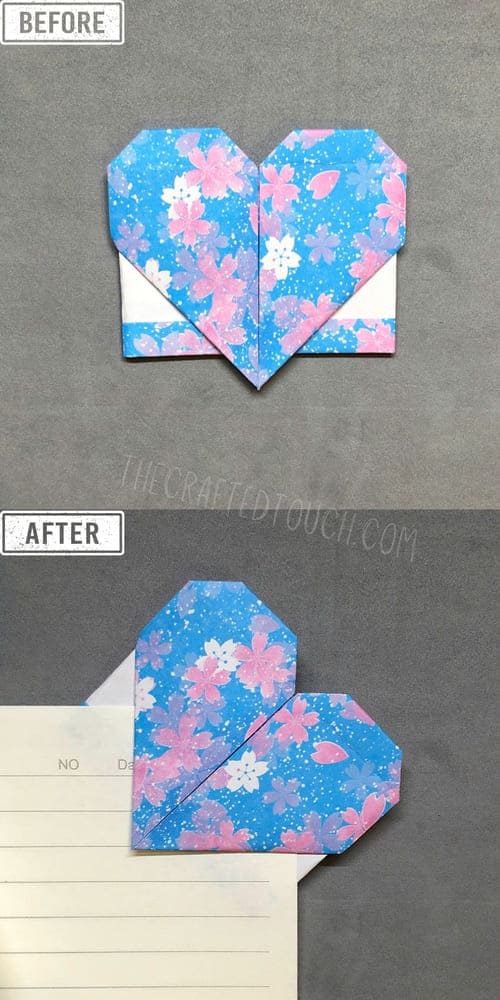
One day, I was looking for something cute to keep my place in a book. I didn’t want to buy anything fancy. That’s when I found out how to fold a heart origami bookmark. At first, it looked tricky, but after trying a few times, it became really easy and fun. I’m going to show you exactly how I did it so you can make one too.
Materials you need
| What You Need | Why It Helps |
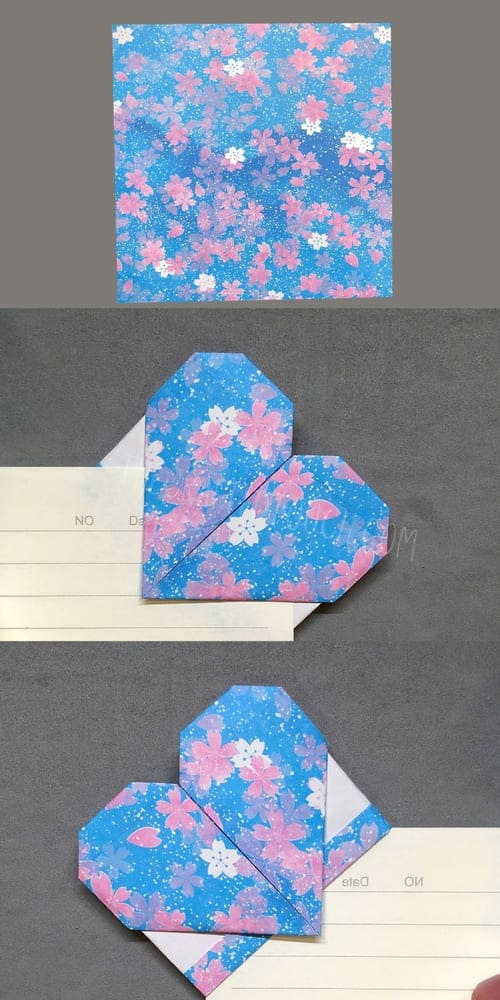
| 1 square sheet of paper | You need a square shape so the folds work evenly. About 10×10 cm is a good size for small hands. One colored side and one white side helps you see the folds better and makes your heart look cuter when finished. |
| A flat surface | Folding on a flat table makes your lines straighter and easier to crease. |
| Clean hands | Clean hands keep the paper neat, no smudges or dirt on your heart |
| A bit of patience | Some folds are tiny, so staying calm helps you finish without mistakes. |
Step by step folding guide
I always lose my page when I read books, and using random papers just feels boring. One day, I saw a cute little heart poking out from someone’s book and thought, “I want that too!” That’s when I learned about the heart origami bookmark. It’s not hard to make at all. I just needed a square piece of paper and a few folds, and boom it turned into something really cool. If you love crafts like I do, you’ll enjoy this one a lot
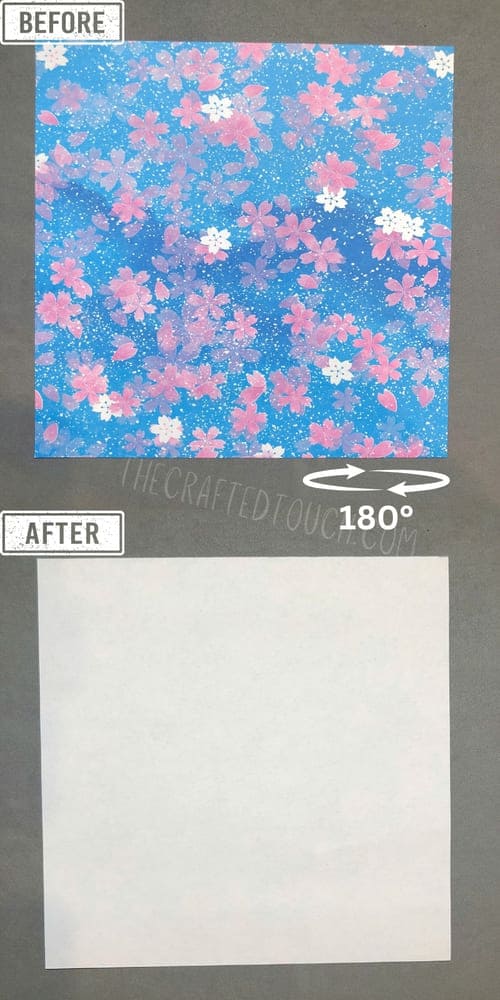
Step 1
First, I put the square paper on the table with the flower side facing up. Then I turn it over so the white side is on top.
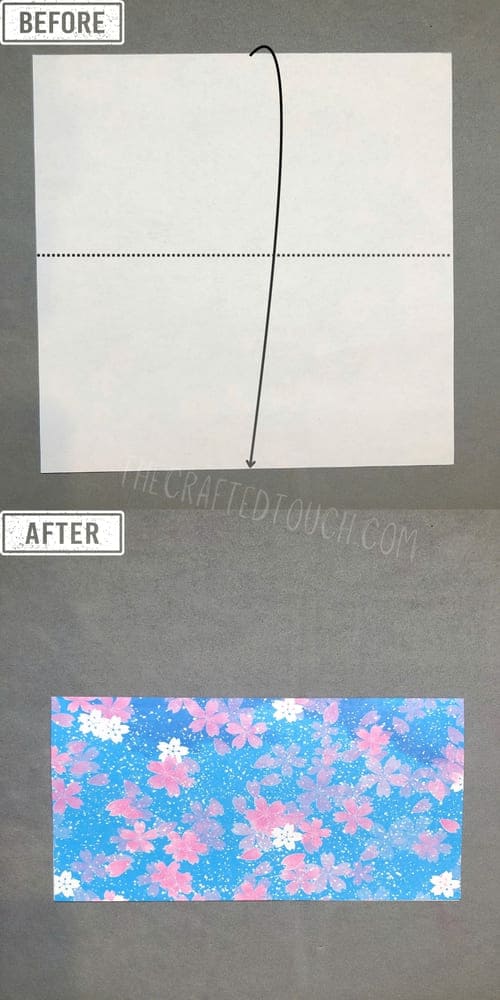
Step 2
Then I fold the paper in half from top to bottom to make a rectangle.
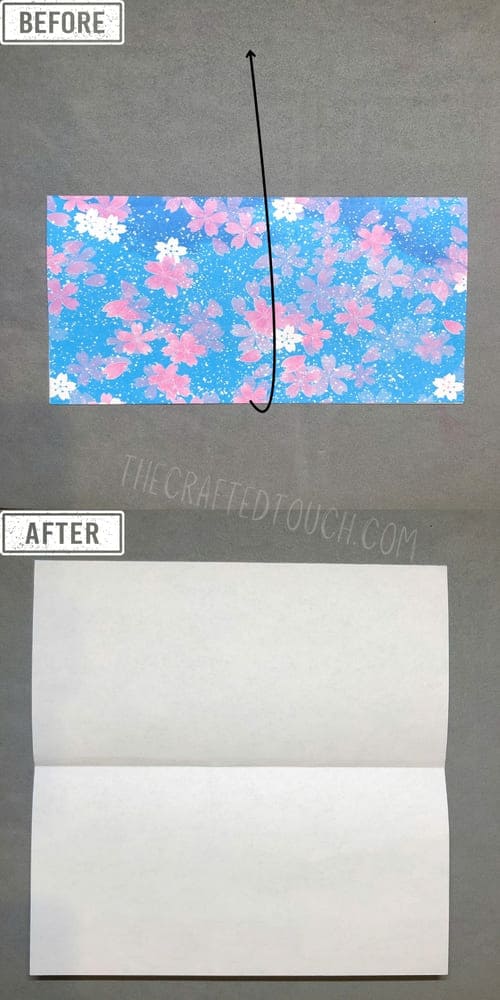
Step 3
After that, I unfold it when the crease is done.
Step 4
Next, I fold the paper in half from right to left.
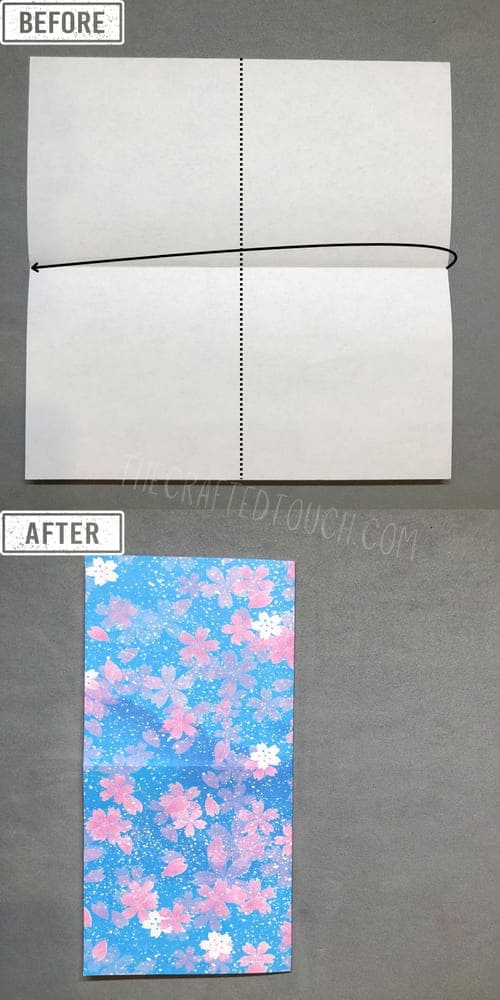
Step 5
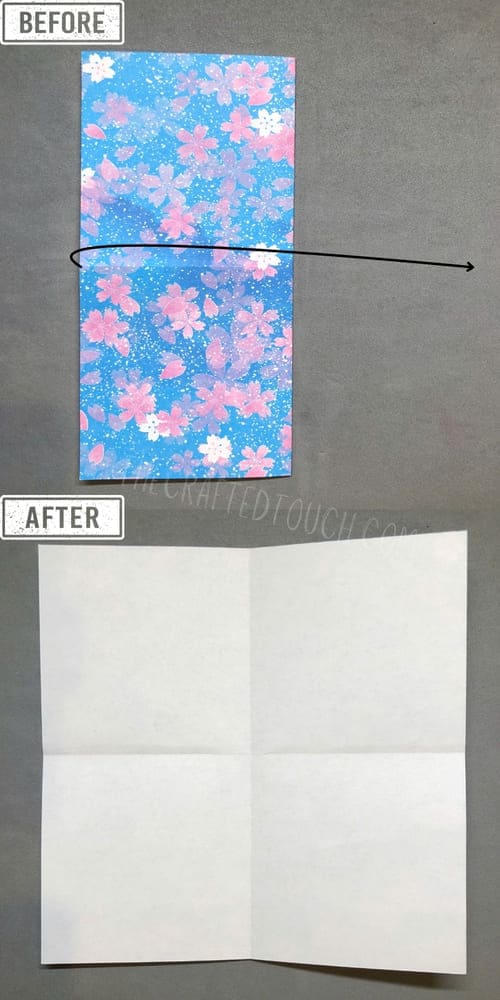
After that, I unfold the paper again. Now there’s a crease that looks like a plus sign (+).
Step 6
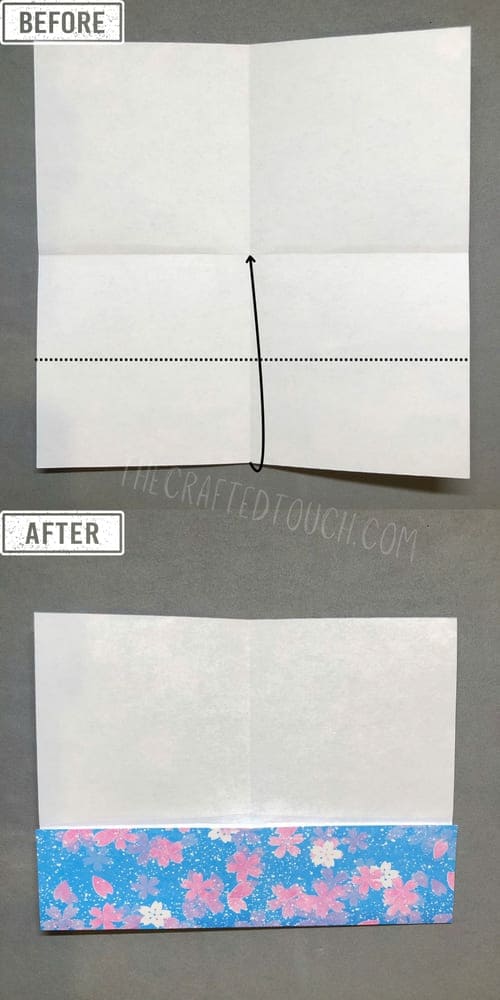
Next, using the center crease as a guide, I fold the bottom part of the paper up to make a smaller rectangle.
Step 7
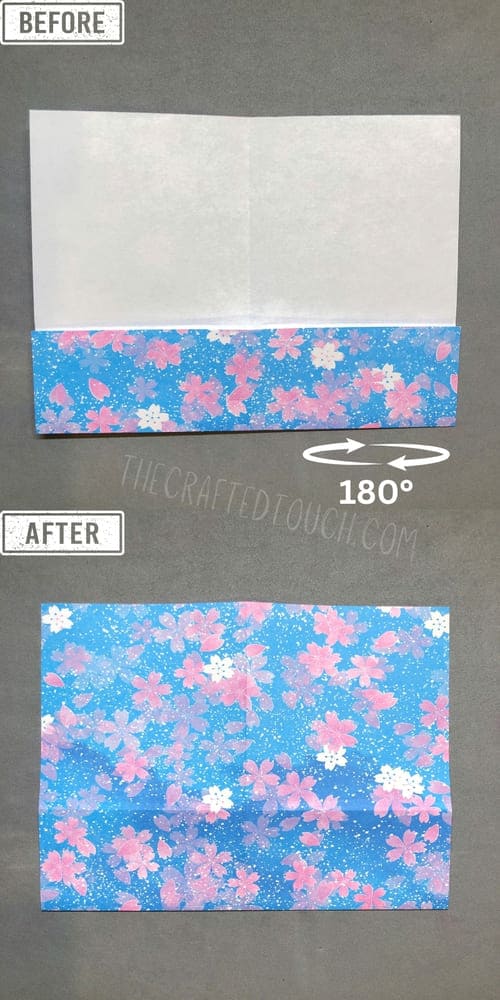
Then I flip the paper over.
Step 8
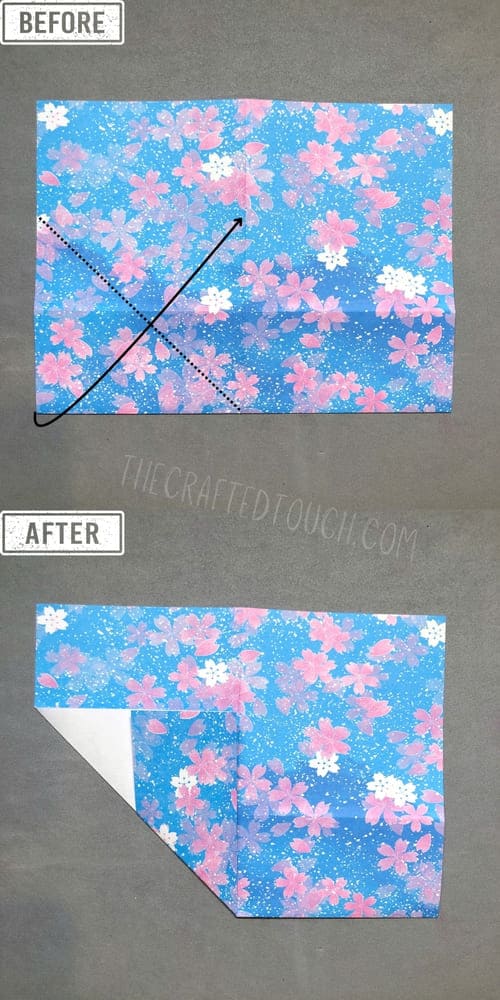
Next, using the straight center crease as a guide, I fold the left corner of the paper up diagonally.
Step 9
After that, i do the same with the bottom right corner, folding it up so it touches the other fold.
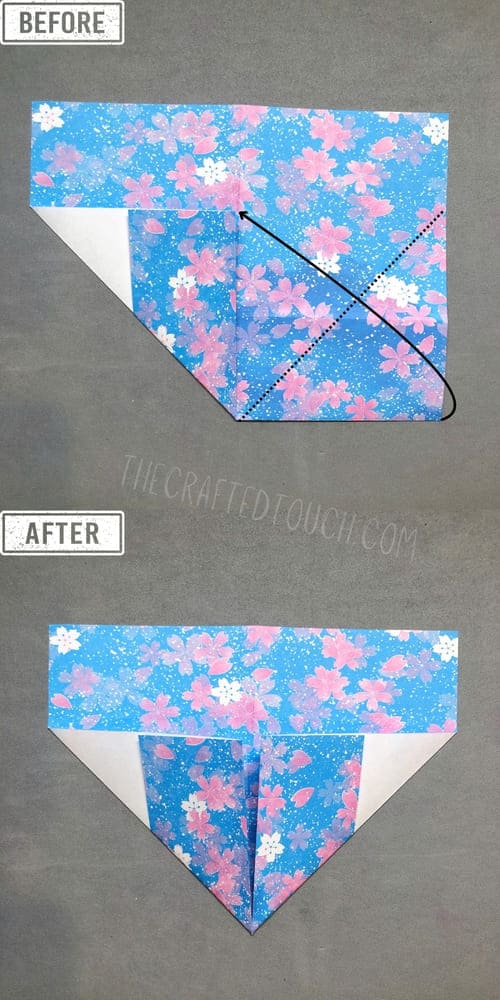
Step 10
Once the folds look nice, I flip the paper over again.
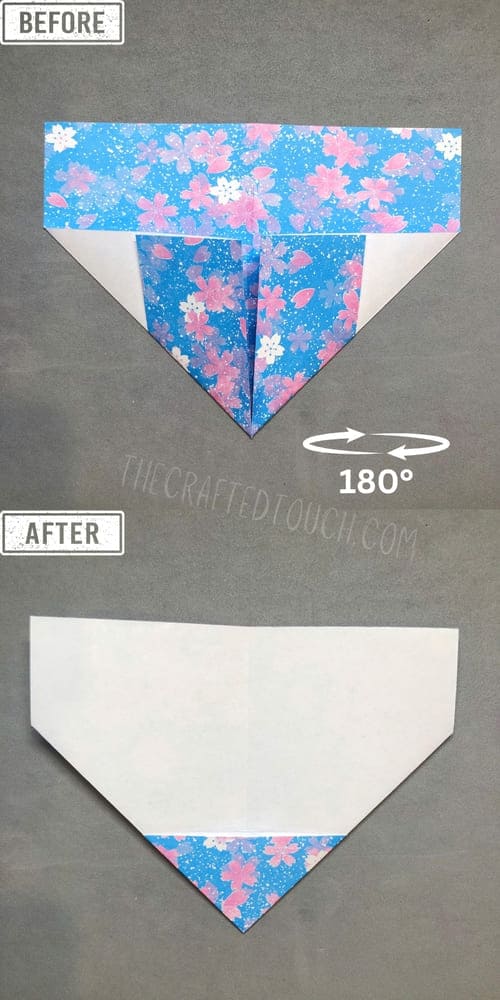
Step 11:
Next, I fold by bringing the bottom point of the paper up to touch the center at the top.
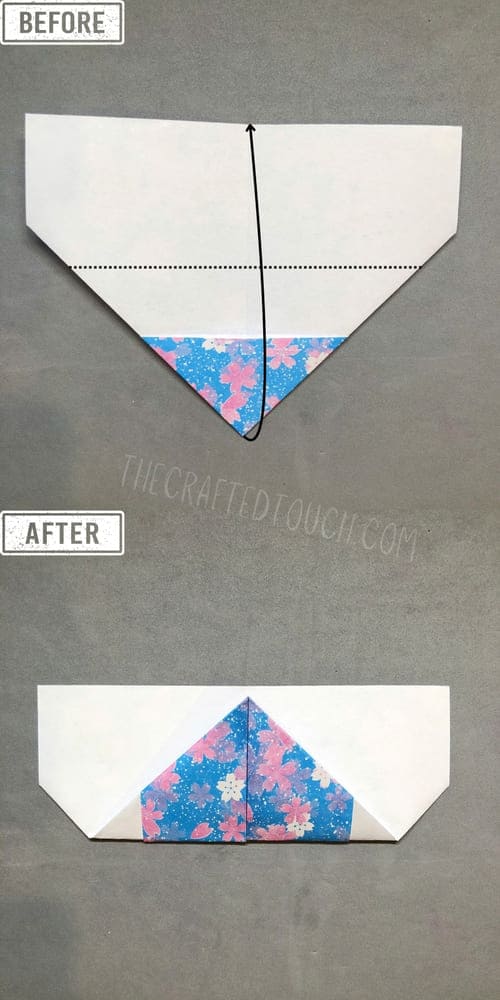
Step 12:
I turn the paper over one more time.
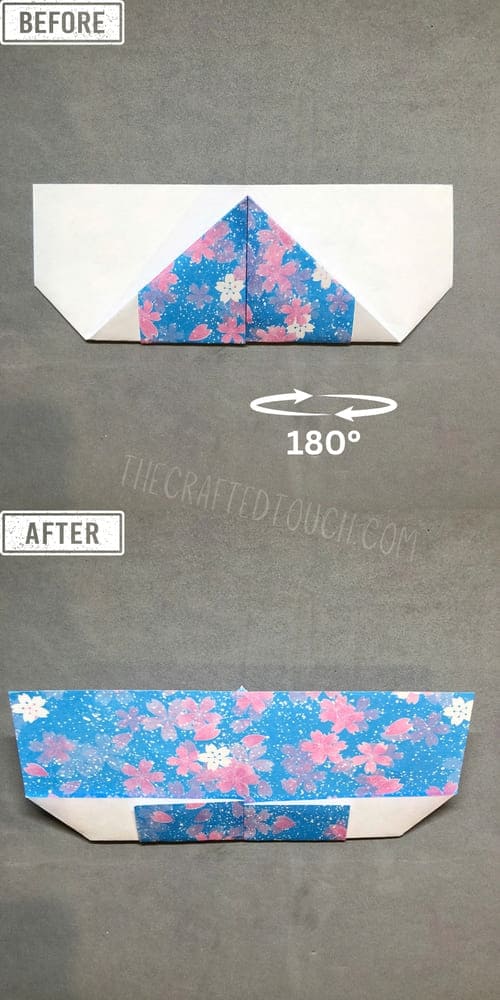
Step 13:
Then, I gently open the small flowered rectangle on the right a little bit by pulling it down.
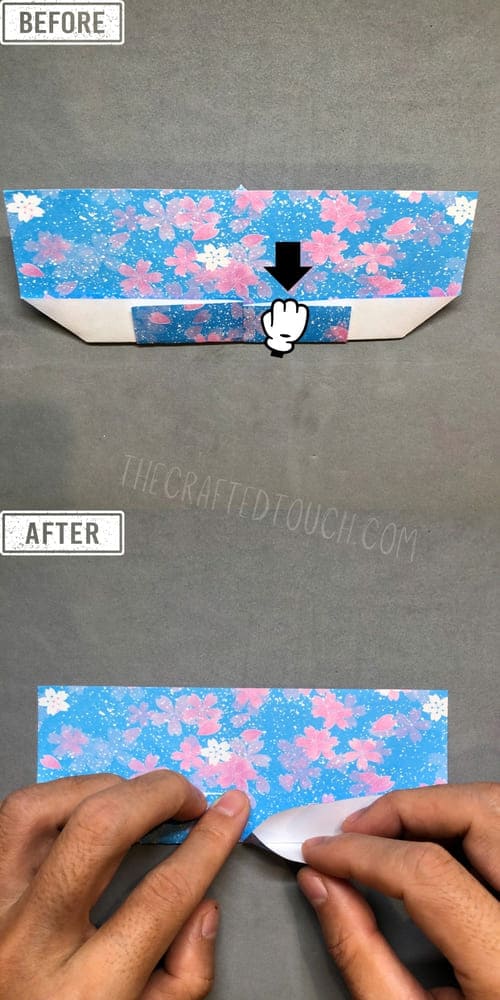
Step 14:
Then, I use my left hand to press down the left corner.
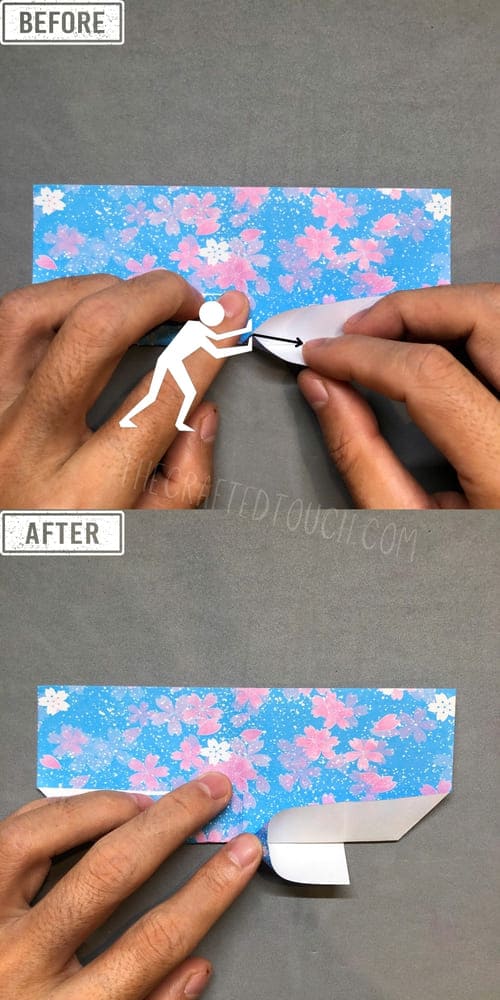
Step 15:
I line it up nicely, then fold it down into a little triangle
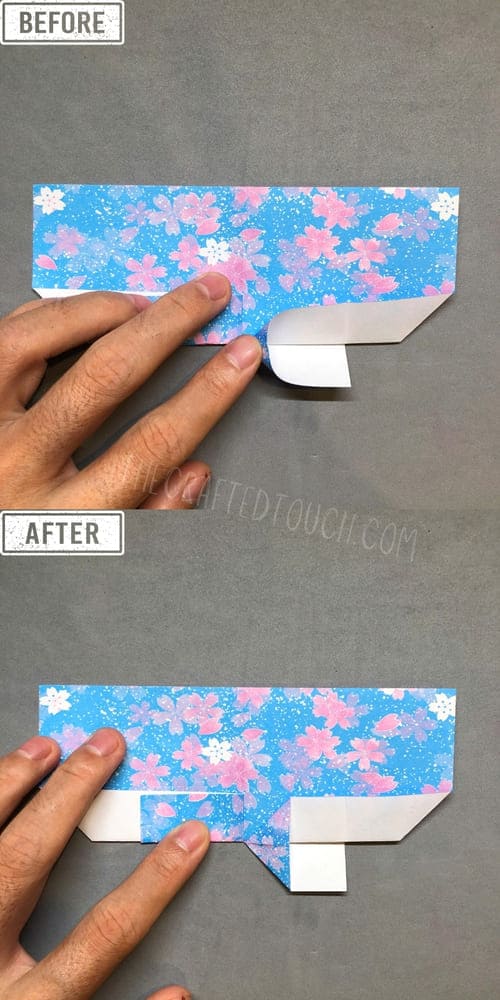
Step 16:
Then, I move to the left side, pull it down, and gently open it just like before.
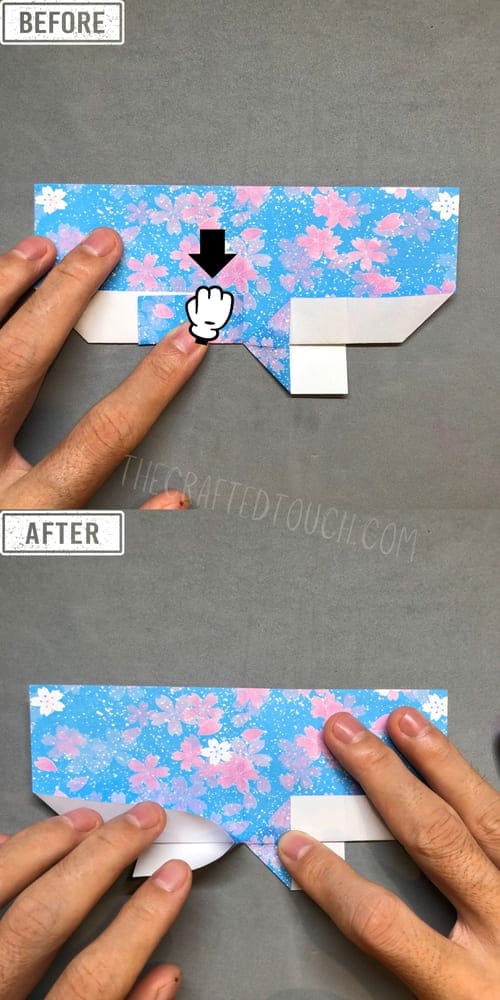
Step 17:
And I use my right hand to press down the right corner of the part I just opened.
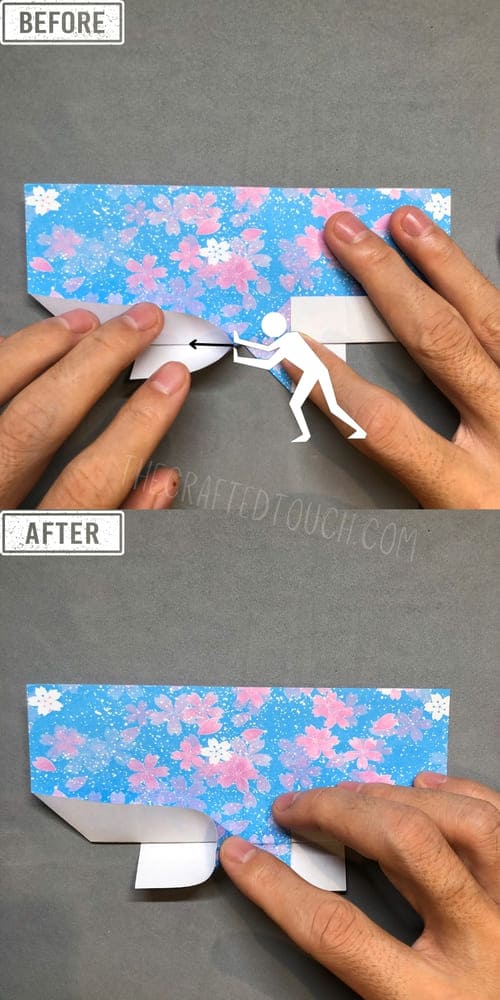
Step 18:
After adjusting it, I press it down to make the second small triangle at the bottom.
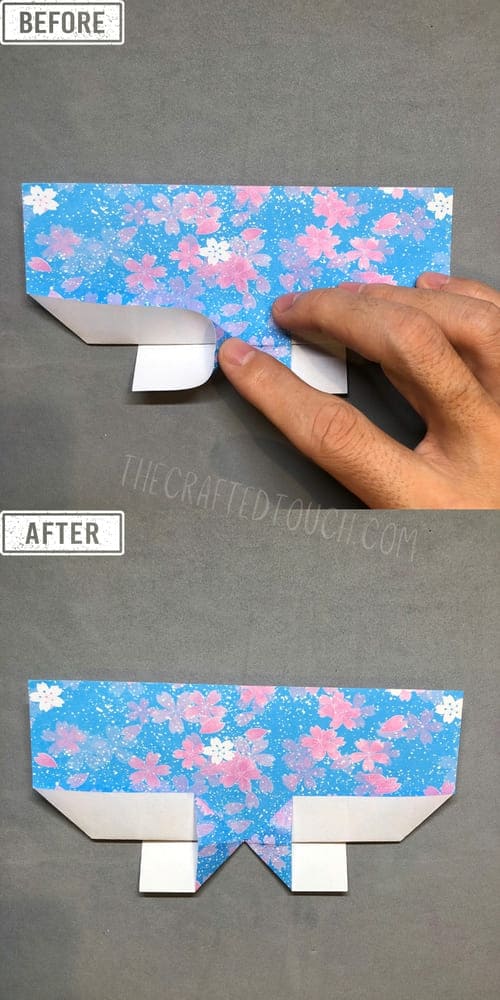
Step 19:
Now, with the white square at the bottom right, I fold its bottom right corner up diagonally to make another small triangle.
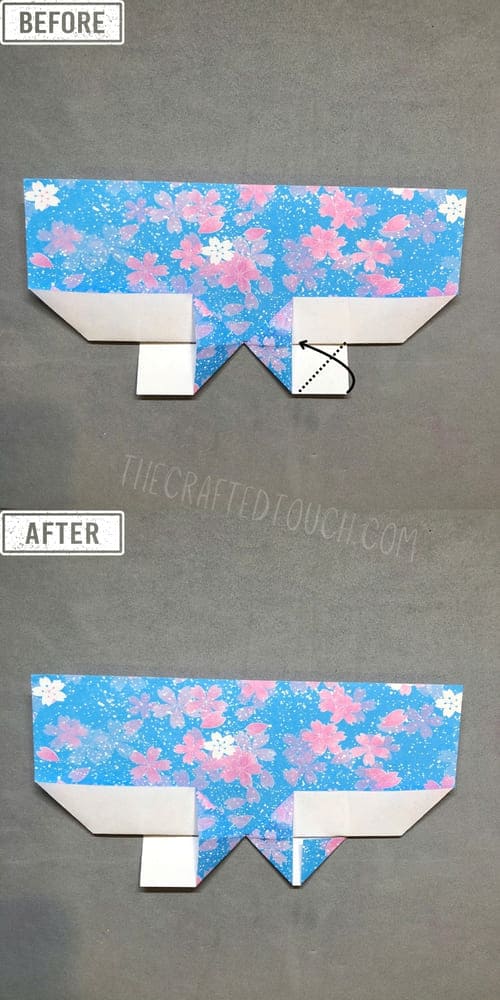
Step 20:
I do the same with the white square on the left, folding its outer left corner up diagonally
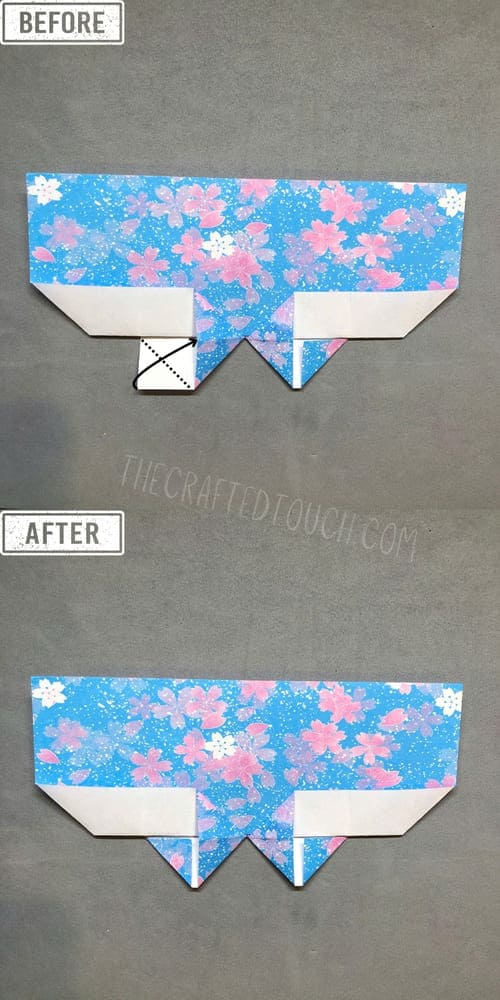
Step 21:
Now I fold up the bottom part of the little triangle on the left to start forming the heart.
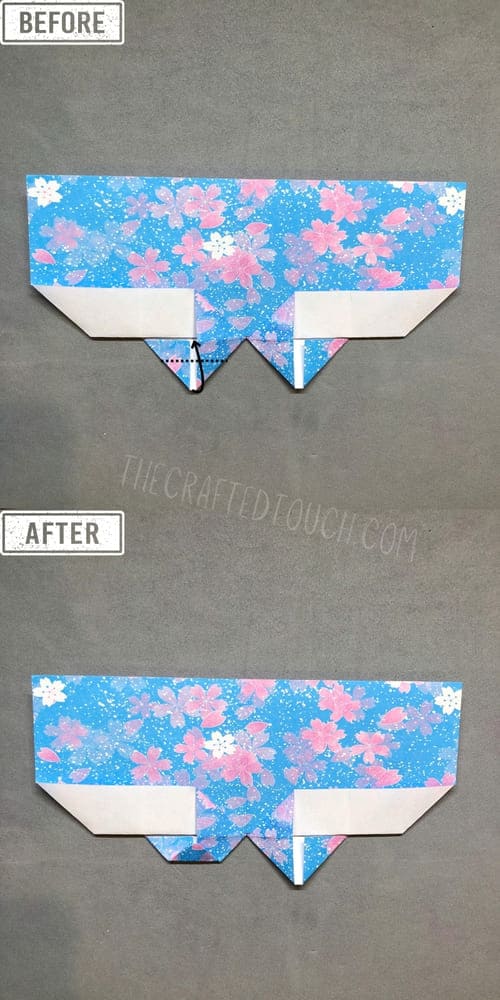
Step 22:
And I fold up the bottom of the little triangle on the right, just like I did on the left.
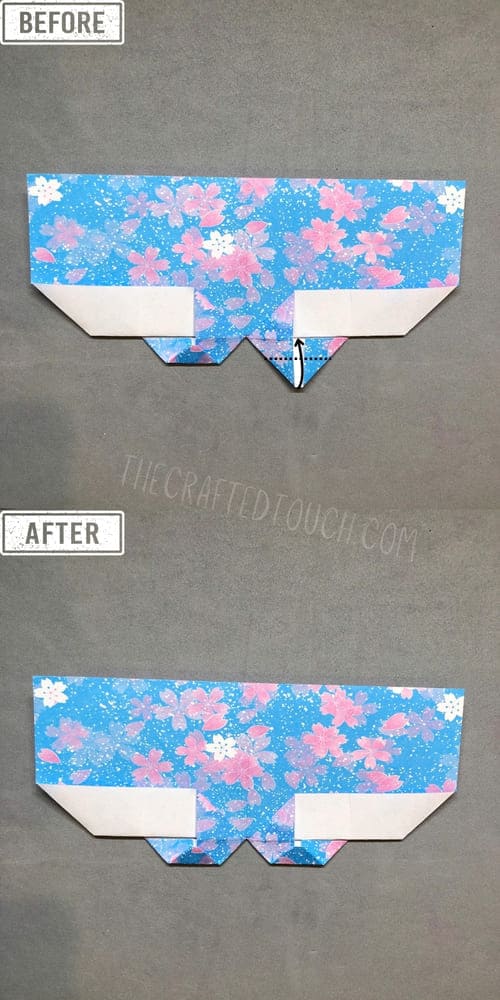
Step 23:
Now I flip and turn the paper so the two top parts of the heart are facing up. Do you see the heart with flower pattern now?
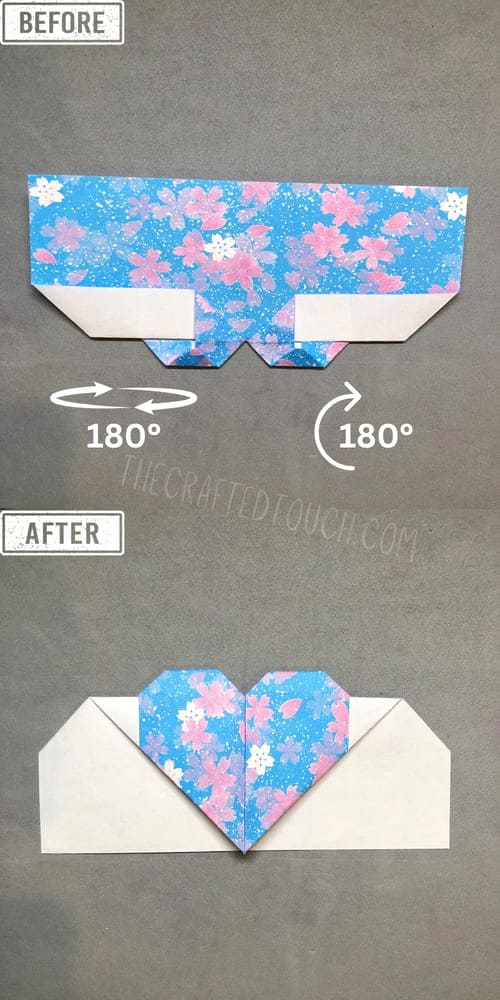
Step 24:
With the white part at the bottom, I fold a small part of it up along the dashed line.
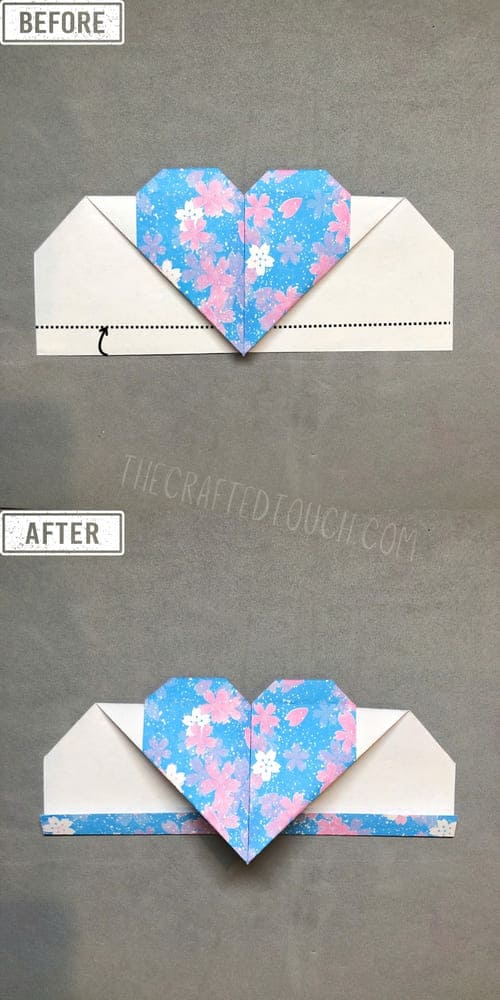
Step 25:
After that, I turn the paper over one more time.
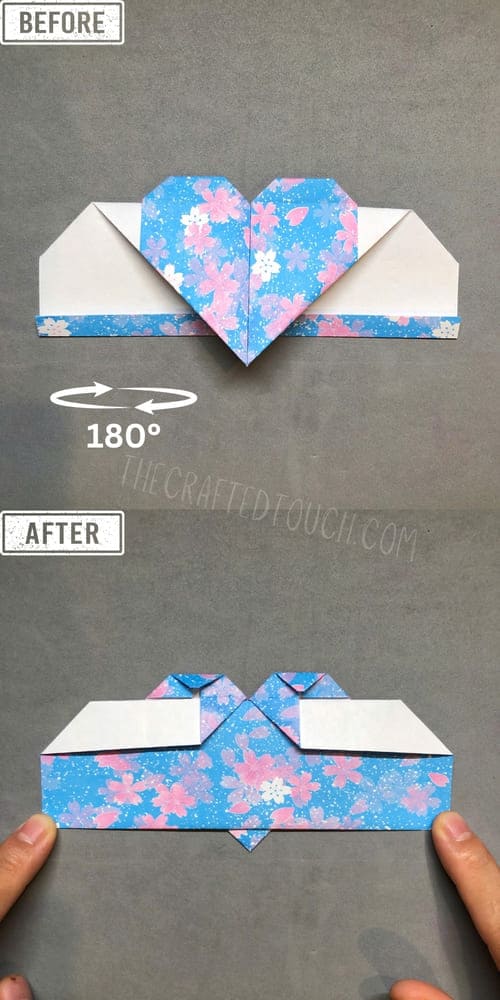
Step 26:
Now I fold the left side to the right, following the dotted line, to make it nice and neat.
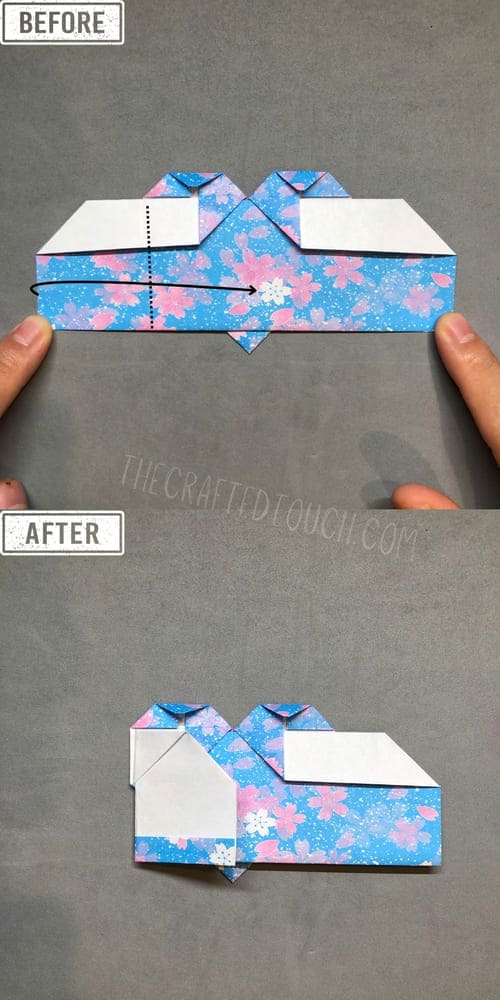
Step 27:
And I do the same with the right side, folding it over to the left. If the right side covers the left fold nicely, that means you did it right
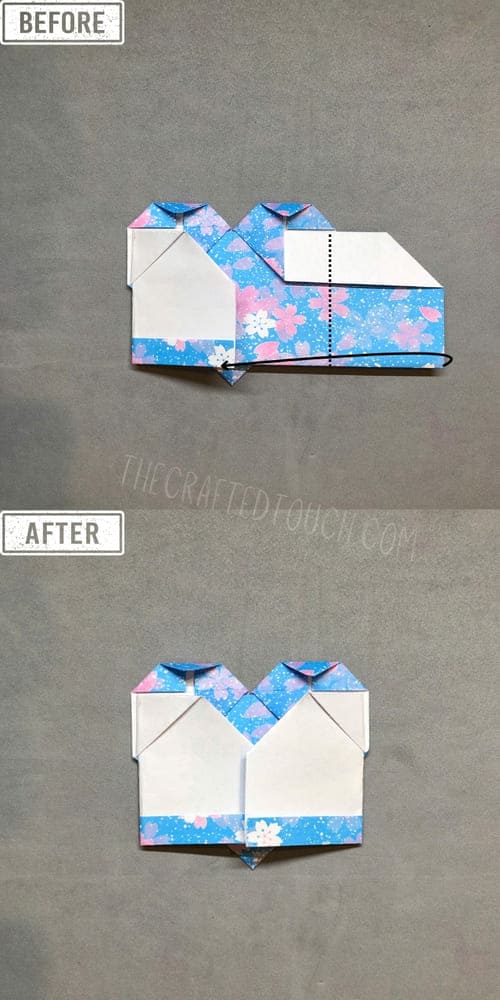
Step 28:
Next, I gently pull down the rectangle on the left and spread it open.
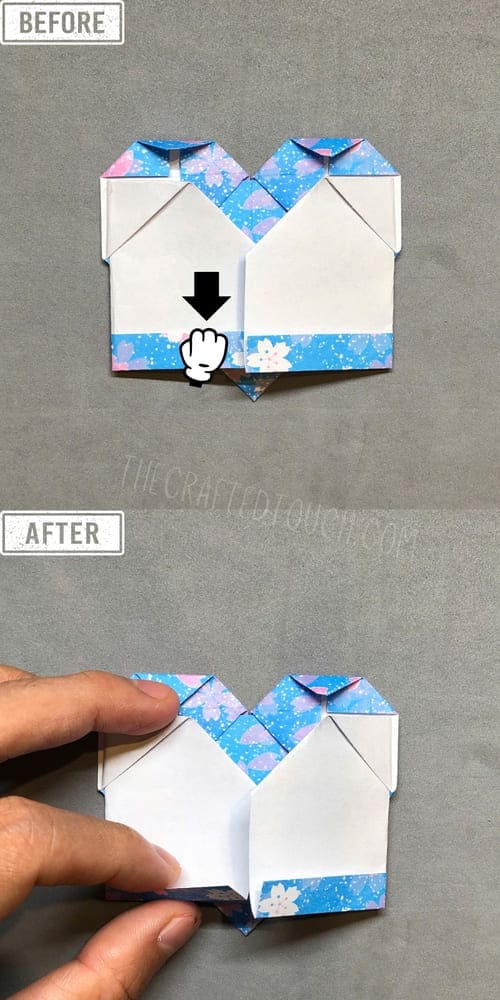
Step 29:
I push the right part inside the area I just opened up.
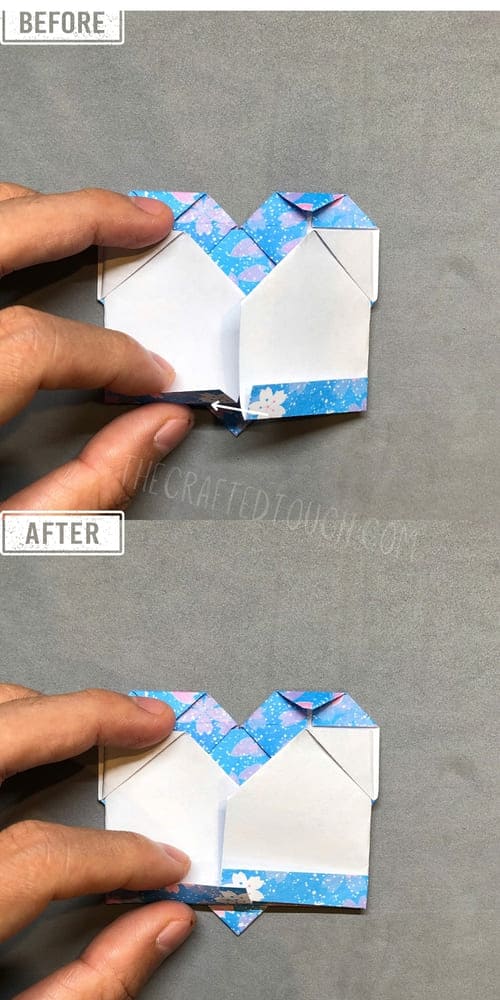
Step 30:
Then I fold the rectangle on the left back down
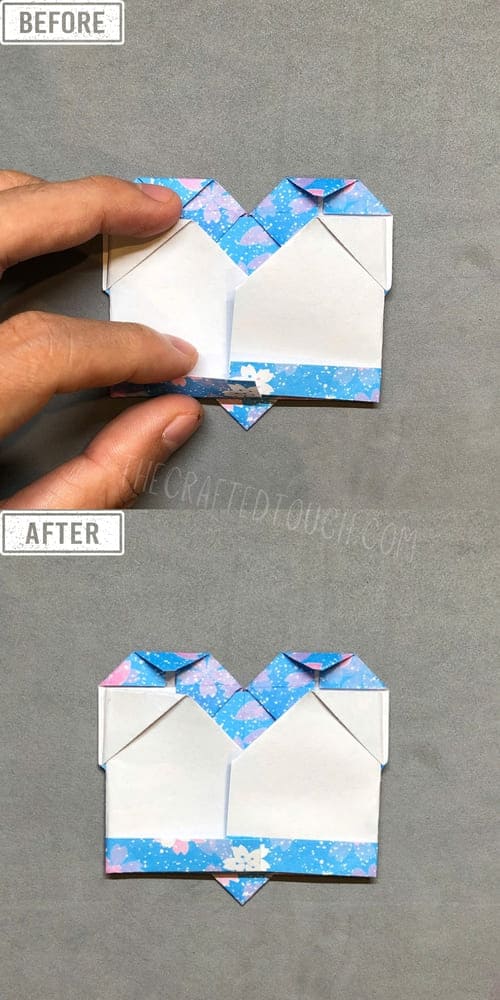
Step 31
Then I flip the paper over. Now I’ve finished my heart origami bookmark
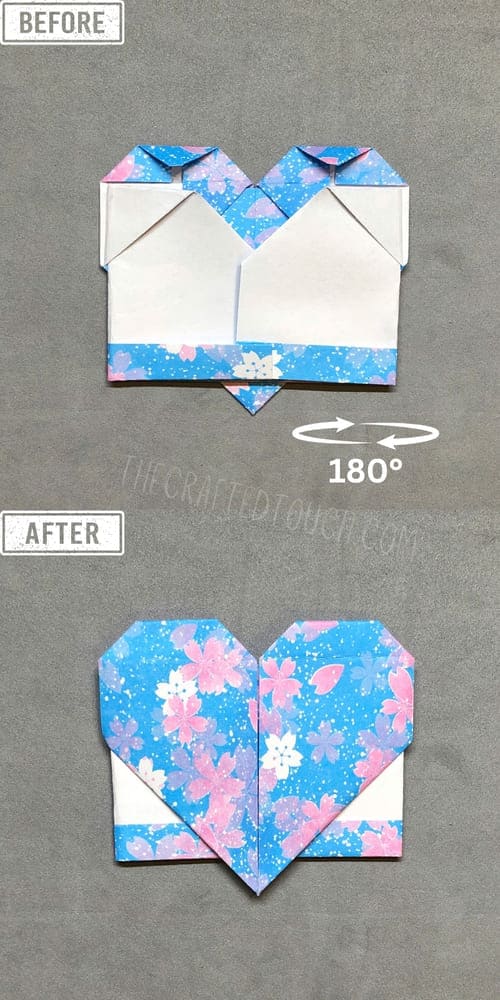
Pro tips
| TIPS | Why It Helps |
| Crease each fold well | Makes the bookmark hold its shape and stay flat in the book. |
| Fold slowly and match corners carefully | Rushing makes the heart look uneven or messy. |
| Don’t use paper that’s too small | Tiny folds are harder to do, especially for beginners. |
| Practice on scrap paper first | If you make a mistake, you don’t waste your good paper. |
| Press down gently after each step | Helps keep the folds sharp without tearing the paper. |
Conclusion
I didn’t think folding a heart origami bookmark could be this fun until I tried it myself. It’s just paper and a few folds, but the result feels special.
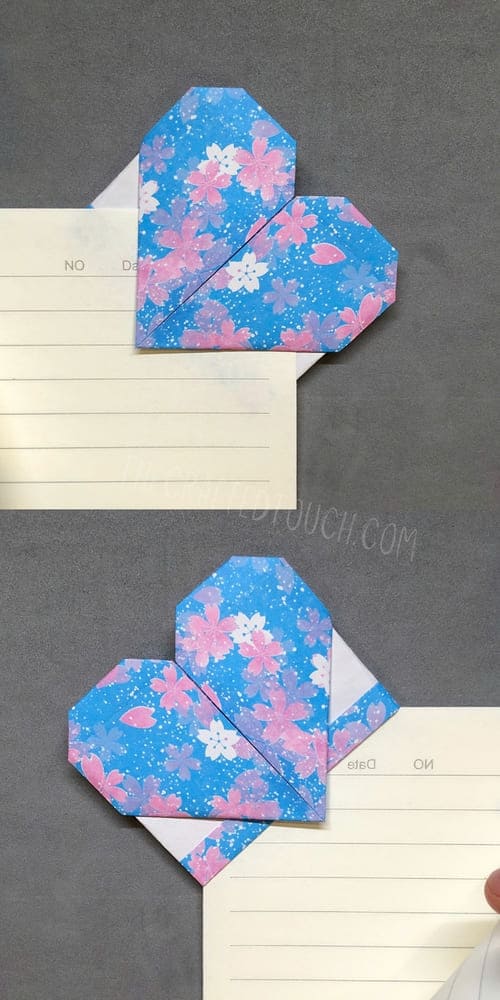
Now I use mine every time I read, and sometimes I even make extra ones to give to my friends. If I can do it, you totally can too, just take your time, enjoy each step, and soon you’ll have your own little heart to keep your place in every book.
