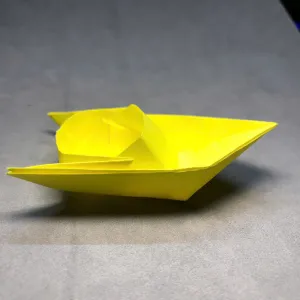
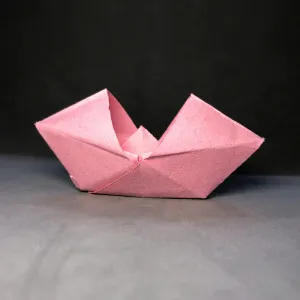
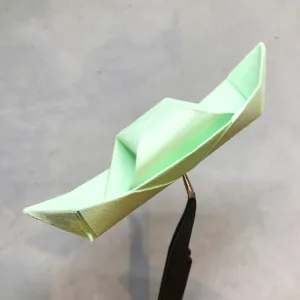
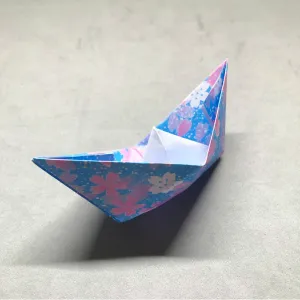
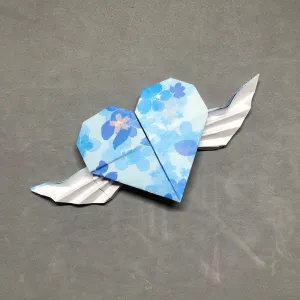
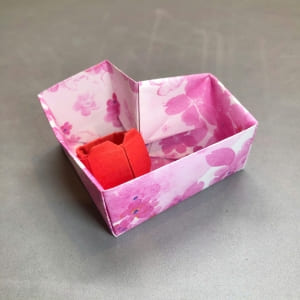
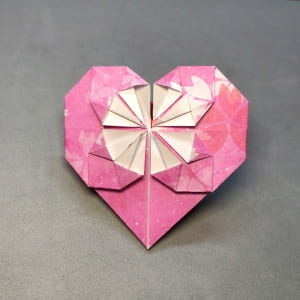
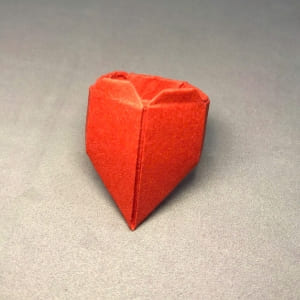
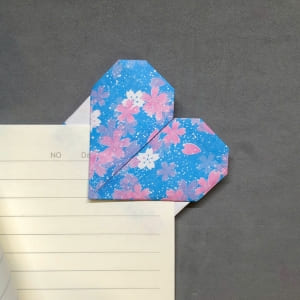
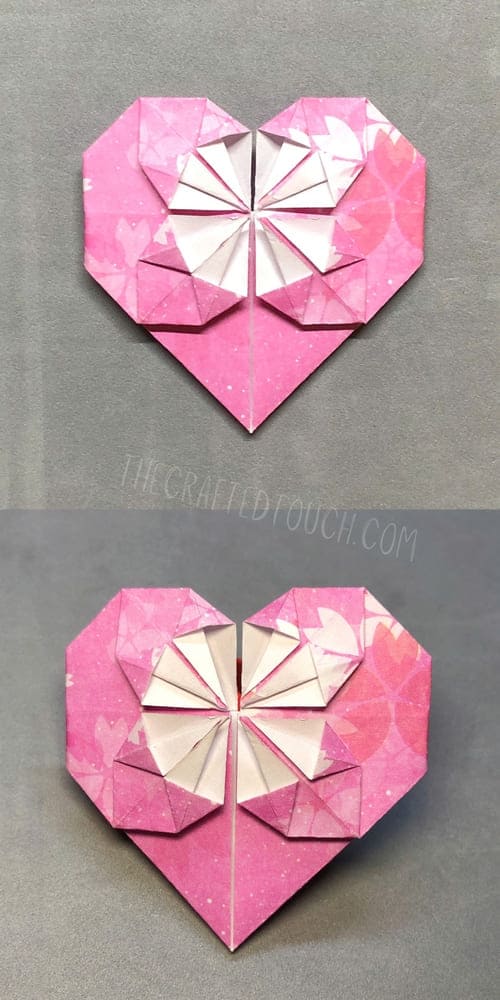
Do you want to make a heart with a lovely flower shape inside? With just a rectangle paper and some simple folds, I’ll show you how to create a beautiful flower heart origami. It’s easier than it looks and perfect for decorating, gifting, or just having fun
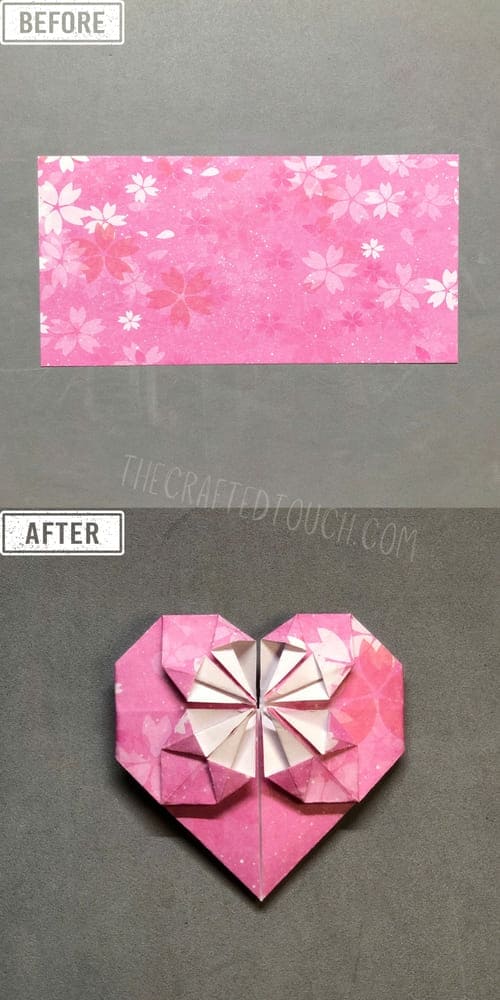
Materials needed for folding Flower Heart Origami
| Material | Details |
| Type of paper | 1 sheet of rectangle paper with a 2:1 ratio (for example, 20cm x 10cm) Try origami paper, wrapping paper, or any paper that is not too thin or too thick |
| Tools | Just your hands, no scissors or glue needed. A flat surface like a table will help you fold more neatly |
| Patience | Don’t worry if it’s not perfect the first time, just take a deep breath and fold again |
TOTAL FOLDING STEPS IN DETAIL
Before we fold, let me tell you something: this Flower Heart Origami is one of my favorite designs. It looks like a heart, but right in the middle, there’s a tiny flower that pops out like magic. Don’t worry if you’re new to origami. I’ll guide you step by step. All you need is your paper, your hands, and a little bit of patience. Ready? Let’s fold together
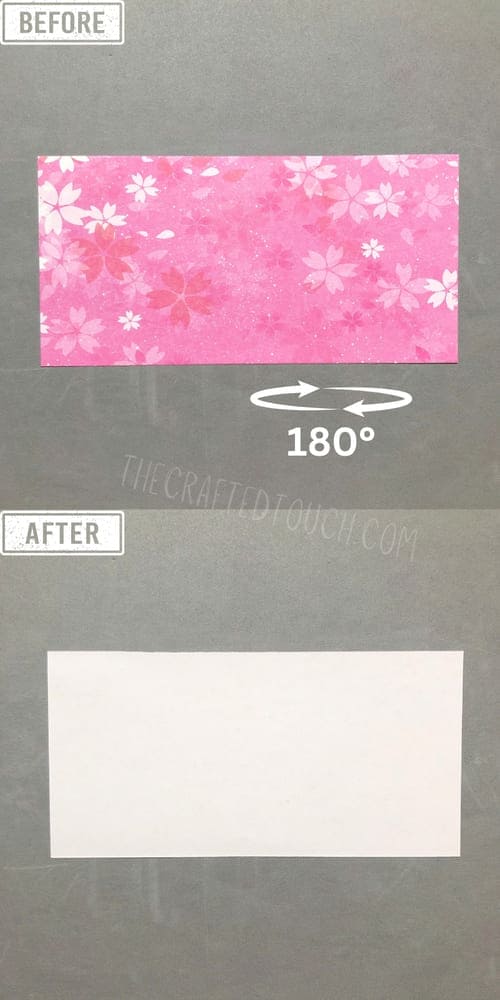
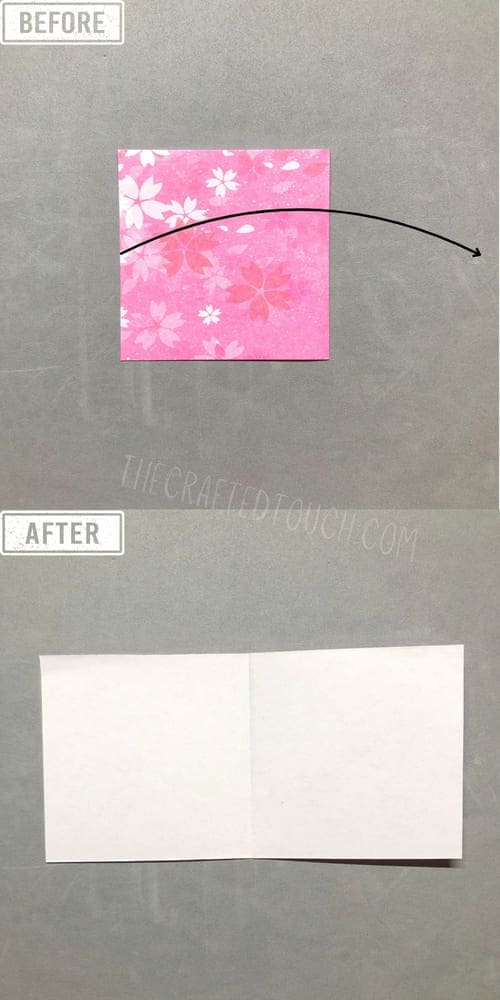
Step 1: I placed the paper flat on the table with flower side up. Then I turned the paper over so the white side was facing up.
Step 2: After that, I folded the paper in half from the right side to the left, so it became a square.
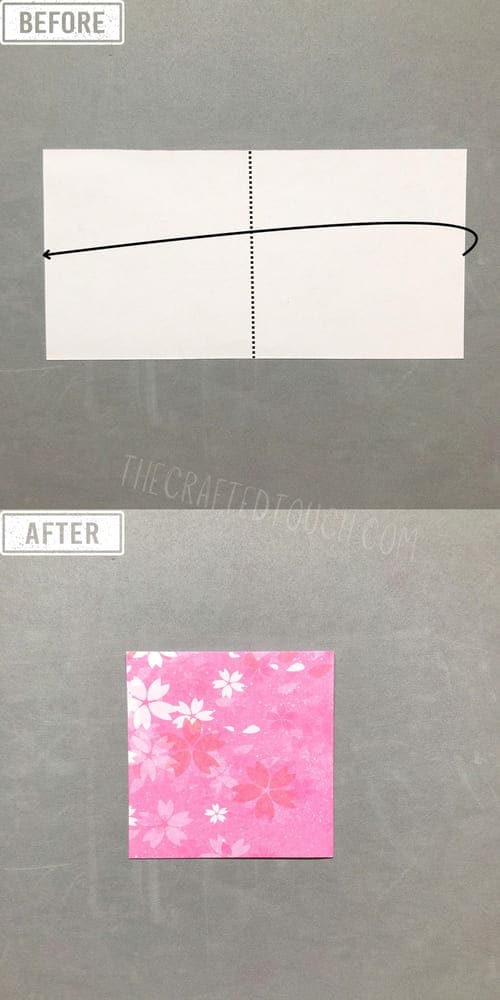
Step 3: After making a nice fold, I opened it back to the way it was before.
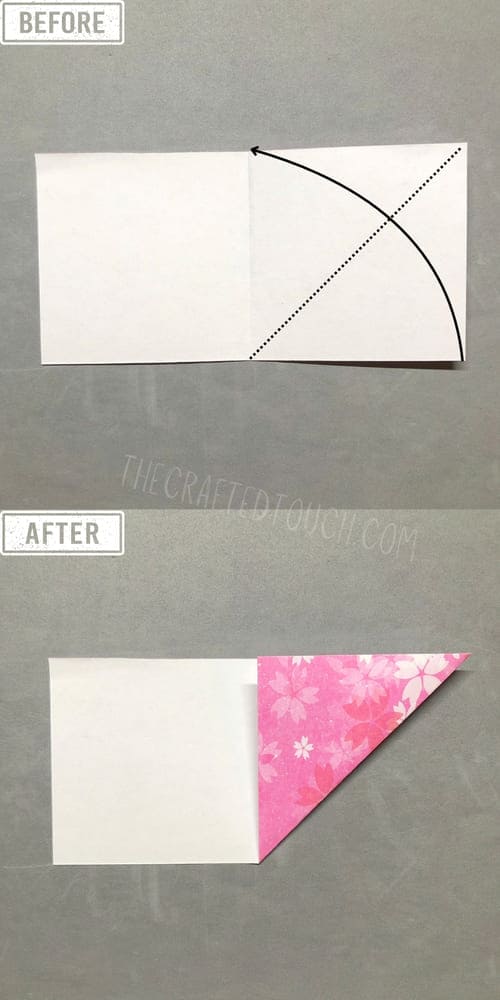
Step 4: Using the crease I just made, I folded the bottom right corner up diagonally to make a triangle.
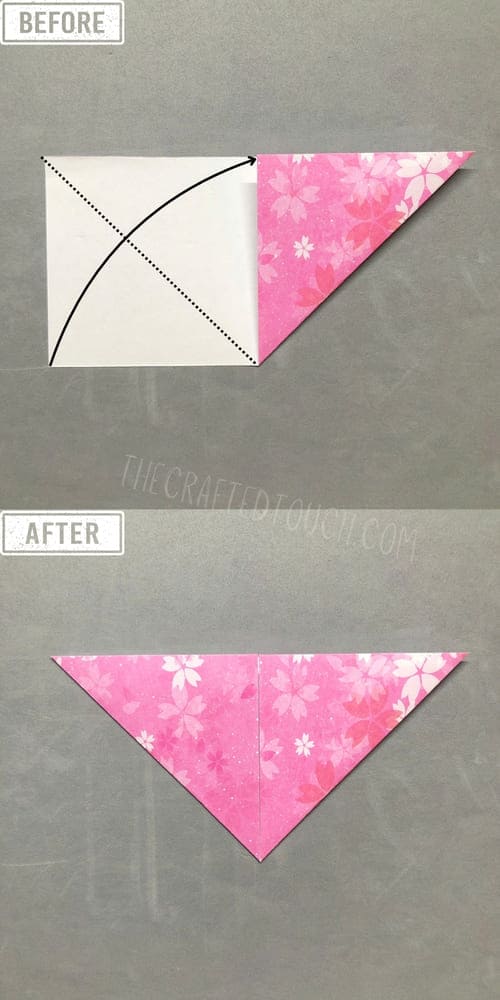
Step 5: I did the same with the bottom left corner and made a second triangle. Now the paper looks like a big upside-down triangle.
Step 6: Now that the folds are done, I opened the paper back to how it looked at the beginning.
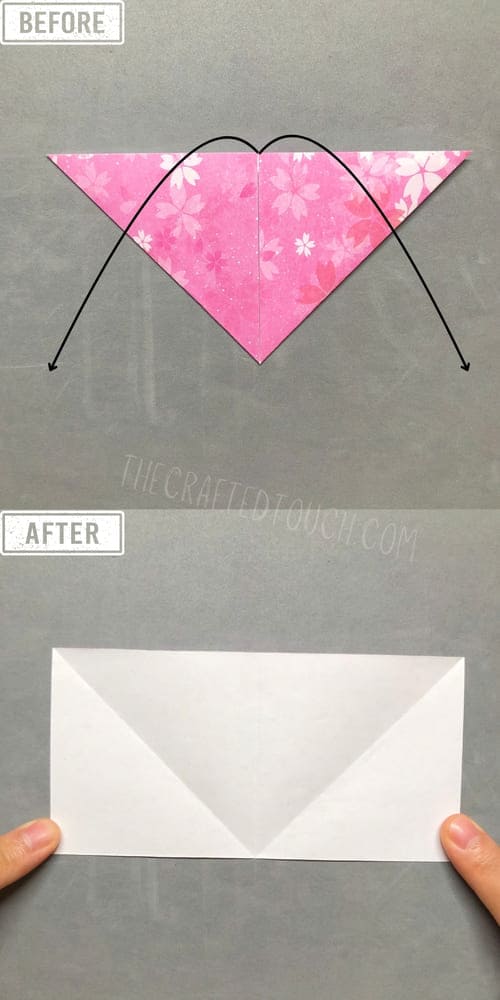
Step 7: I then folded the top right corner down diagonally to make a triangle.
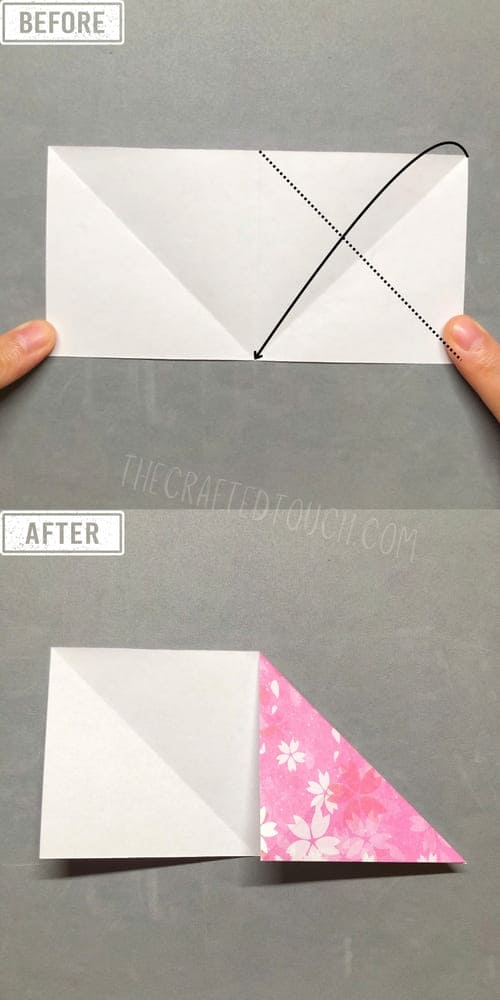
Step 8: I did the same with the top left corner and folded it down diagonally to make the second small triangle.
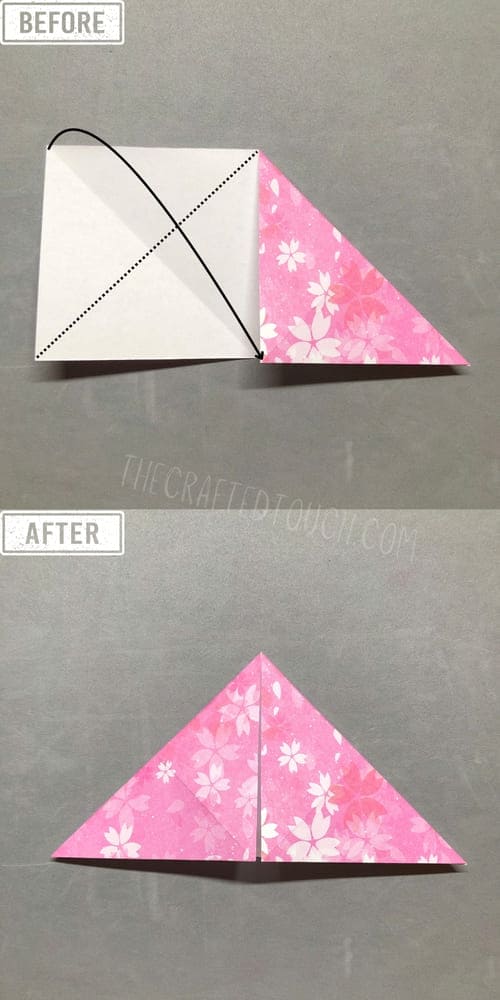
Step 9: All done! I opened the paper back to how it was. Now I can see all the crease lines an X, a straight line down the middle, and another X.
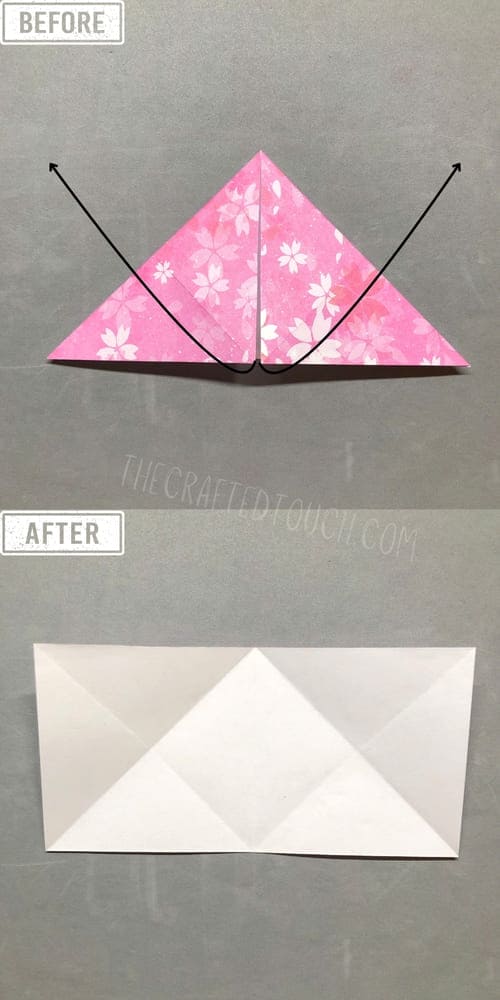
Step 10: Then I brought the top and bottom of the first square on the left closer together, using the X-shaped crease as a guide.
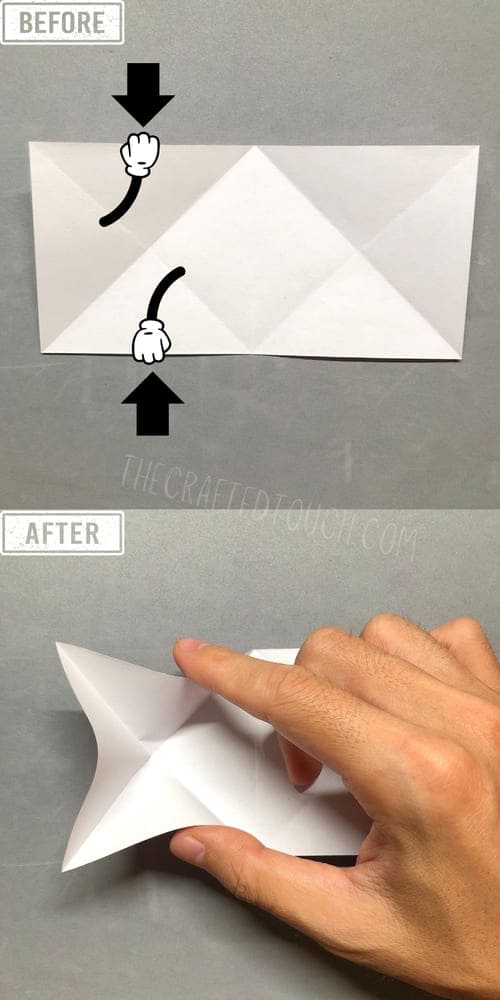
Step 11: I used my right hand to hold the top and bottom parts, then I pressed down the outer left edge of the paper with my left hand.
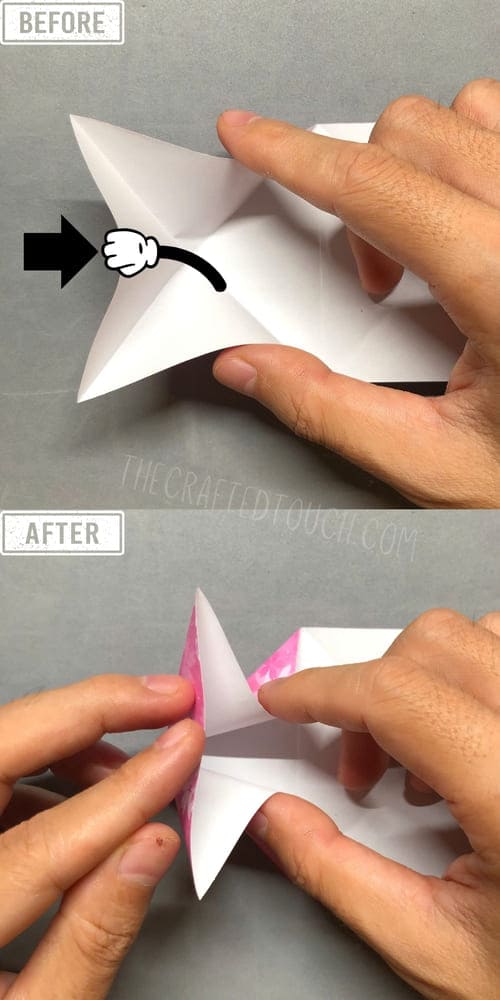
Step 12: Using the crease as a guide, I pressed the folding part down with my left hand.
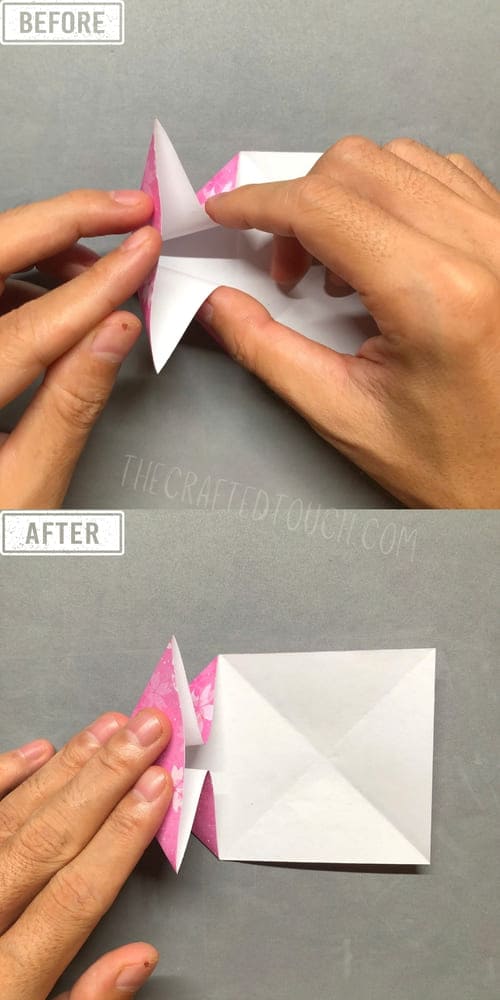
Step 13: I pressed the paper down firmly to make a triangle on the left side
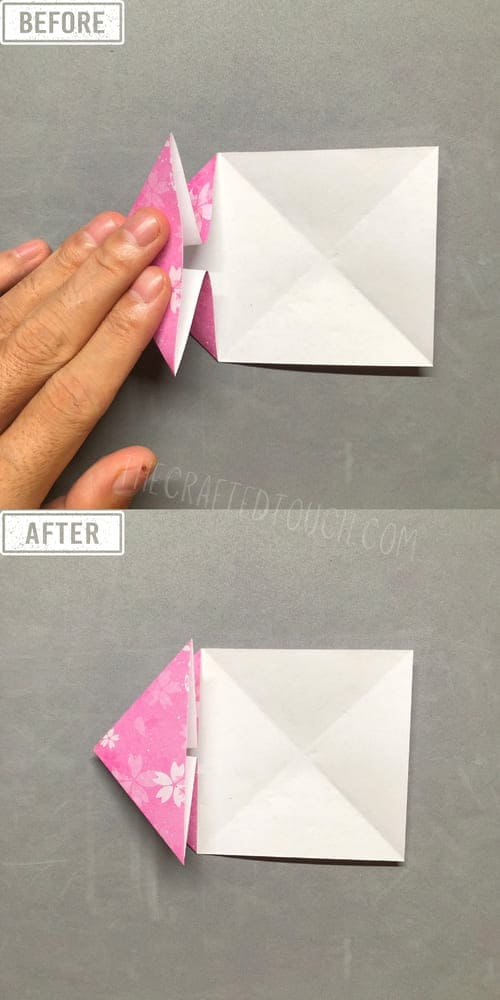
Step 14: I repeated the same steps on the right side, starting from step 11. I pulled the top and bottom of the right square closer together.
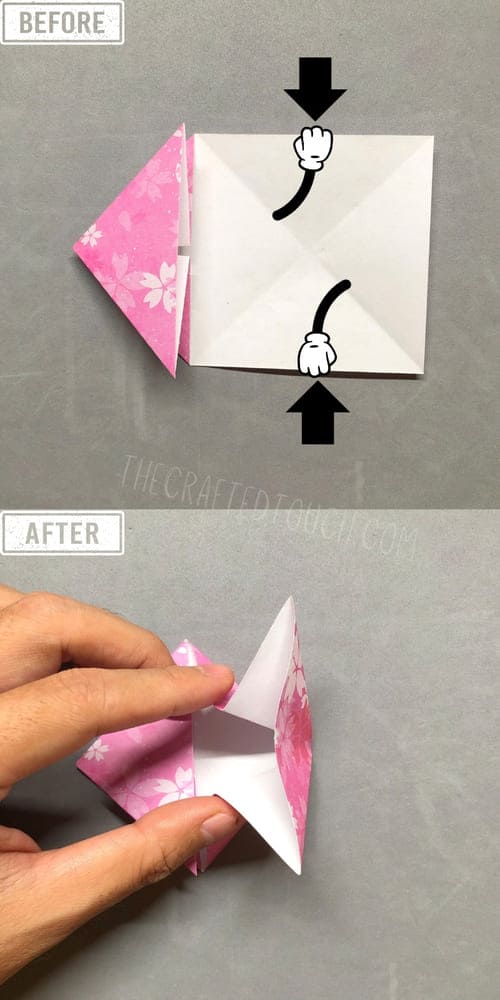
Step 15: Next, I took the bottom edge of the first triangle and folded it up diagonally to make another triangle on the right
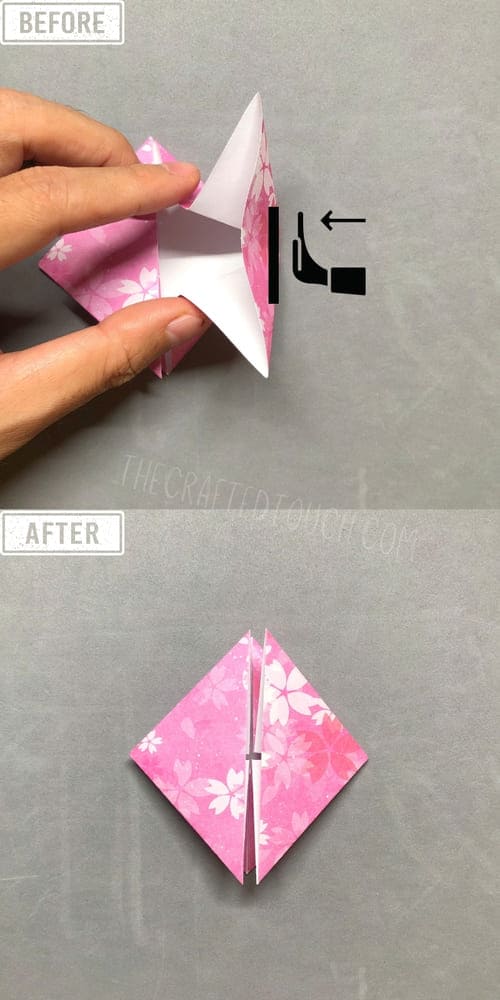
Step 16: At the top corner of the triangle on the left, I fold it down diagonally to make a small triangle.
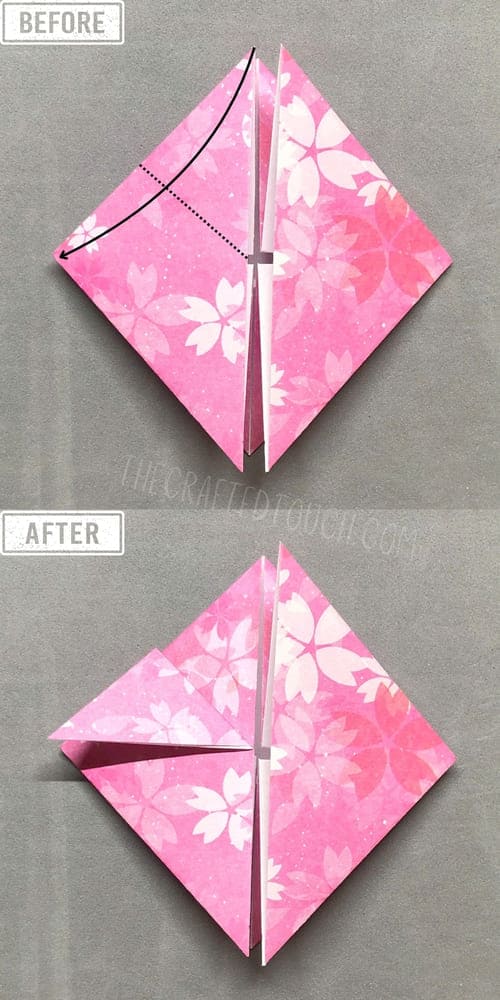
Step 17: I do the same with the bottom corner of the triangle, folding it up diagonally to make a diamond shape on the left.
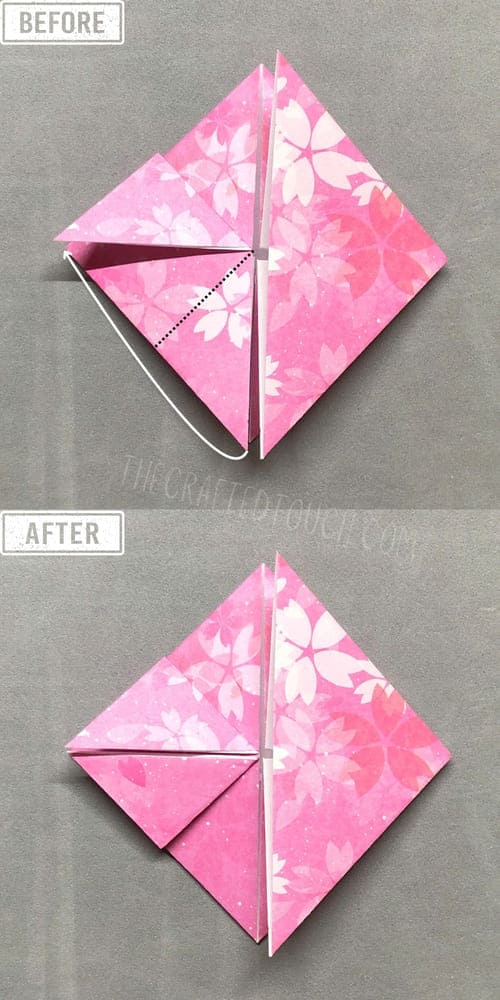
Step 18: Do it’s again with the right side. Fold the top corner of the right triangle down diagonally.
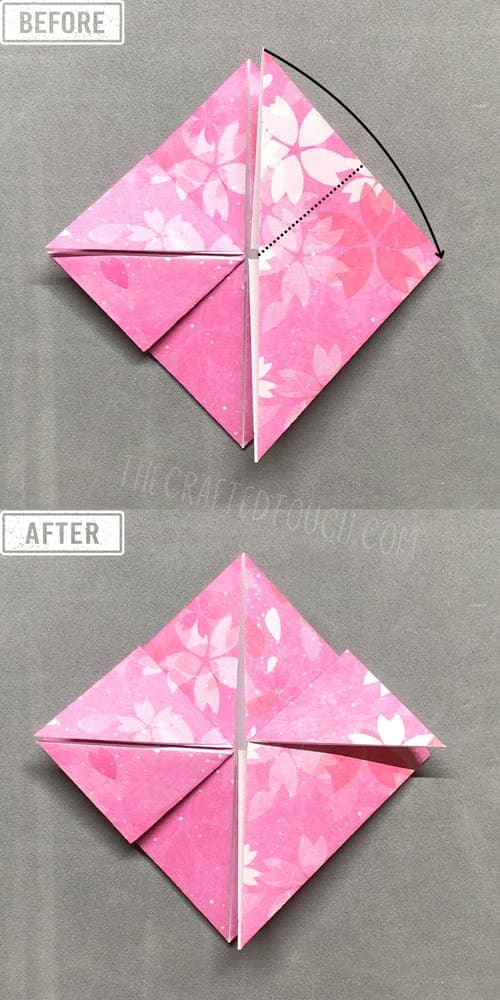
Step 19: And i folded the bottom edge of the right triangle up at an angle, just like I did on the left side
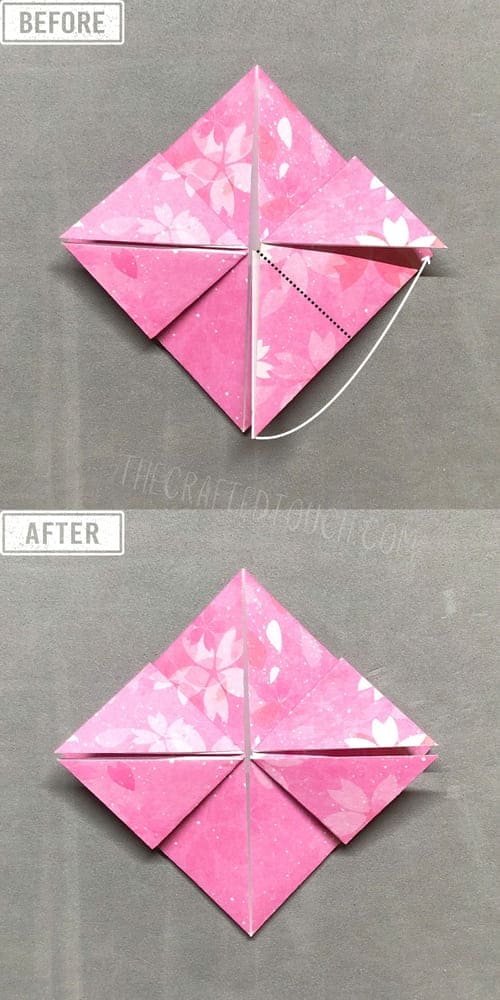
Step 20: I started shaping the left side first. I took the small triangle at the bottom and gently pulled it down, opening it up a little.
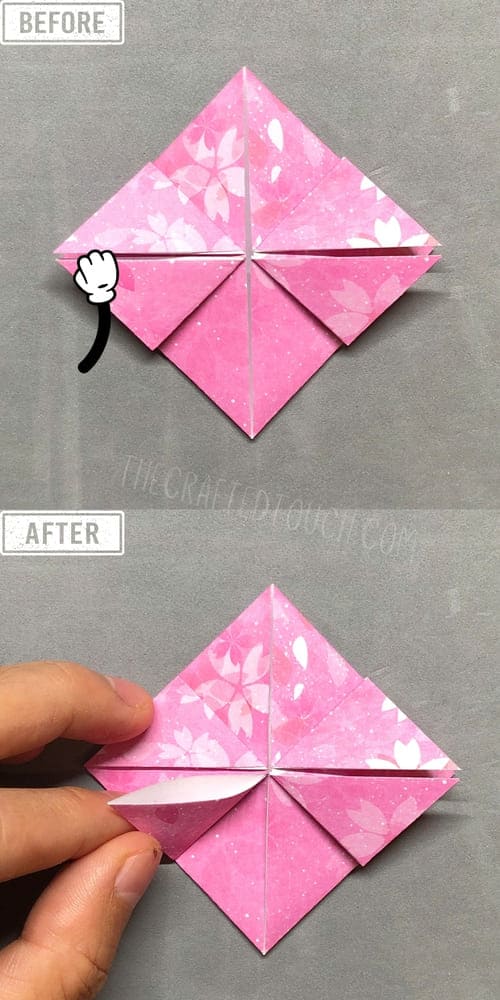
Step 21: I opened the triangle wider
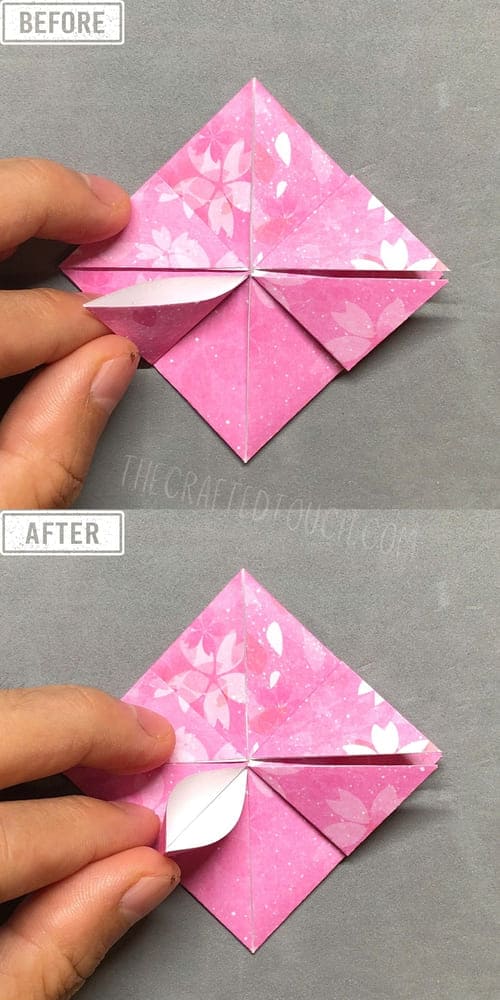
Step 22: And gently pressed it down with my left hand to turn it into a square.
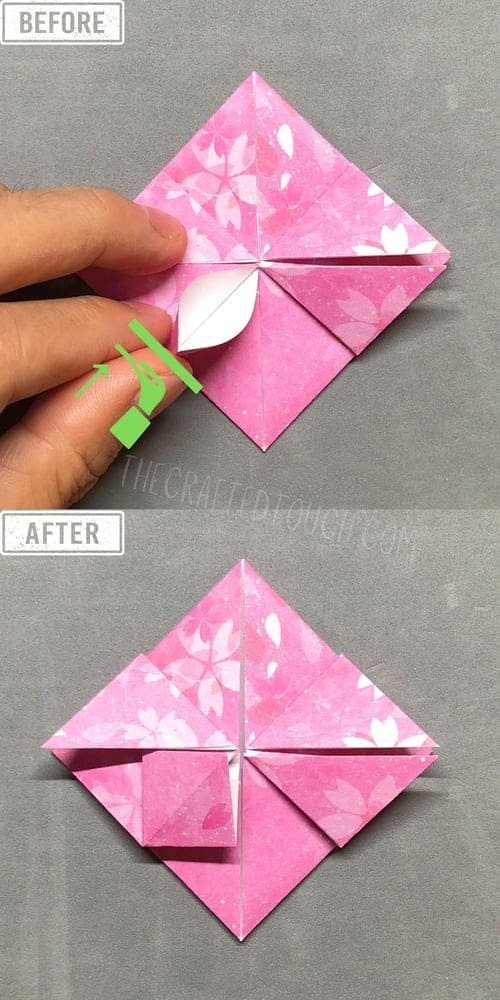
Step 23: I did the same with the top triangle on the left. I pulled it up and opened it out.
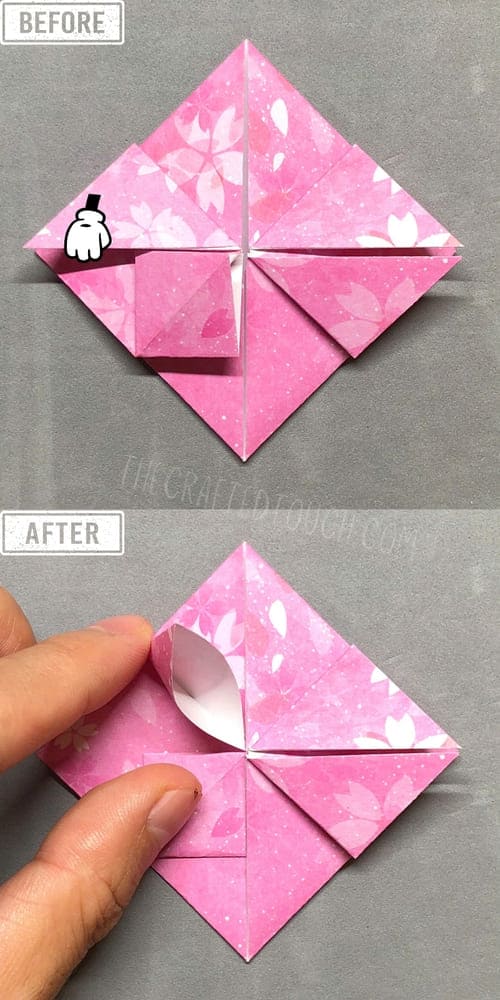
Step 24: Then I pressed it down to make a small, neat square.
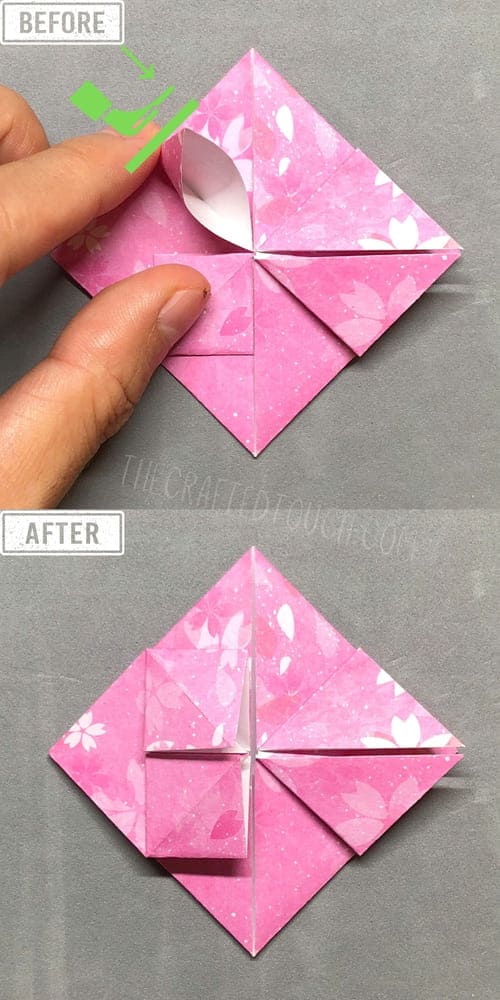
Step 25: I did the same with the top triangle on the right side. I gently lifted it up and opened it to the sides.
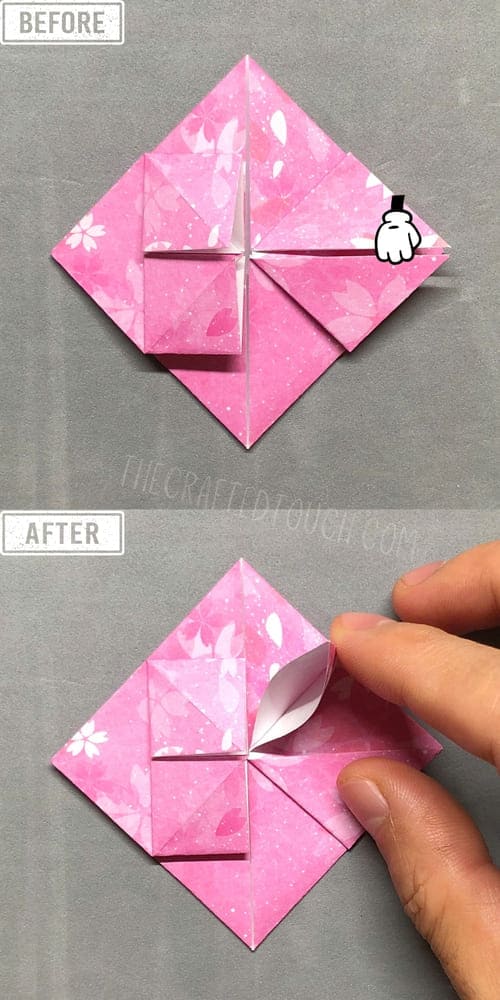
Step 26: Then I pressed it down to make a square.
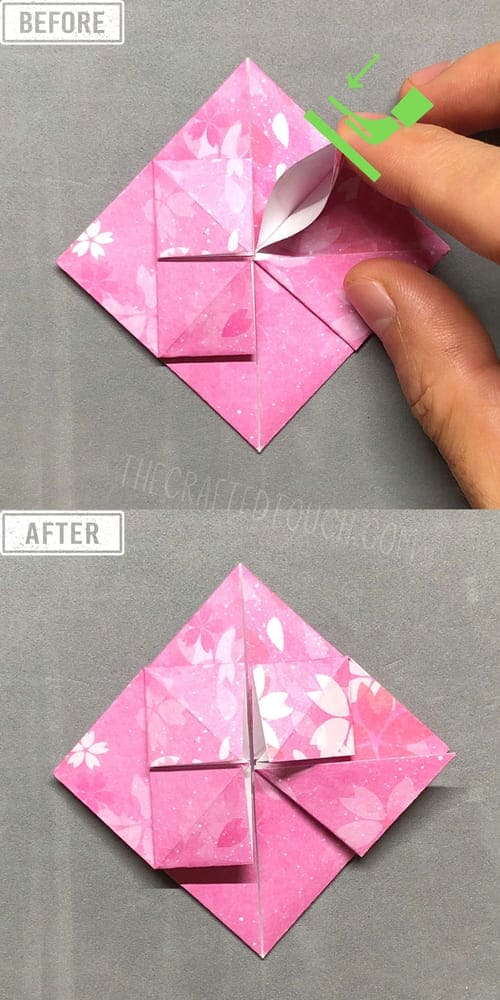
Step 27: Now for the last triangle on the bottom left, I pulled it down and opened it out.
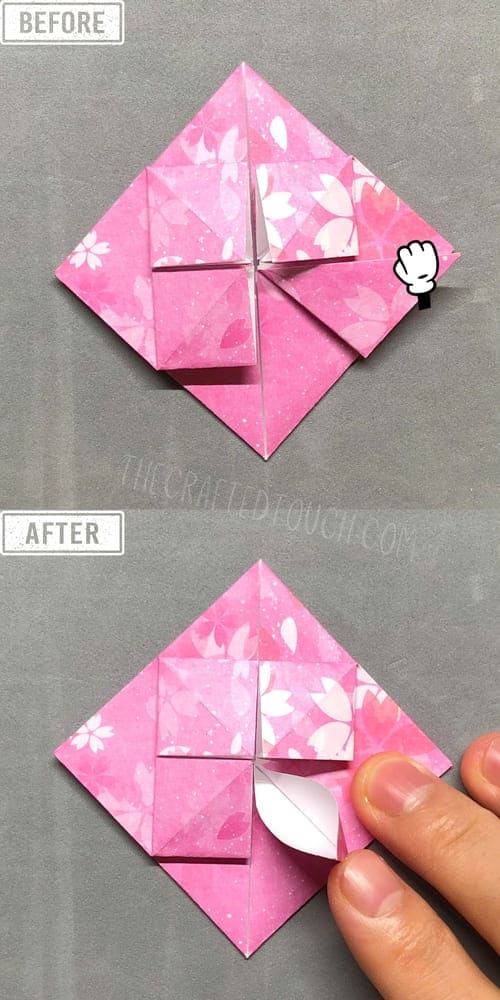
Step 28: I pressed it down to make the last square
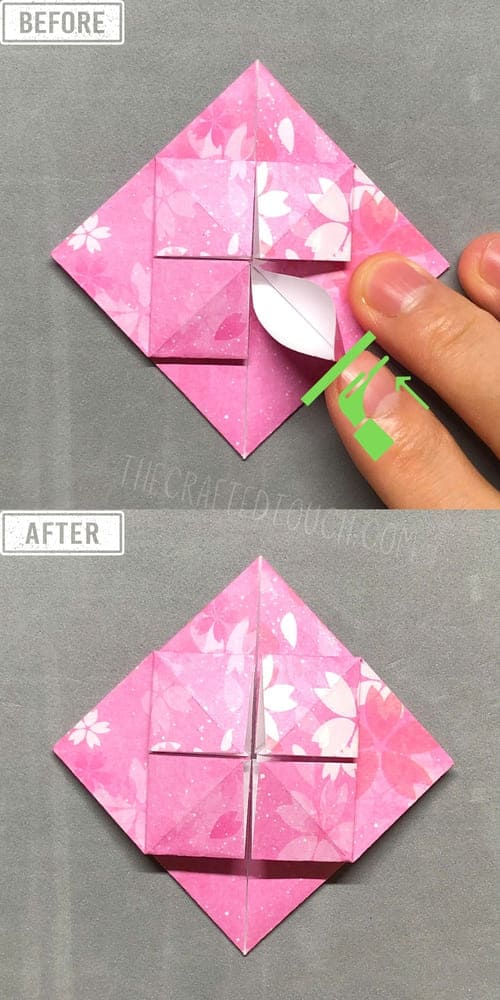
Step 29: Now I began the details. For the bottom-left square, I folded the top point down at an angle to make a tiny triangle.
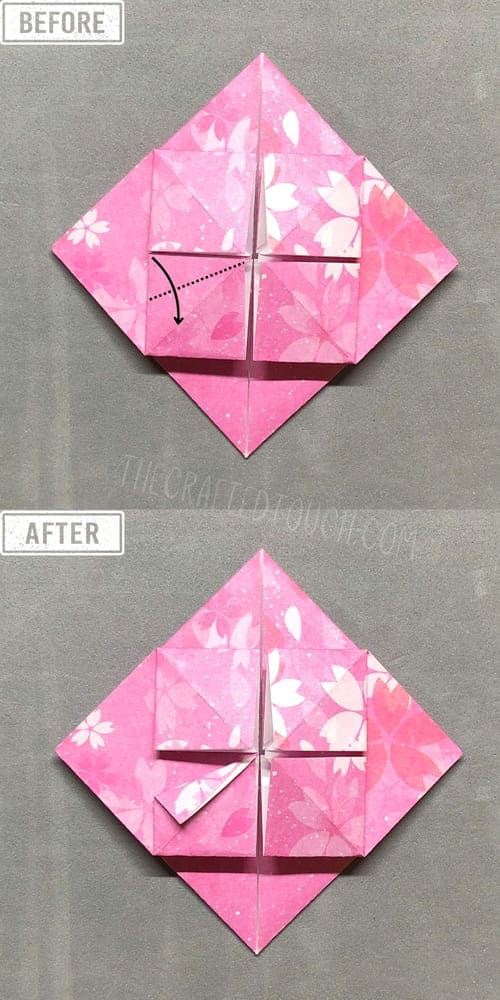
Step 30: I do the same with the bottom right corner of the square, folding it up diagonally
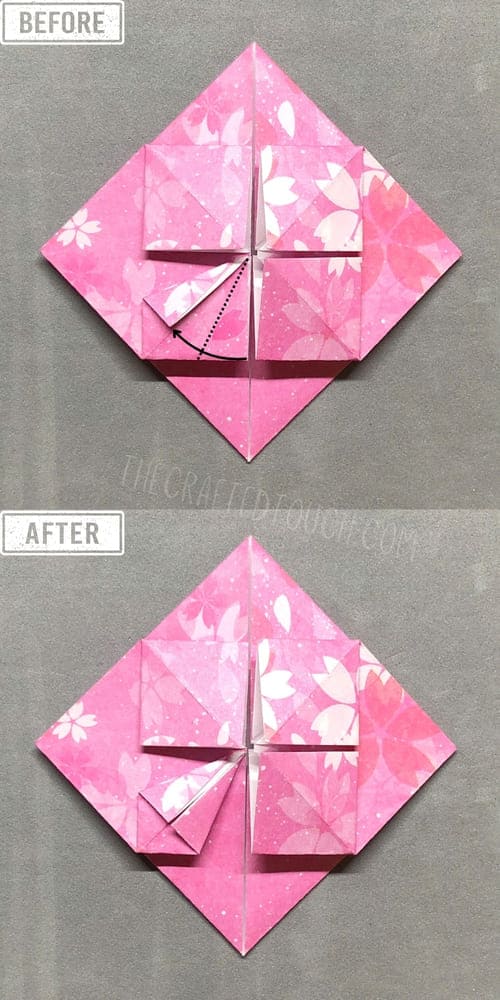
Step 31: Next, I moved to the square above and folded its bottom-left corner up at an angle, just like before.
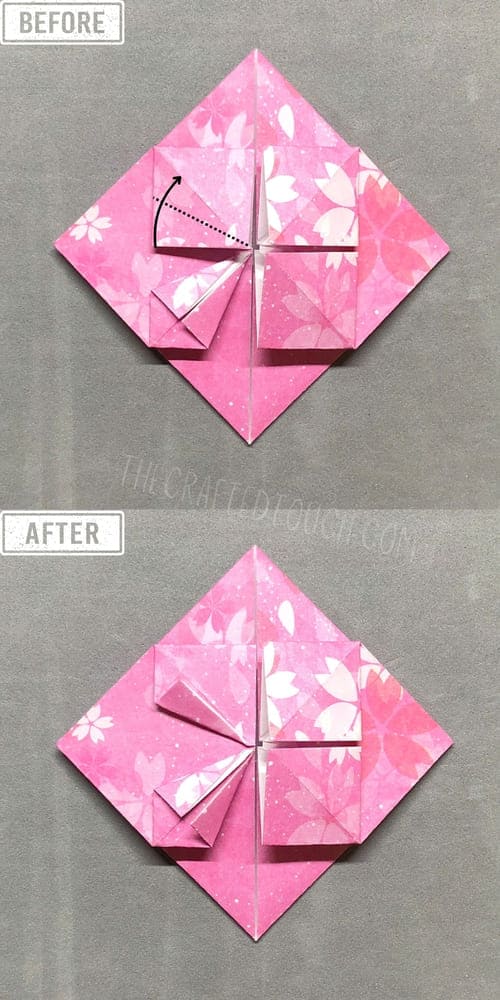
Step 32: After that, I folded the top-right corner of the square down at an angle to make another small triangle.
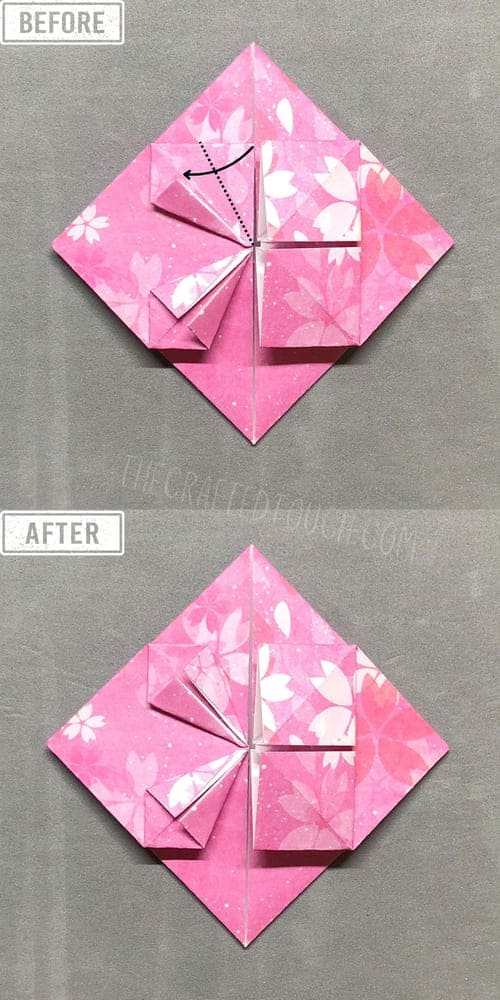
Step 33: Move to the next square, i folded the top left corner down
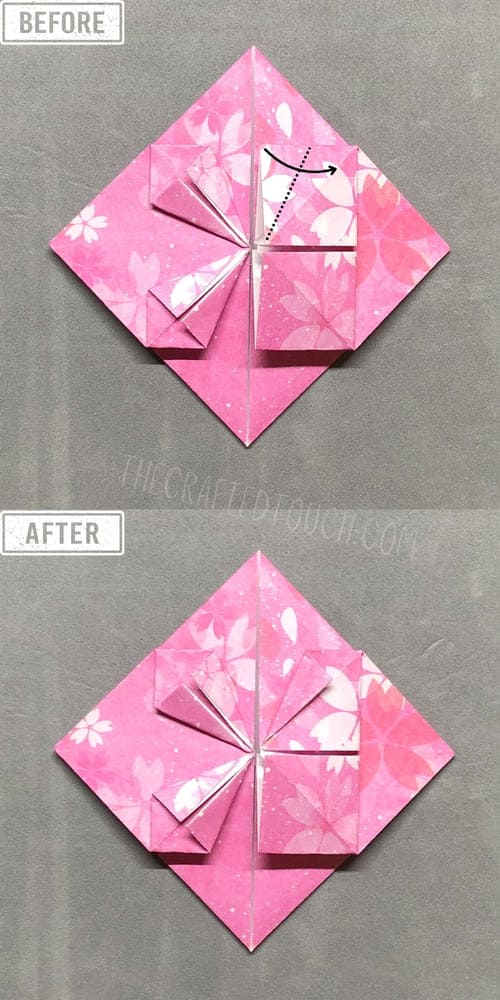
Step 34: And i folded the bottom-right corner of the square up at an angle to make another small triangle
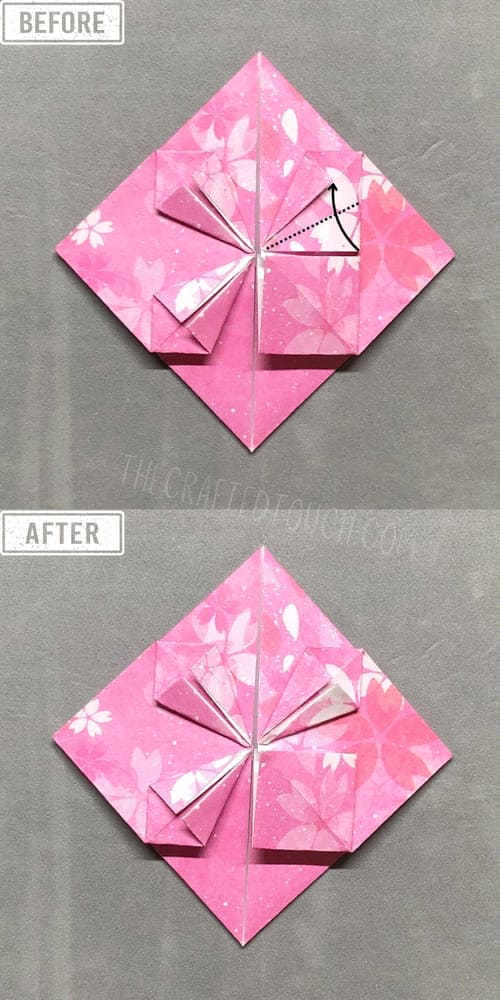
Step 35: Just one last square to go! I folded its top-right corner down at an angle
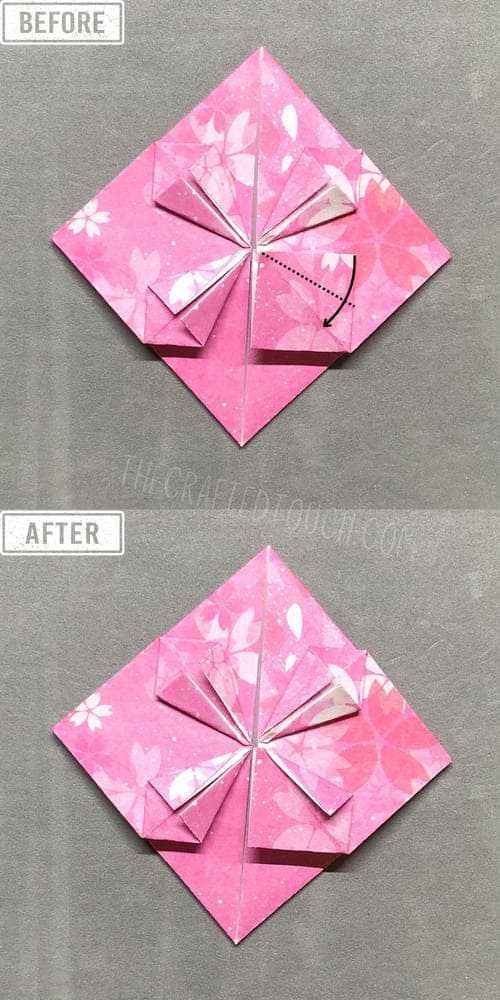
Step 36: And i folded the bottom-left corner up too
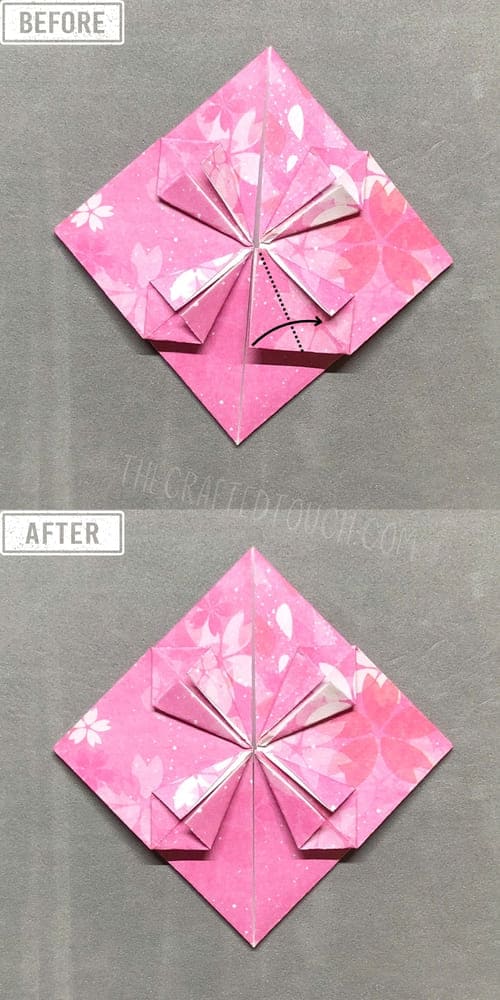
Step 37: Now it’s time to make the flower petals. I started by opening the first small triangle
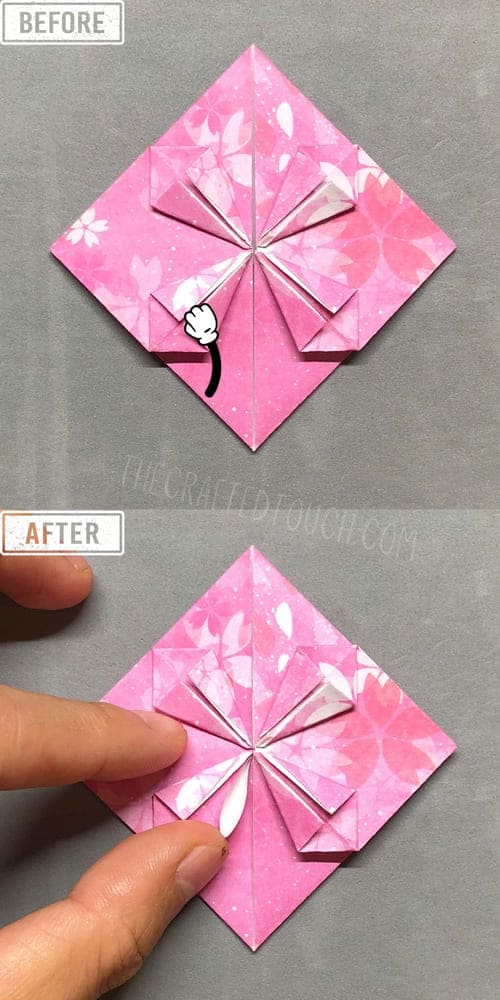
Step 38: I gently pressed it down, following the fold as shown.
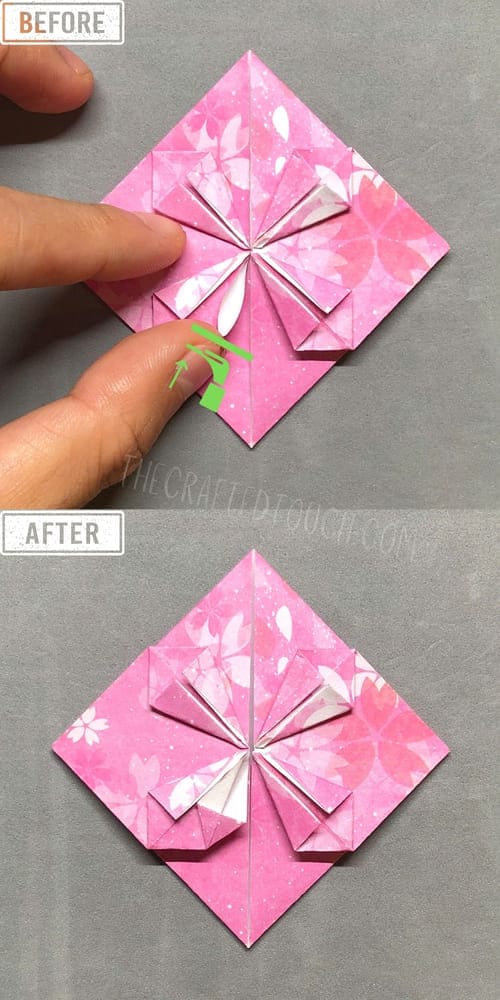
Step 39: I did the same with the next triangle to make the second petal
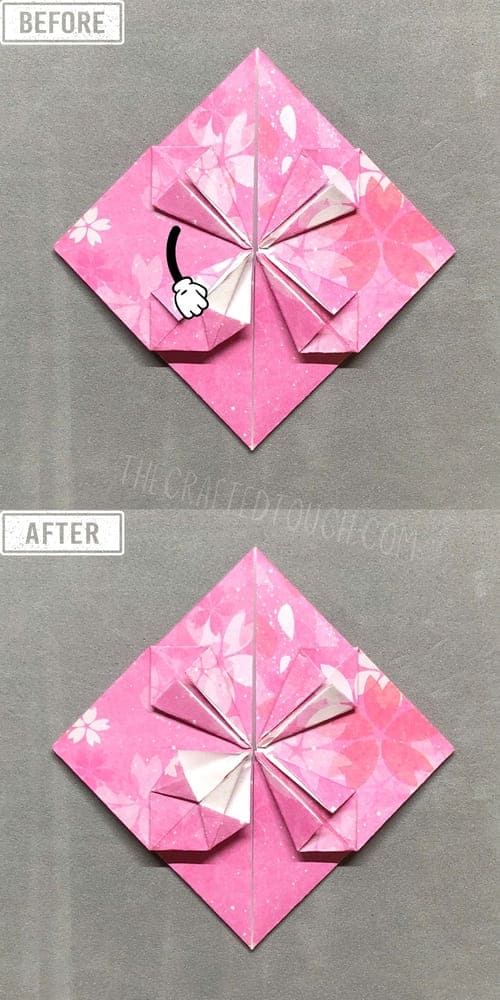
Step 40: I kept going with the other little triangles, opening each one and pressing it down to make a third tiny petal
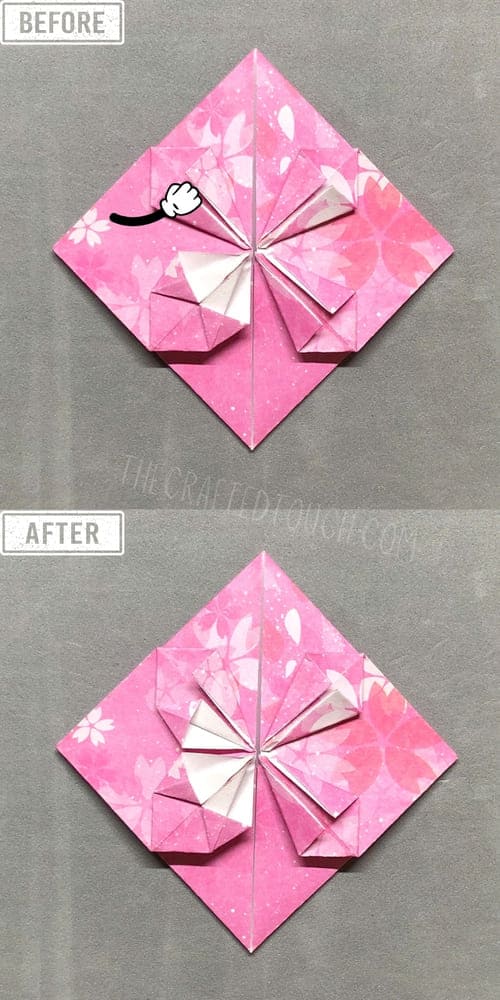
Step 41: Then I opened the fourth triangle to make the next flower petal
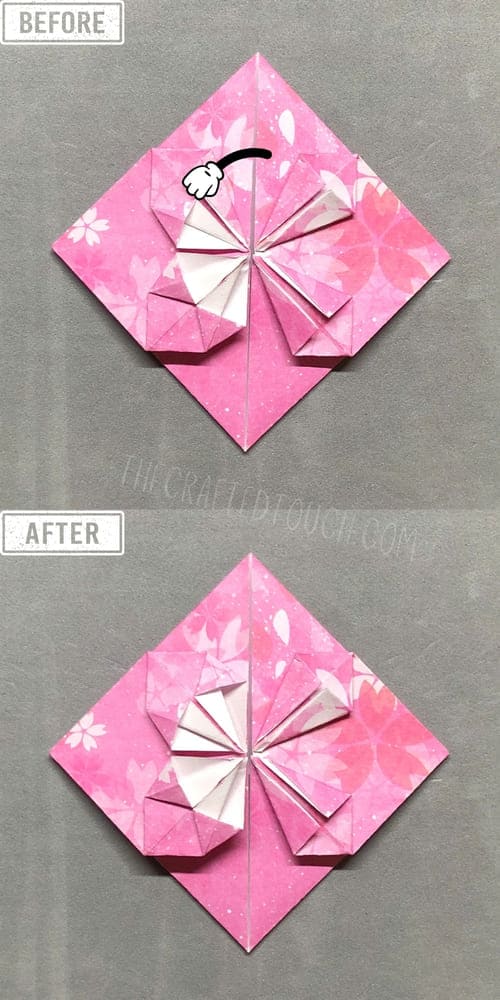
Step 42: I repeated the same steps on the right side to make the other petals. Now I have five beautiful flower petals.
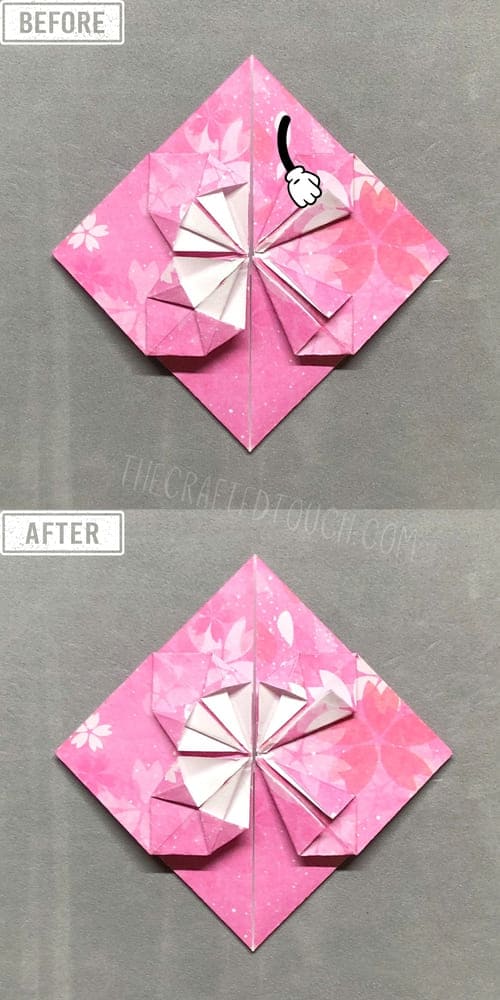
Step 43: I kept going and opened up the sixth flap to make the sixth flower petal
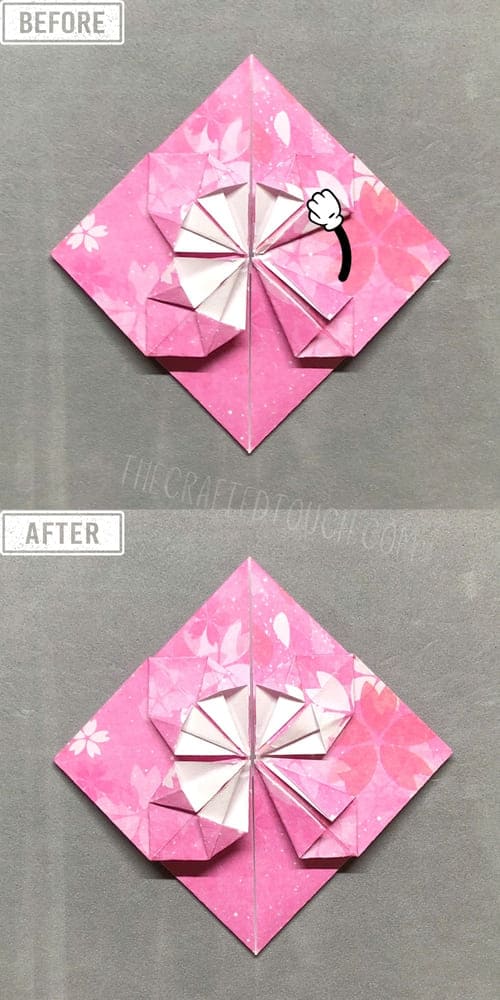
Step 44: Then I opened the seventh flap just like before to finish the seventh petal
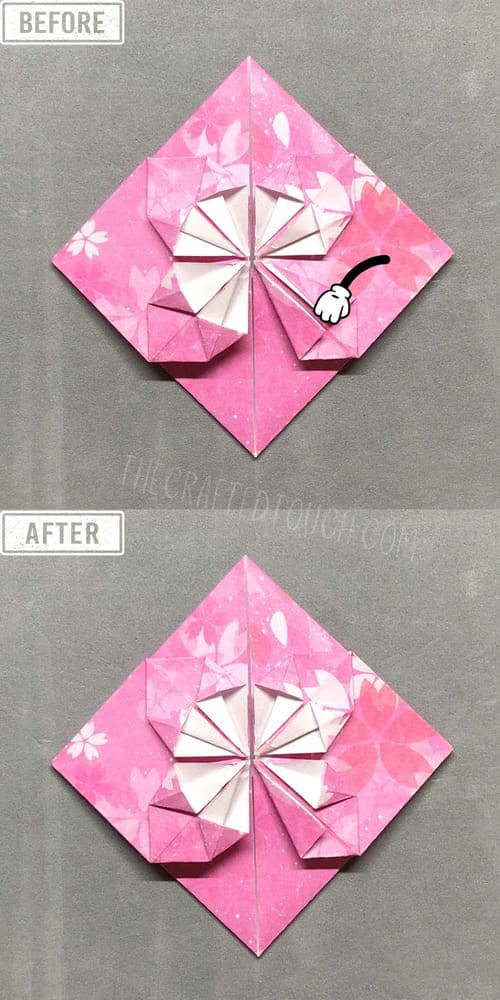
Step 45: This is the final petal. Yay! All my flower petals are done!
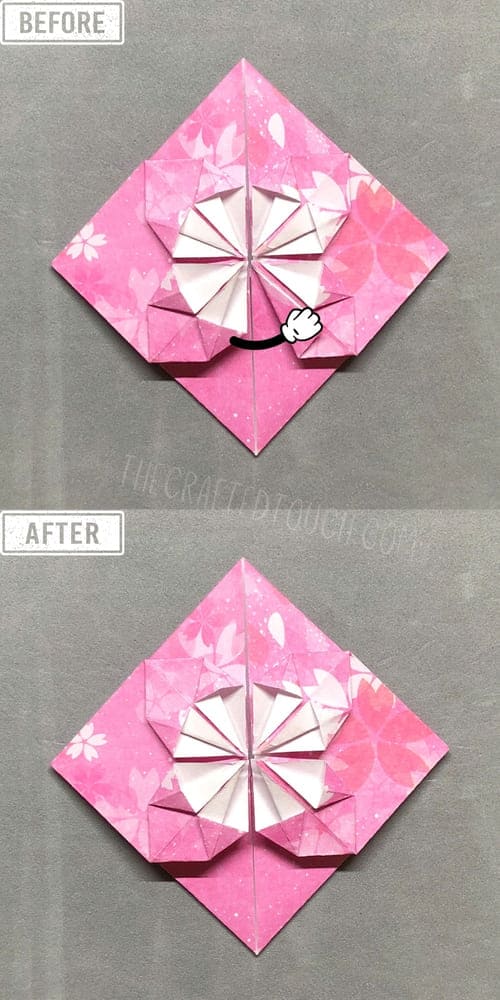
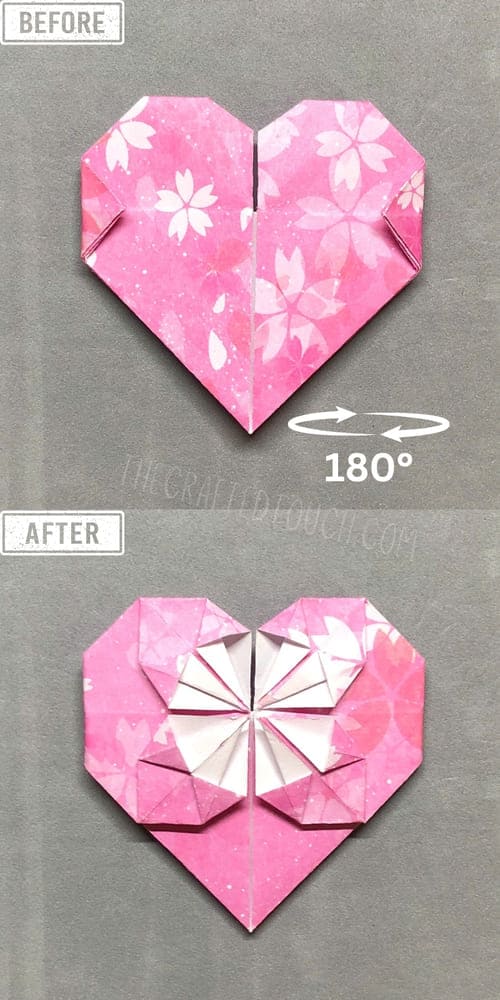
Step 46: Now I flip the whole paper over to the other side.
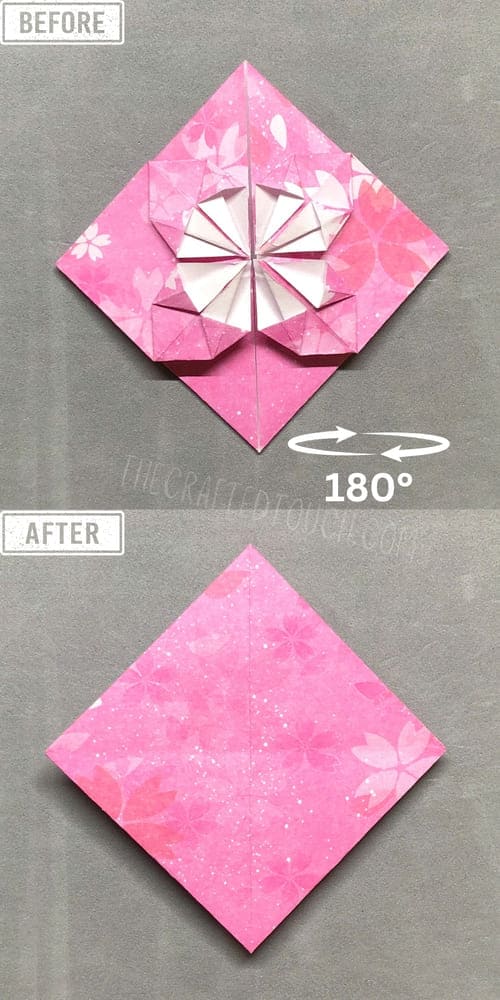
Step 47: I follow the fold and fold the diamond in half from the top down
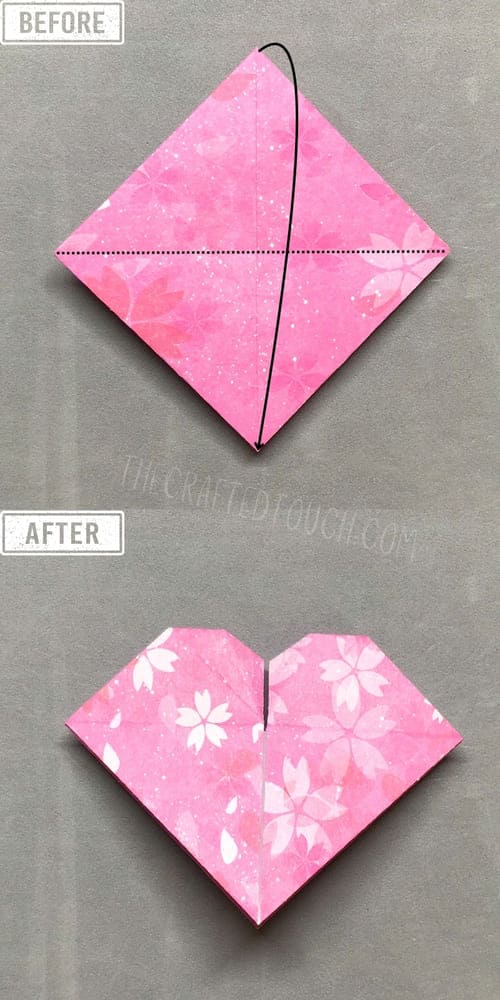
Step 48: It’s starting to look like a heart now, right? To make the heart neater and prettier, I fold the left corner in just a little bit along the dotted line
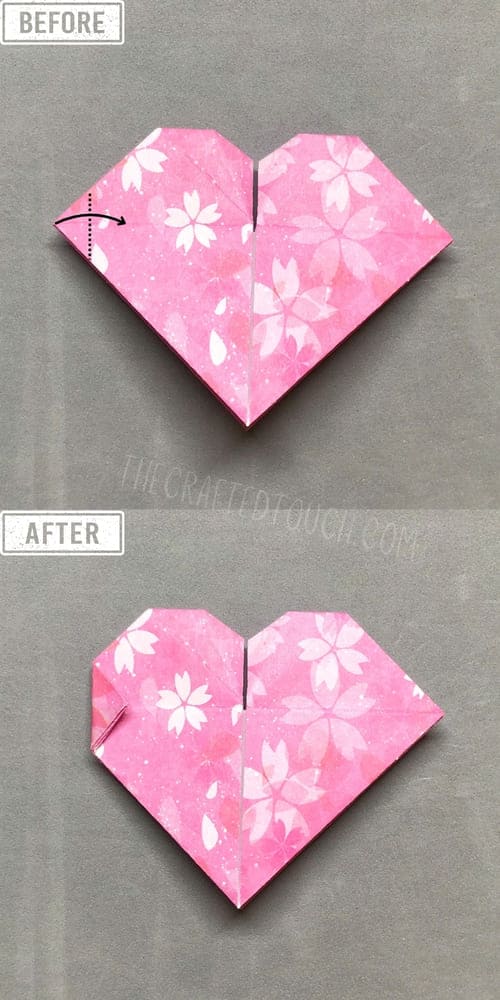
Step 49: I do the same on the left side. I fold a small part in to make a little triangle on the right.
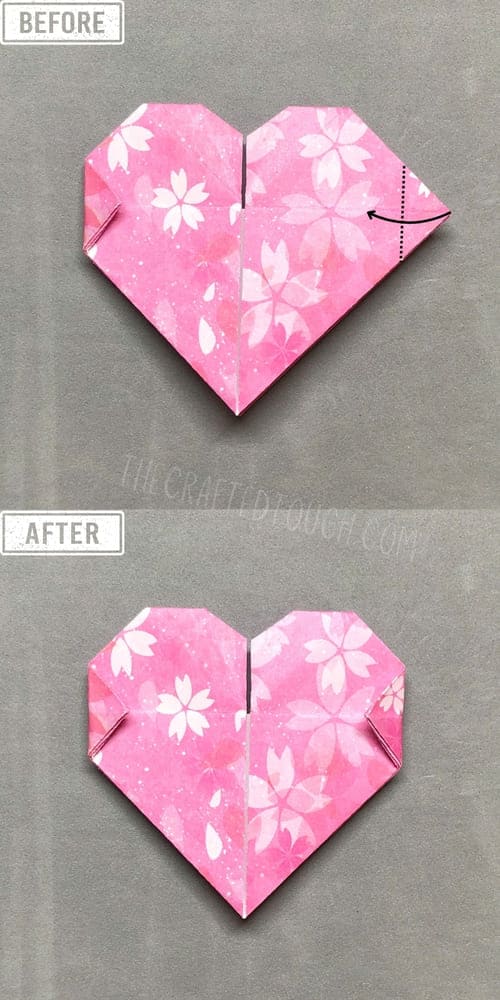
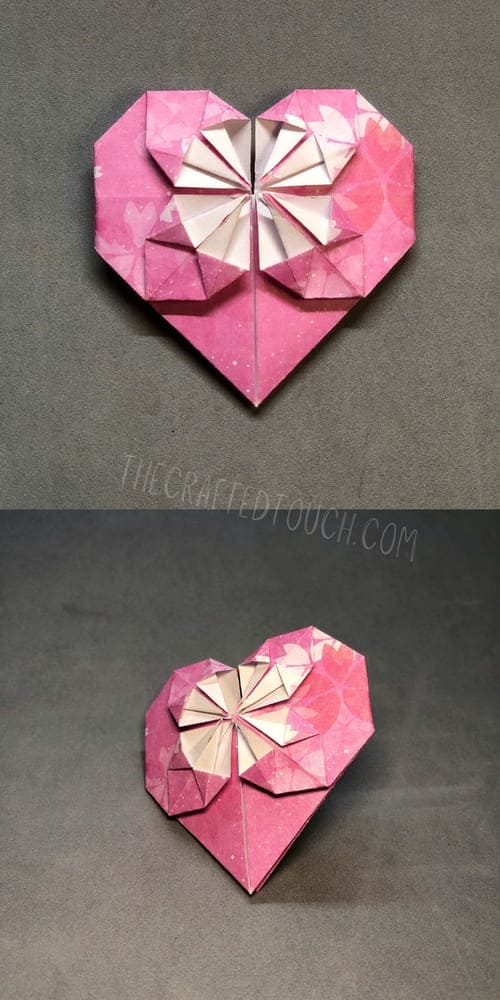
Step 50: Now I flip the folded paper over, and there it is, my Flower Heart Origami is finished!
TIPS FOR SUCCESS
| PAPER | The thinner the paper, the better the petals bloom. |
| FOLDING PROCESS | Fold gently. Don’t press too hard; that might tear or wrinkle the paper. |
| YOUR MOOD | Don’t worry if your first try isn’t perfect. The second one always turns out better! |
AVOIDING SOME MISTAKES
| PAPER | Choosing the wrong paper size makes your shape worse and results in failure. |
| FOLDING IN WRONG ORDER | One wrong step will make the whole model skewed. Do it step by step according to the picture! |
| NOT PATIENT | Origami needs to be slow and steady; otherwise, the paper will easily wrinkle or tear. |
| FOLDING HARD | The petals are very thin, so stroke gently to keep the shape soft. |
CONCLUSION
And just like that, your paper has turned into something beautiful! A flower heart by origami is successfully folded by your clever hands. This flower heart is more than a decoration; it’s a heart you made yourself. I hope you had fun when folding with me. Try gifting it to someone special or make another one for yourself. Every fold is a little moment of caring and cosseting.
