Need a quick, fun, and relaxing craft project to try right now? Let me show you how to fold a simple origami boat using just one square sheet of paper. This easy guide is great for beginners and only takes a few minutes. I’ll walk you through each step slowly and clearly, so you can follow along even if this is your first time folding.
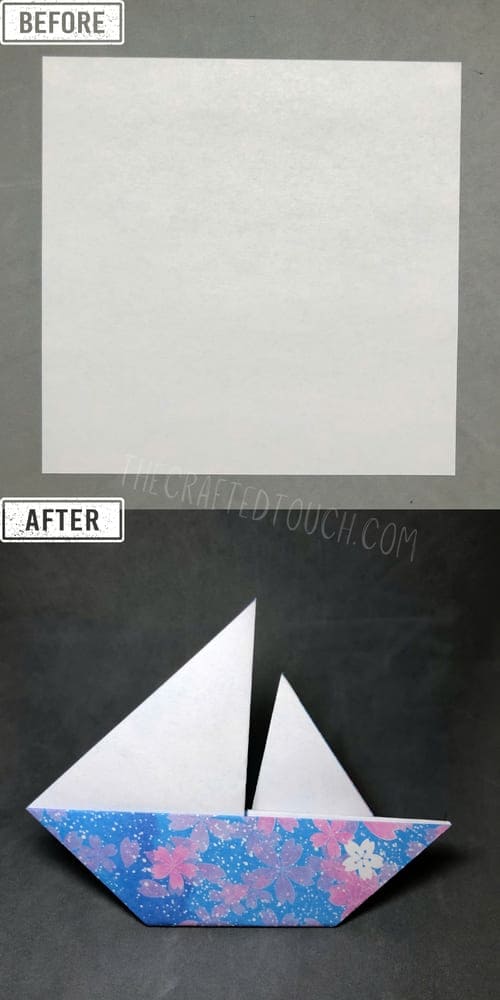
Step 1: Fold the First Diagonal
Let’s get started with the basics!
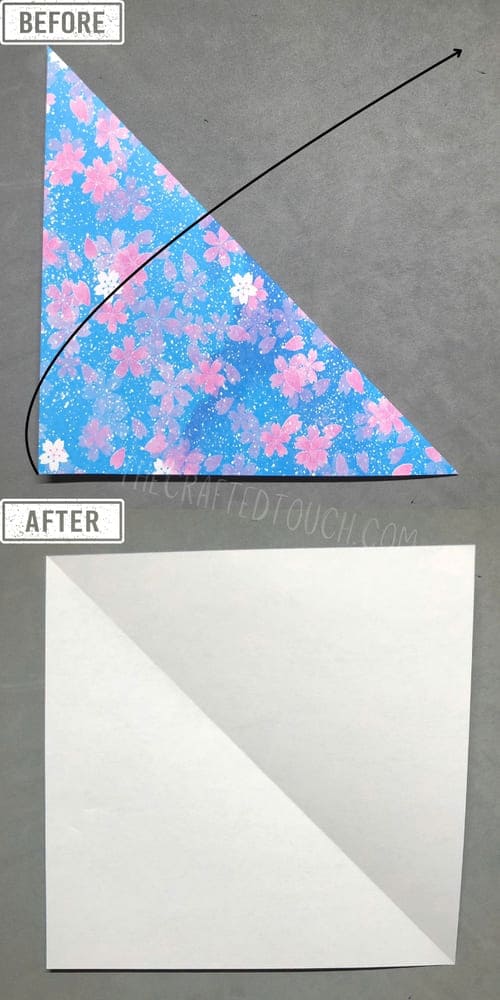
First, I use a square paper that’s 15 x 15 cm. You can use a similar size as long as it’s a square. Place it flat on your table, with one corner pointing toward you, like a diamond.
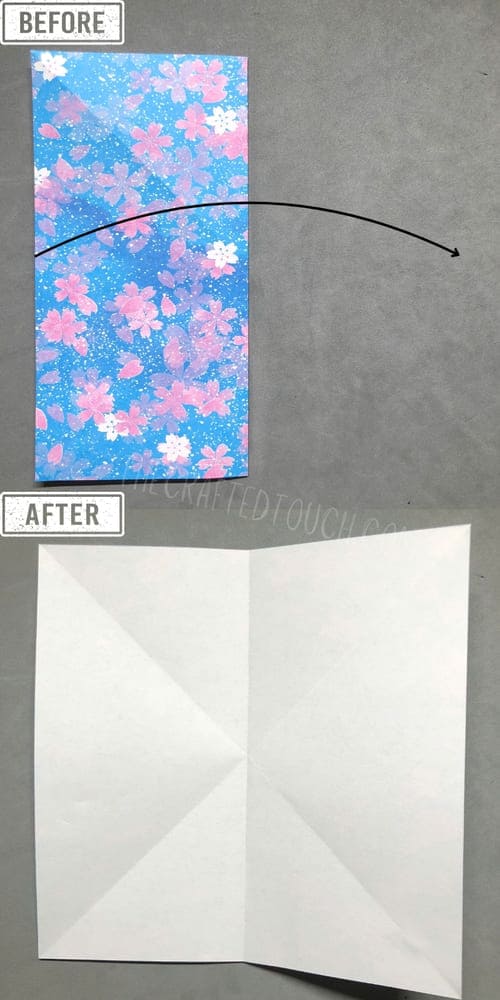
Now, take the top right corner and fold it down to the bottom left corner. Press the fold gently but firmly to make a clear crease.
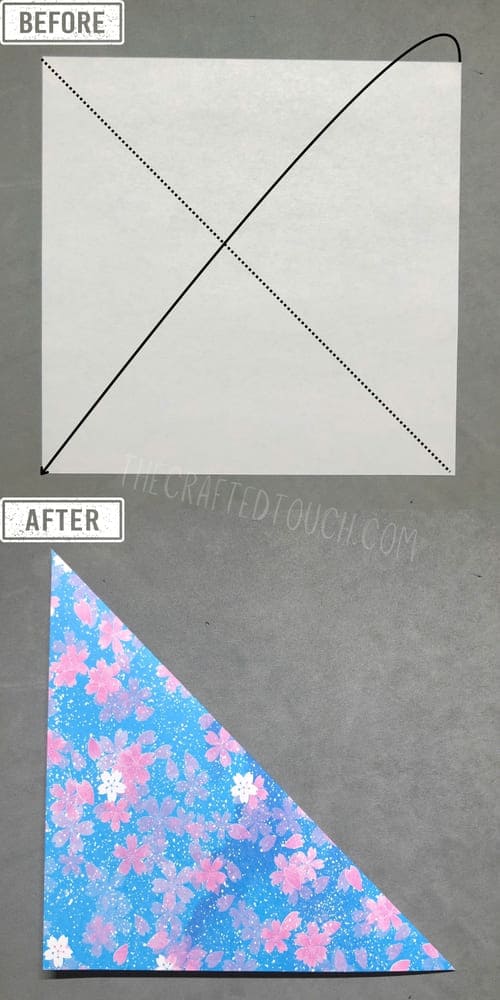
Then, open it back up. You should now see a crease running diagonally across the paper.
Step 2: Fold the Second Diagonal
Let’s make another diagonal fold to shape the base.
Take the bottom right corner and fold it up to the top left corner. Again, press along the fold and then unfold it.
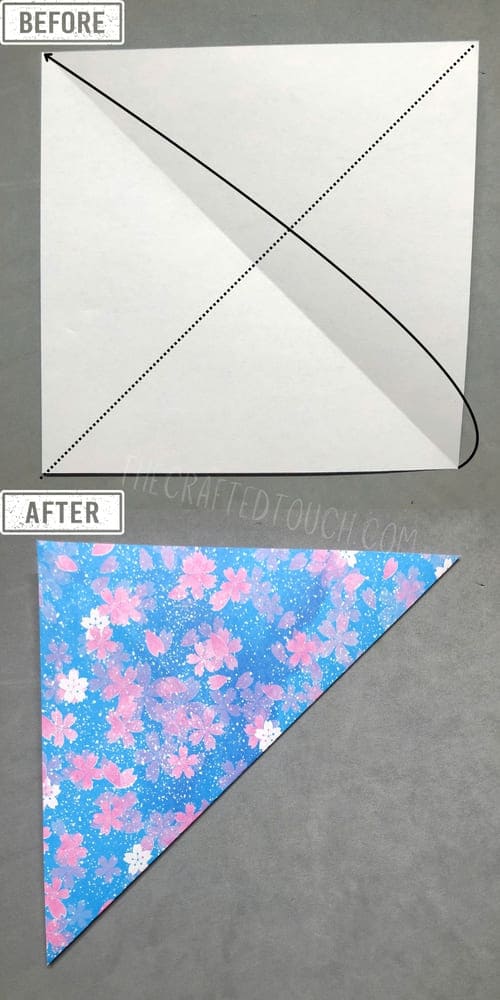
Now, your paper should show two diagonal lines crossing in the center, forming an “X.”
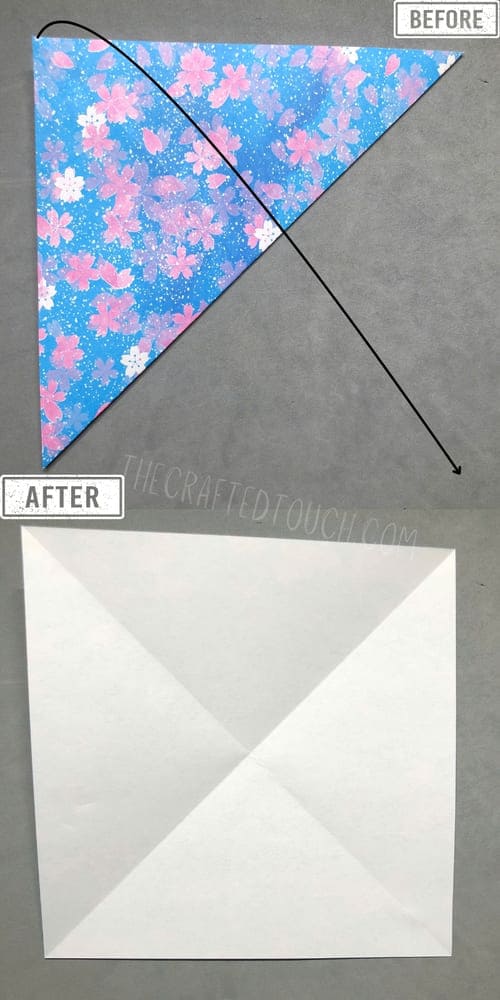
Step 3: Fold Vertically
Next, we’re going to add vertical symmetry.
Fold the right edge of the square over to meet the left edge. Crease it well, then open the paper back up.
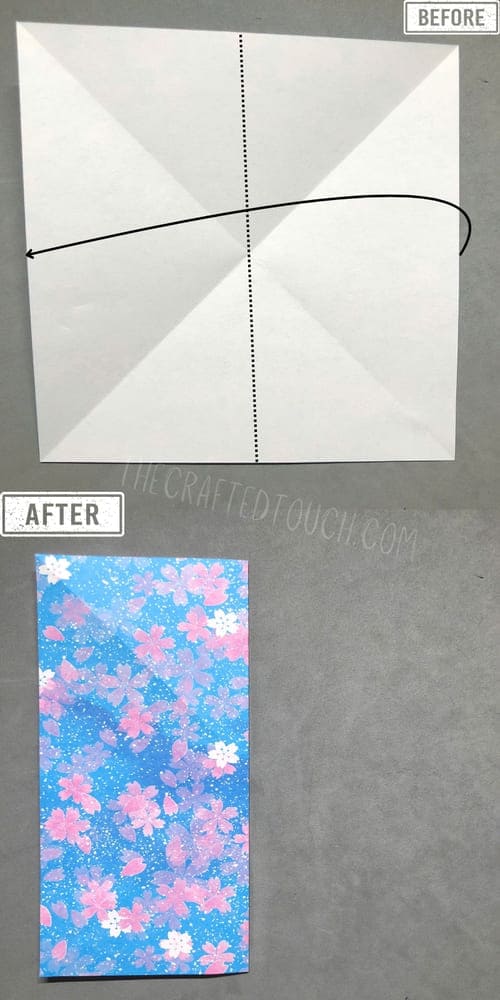
This fold helps define the middle line for our next steps.
Step 4: Fold Horizontally
It’s time to complete the basic crease pattern.
Fold the bottom edge of the square up to meet the top edge. Make a strong crease, then open it back out.
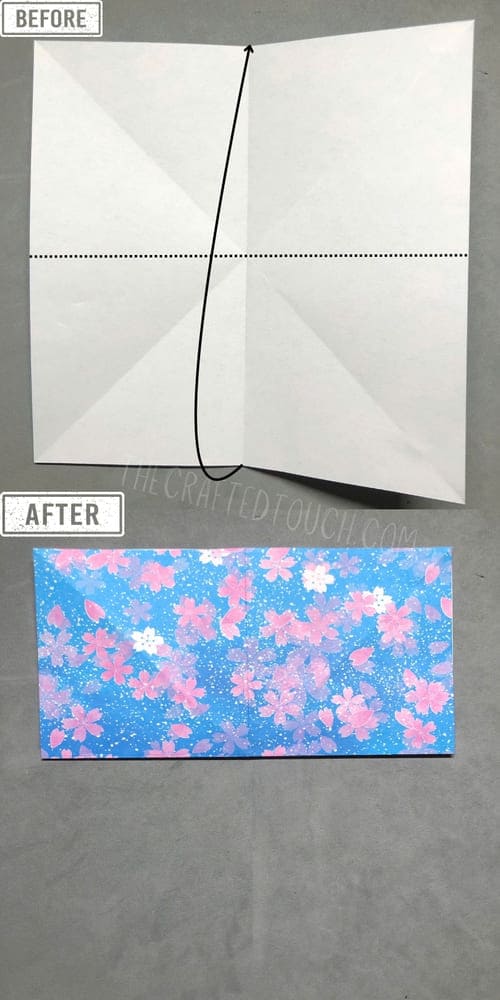
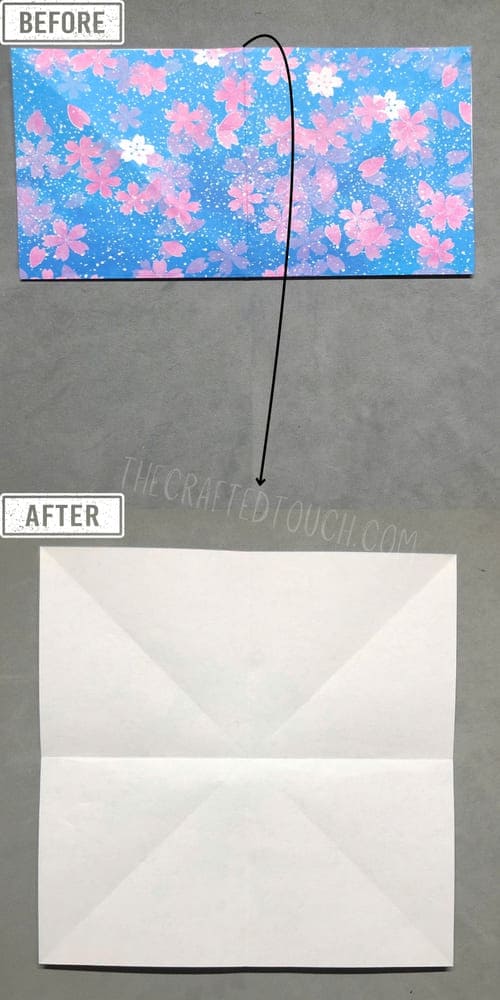
Your square should now have diagonal and straight creases, dividing into several smaller triangles and squares.
Step 5: Fold the Top Right Corner Down
Now, let’s start shaping the sail.
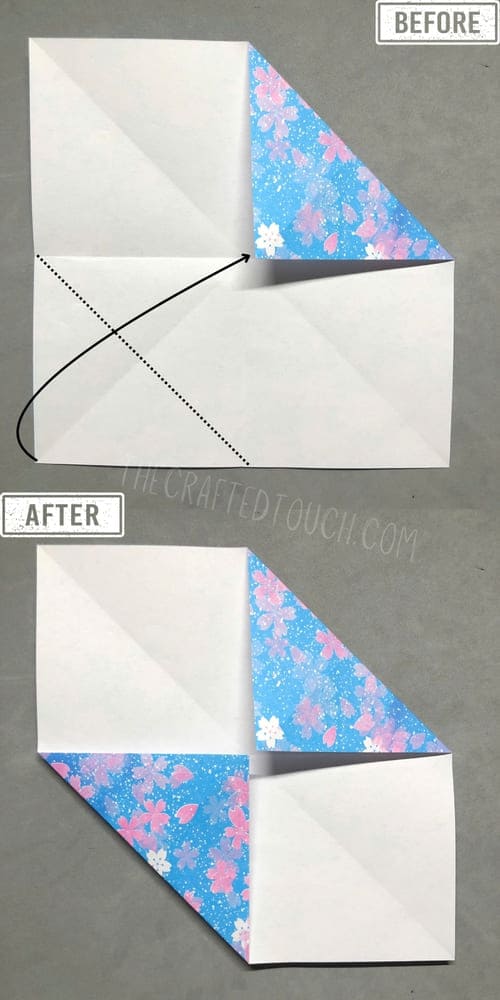
Focus on the top right quarter of the square. Fold that corner down towards the center of the square, lining it up with the central point where all the creases meet. This small fold will become part of the sail later.
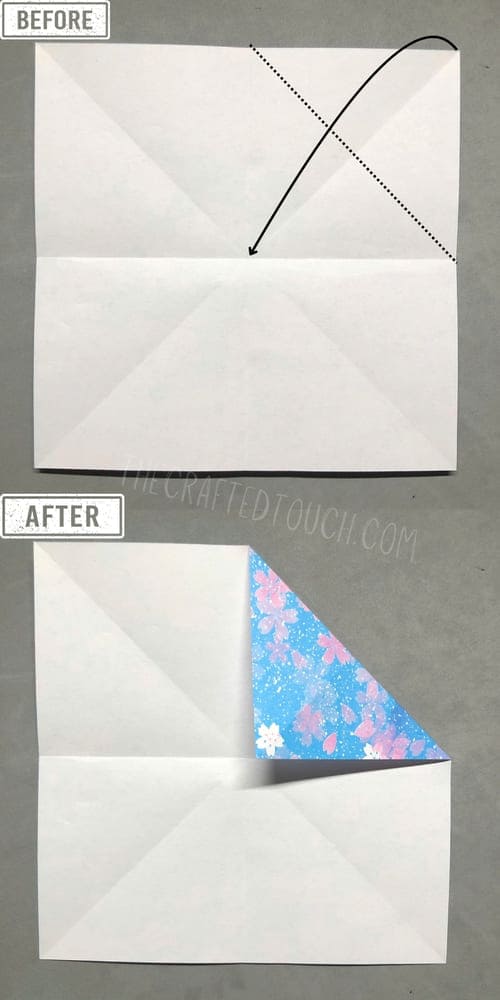
Step 6: Fold the Bottom Left Corner Up
Let’s mirror that move.
In the opposite corner—the bottom left—fold the tip upward toward the center. Try to line it up as neatly as possible with the previous fold. These two folds together form the first structure of our future boat.
Step 7: Rotate the Paper
We need a better angle now.
Turn the entire paper 45 degrees counterclockwise. This helps us work on the remaining folds from the right direction. The folded corners should now sit at the top right and bottom left positions.
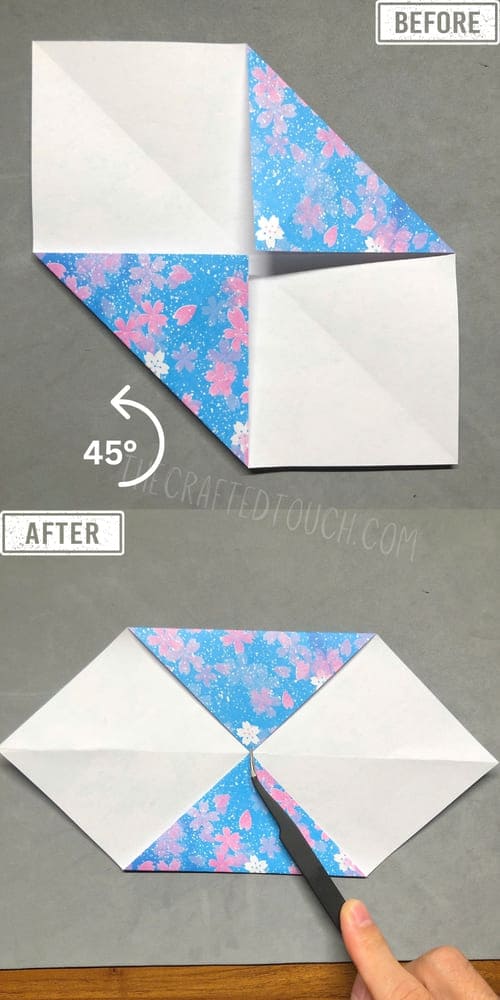
Step 8: Lift the Remaining Corners
Now, we’ll use the other two corners.
Pick up the two unfolded corners on the left and right sides. Gently lift them as shown in the visual. Be careful to keep the rest of the folds in place.
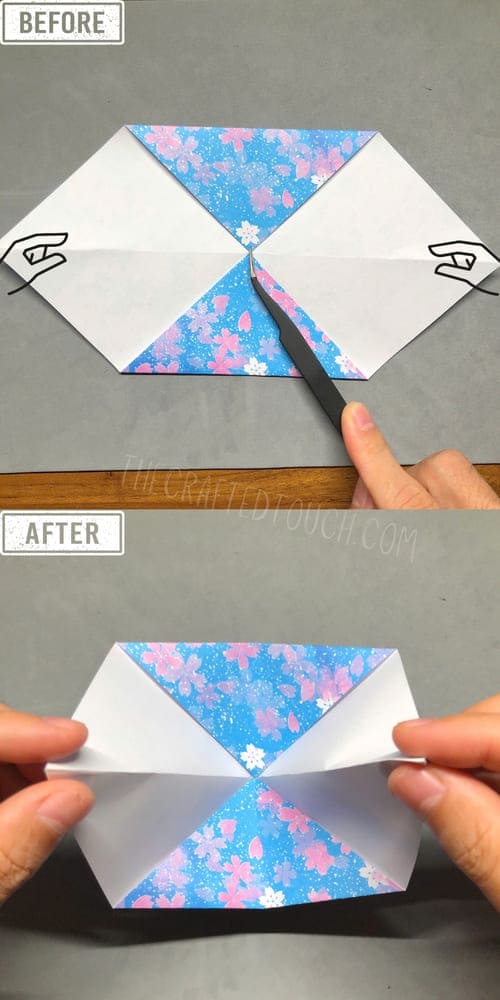
Step 9: Bring the Corners Together
Here’s where it starts to look like a boat!
Pull the two lifted corners in toward each other. As you bring them together, they’ll fold into a new shape, like a triangle. Line up the edges so they meet in the center.
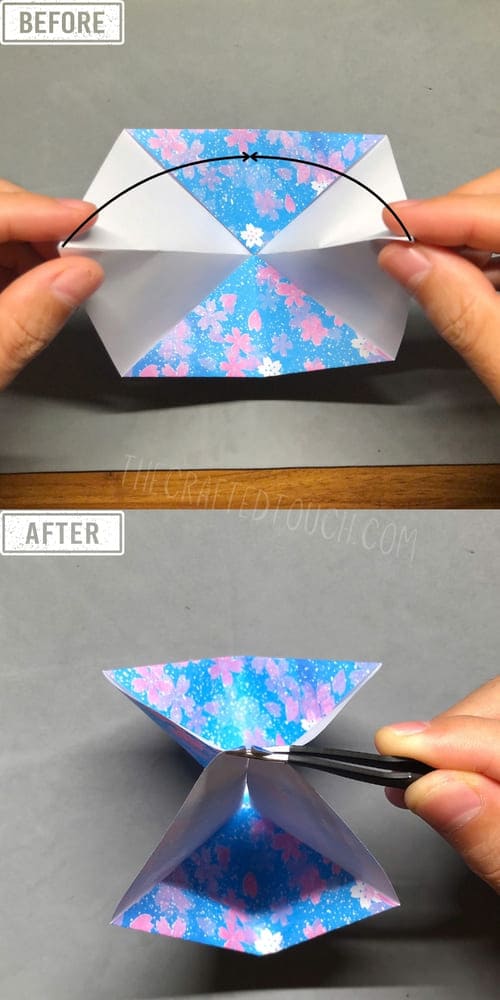
Step 10: Fold the Top Edge Down
Now we secure it.
Flip the top edge down toward the base of the triangle. Press down from the top to flatten it, ensuring everything holds together nicely.
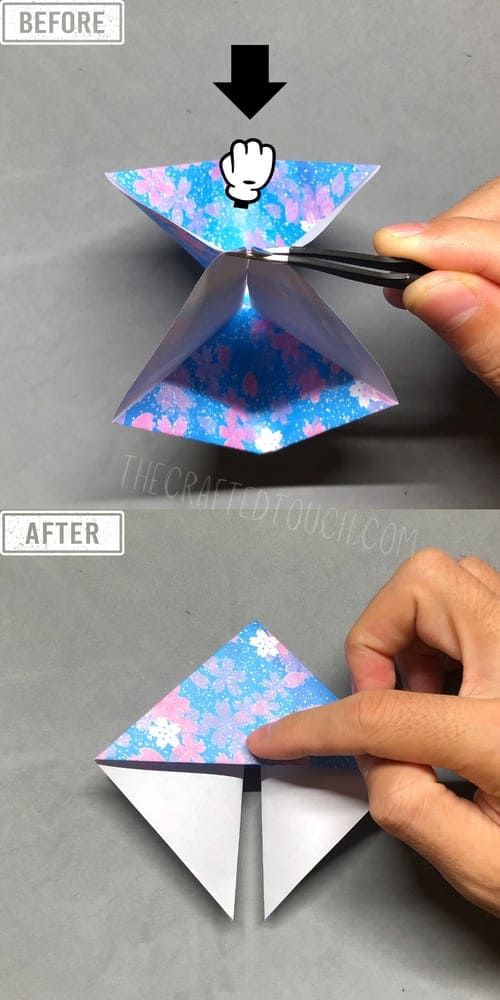
This step helps stabilize the form and makes the model more boat-like.
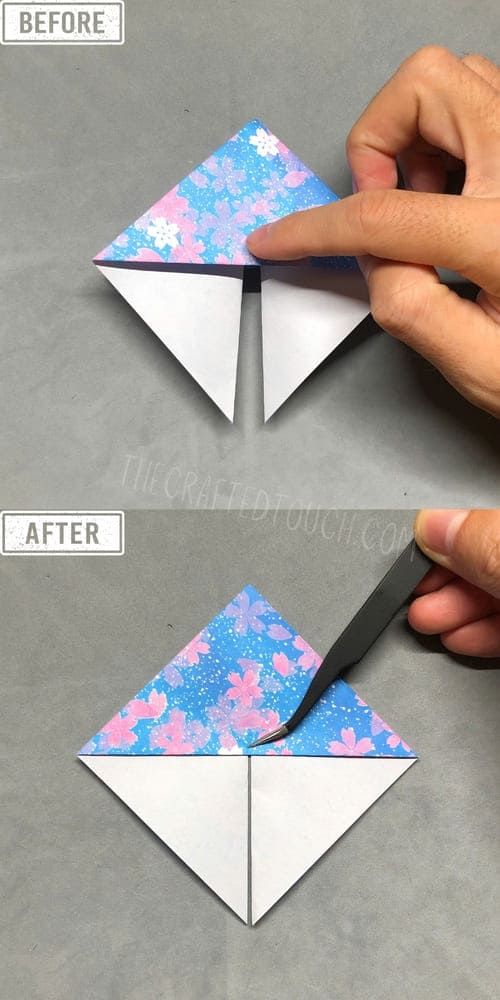
Step 11: Rotate the Model Again
A final turn for the final touches.
Turn your model 180 degrees so the two white triangle flaps point upward. These will become sails, and you’ll work on them next.
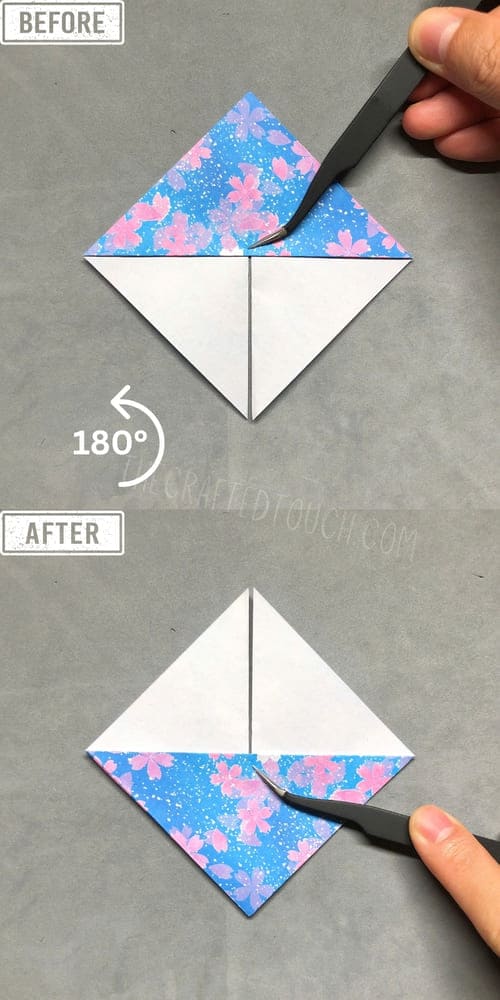
Step 12: Fold the Left Triangle Down
Time to adjust the sail.
Take the white triangle on the left side and fold it downward. Fold from top to bottom so that the tip now points downward. This creates one side of the sail structure.
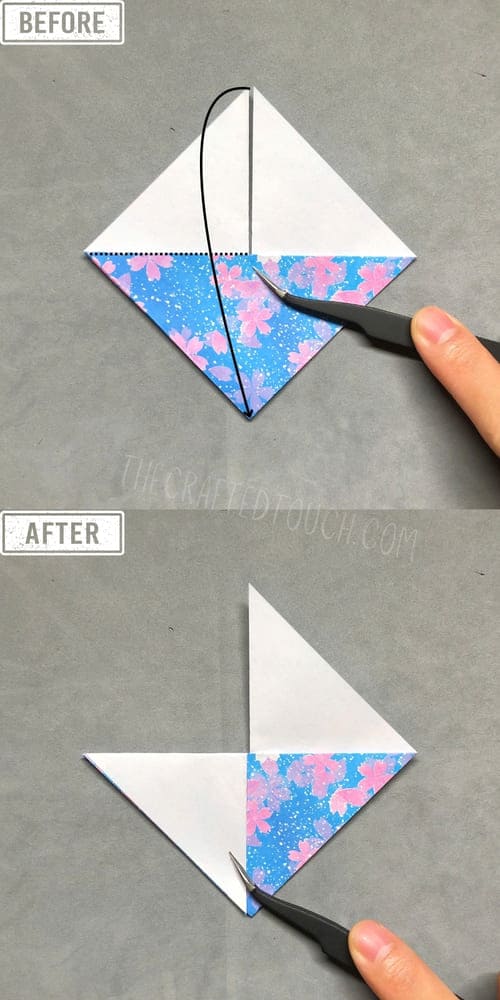
Step 13: Fold the Triangle Back Up Differently
Let’s refine the sail for a natural look.
Now, fold that same triangle back up—but not along the same line. Fold it at a different angle this time, following an imaginary dotted guideline. Tilt the triangle slightly so it looks like a smaller sail leaning toward the left. It should now look like a lopsided sail, smaller than the triangle on the right.
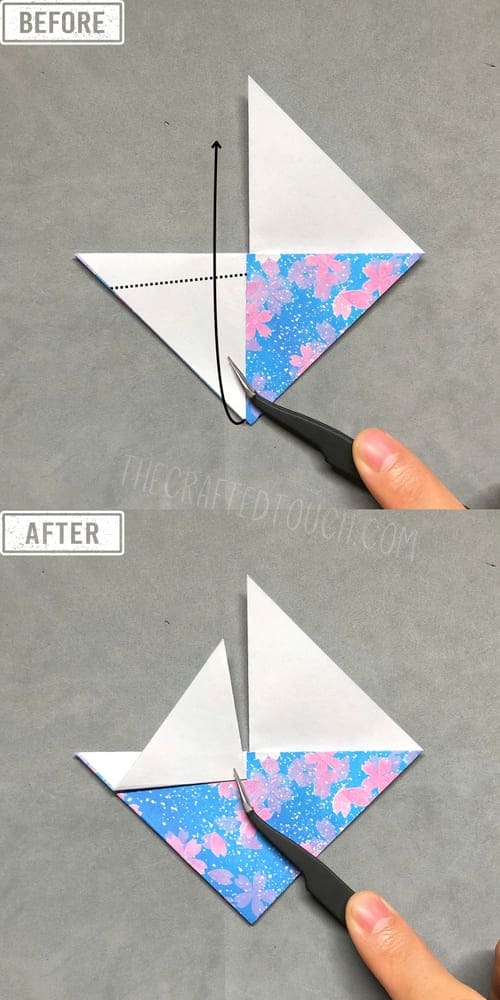
Step 14: Create the Base of the Boat
We’re almost done—let’s shape the base.
At the bottom of the model, fold a small triangle upward. Ensure the pointed end moves close to the center or touches the lower edge of the smaller white triangle on the left. This triangle fold forms the bottom of the boat and helps keep the shape balanced.
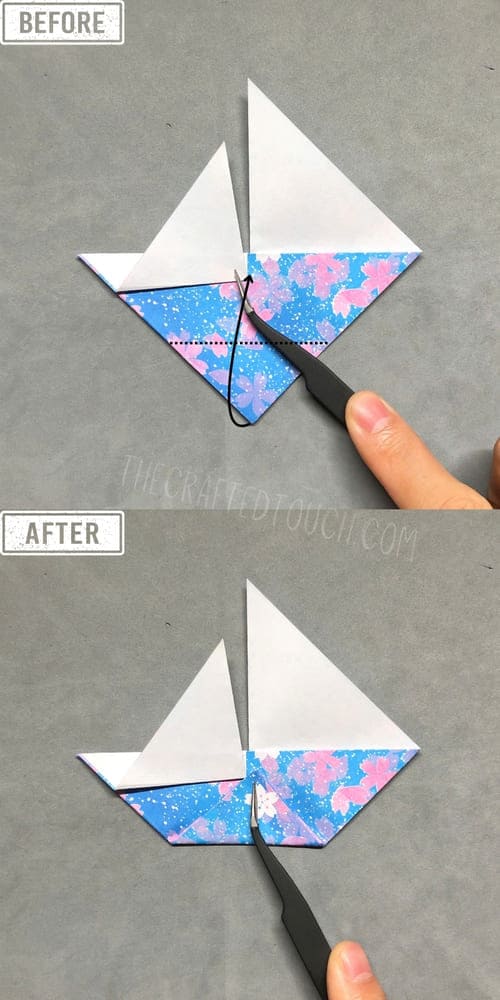
Step 15: Rotate to Reveal the Boat
Ready for the final reveal? Turn the whole model 180 degrees one last time.
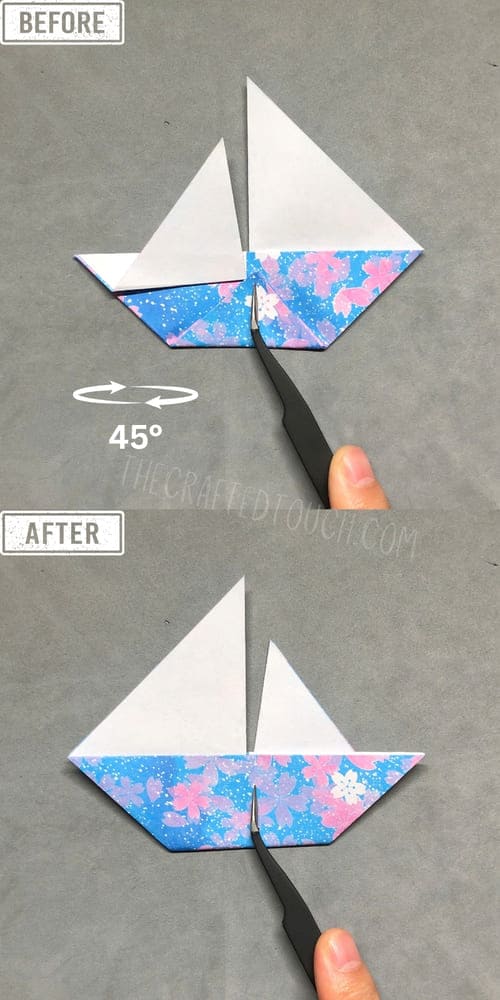
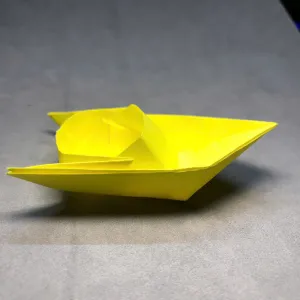
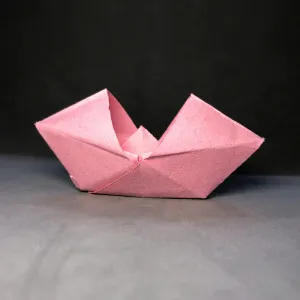
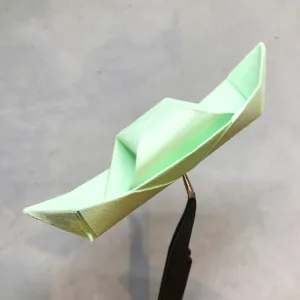
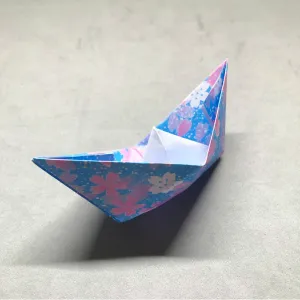
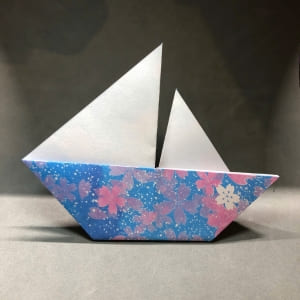
And there it is—a simple origami sailboat! You should now see the sails at the top and the triangle base at the bottom, giving your boat a clean, finished look.
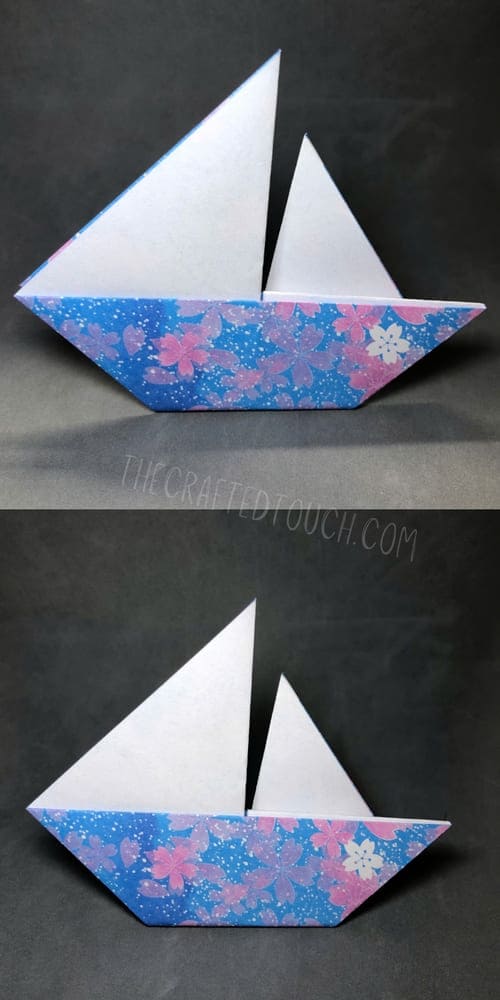
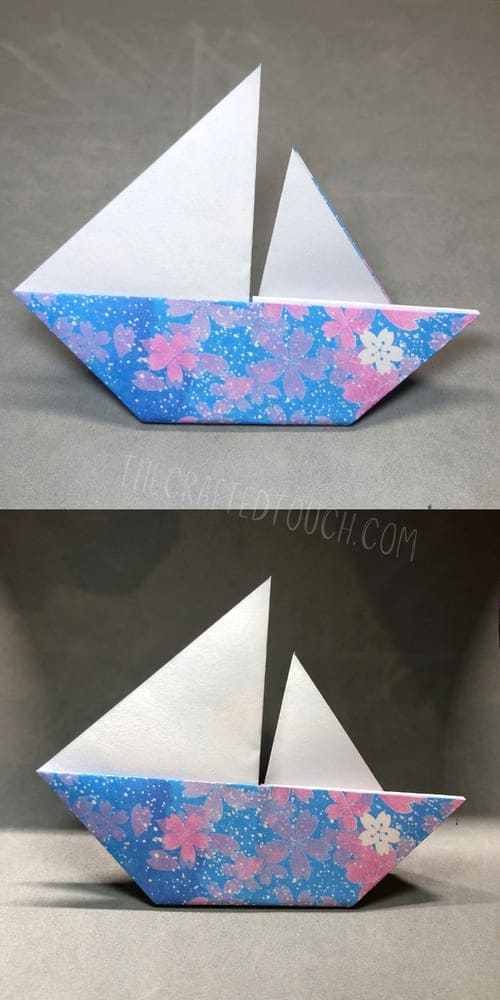
Wrapping Up
Isn’t it satisfying to make something so charming from just a piece of paper? I hope this step-by-step guide helped you fold your origami boat. If you enjoyed this, why not make more in different colors or sizes? Leave a comment below if you followed along—I’d love to hear how your boat turned out!
